Building a Progressive Web App from Scratch with Vanilla JavaScript

A Progressive Web App requires just three things beyond your existing website: a Web App Manifest JSON file that defines the app’s name, icons, and display mode; a service worker that intercepts network requests for offline support and caching; and HTTPS hosting. Add these to any site with plain JavaScript - no React, Angular, or framework needed - and browsers will offer an install prompt, enable push notifications, and cache your app for offline use. The entire setup can be done in under an hour with three files.
The Web App Manifest: Making Your Site Installable
The Web App Manifest
is a JSON file that tells browsers your website can behave like a native app. Create a file called manifest.json in your site root with these required fields:
{
  "name": "My PWA App",
  "short_name": "MyApp",
  "start_url": "/",
  "display": "standalone",
  "theme_color": "#1a1a2e",
  "background_color": "#1a1a2e",
  "id": "/app",
  "icons": [
    {
      "src": "/icons/icon-192.png",
      "sizes": "192x192",
      "type": "image/png",
      "purpose": "any maskable"
    },
    {
      "src": "/icons/icon-512.png",
      "sizes": "512x512",
      "type": "image/png",
      "purpose": "any maskable"
    }
  ]
}
A few fields to pay attention to:
short_nameshould be 12 characters or fewer since it appears on home screens and app launchers where space is tight.displayset to"standalone"removes the browser chrome entirely, making your app look native. Use"minimal-ui"if you want to keep a URL bar visible.idis a unique identifier that lets you change thestart_urllater without breaking existing installations. Set it to something stable from the start.iconsmust include at least 192x192 and 512x512 PNGs. Chrome requires the 512px icon for the install prompt and splash screen. You can generate all sizes from a single SVG using pwa-asset-generator or Squoosh .
Link the manifest in your HTML <head>:
<link rel="manifest" href="/manifest.json">
<meta name="theme-color" content="#1a1a2e">
The theme_color meta tag is important because some browsers read it before parsing the manifest itself.
Screenshots for the Richer Install UI
Chrome now uses a richer install dialog instead of the old simple banner. To take advantage of it, add a screenshots array to your manifest:
"screenshots": [
  {
    "src": "/screenshots/desktop.png",
    "sizes": "1280x720",
    "type": "image/png",
    "form_factor": "wide"
  },
  {
    "src": "/screenshots/mobile.png",
    "sizes": "750x1334",
    "type": "image/png",
    "form_factor": "narrow"
  }
]
Chrome requires screenshot dimensions between 320px and 3840px, and the maximum dimension cannot be more than 2.3 times the minimum dimension. Desktop screenshots use "form_factor": "wide", mobile ones use "narrow".
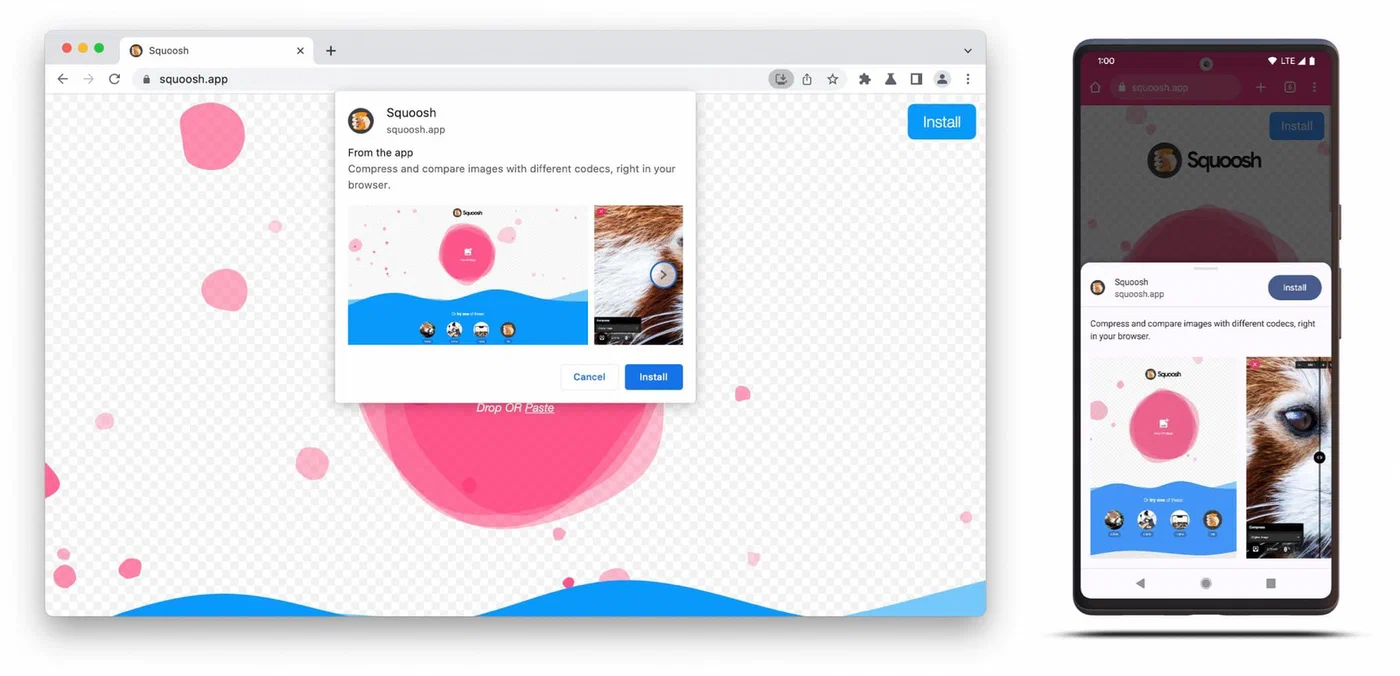
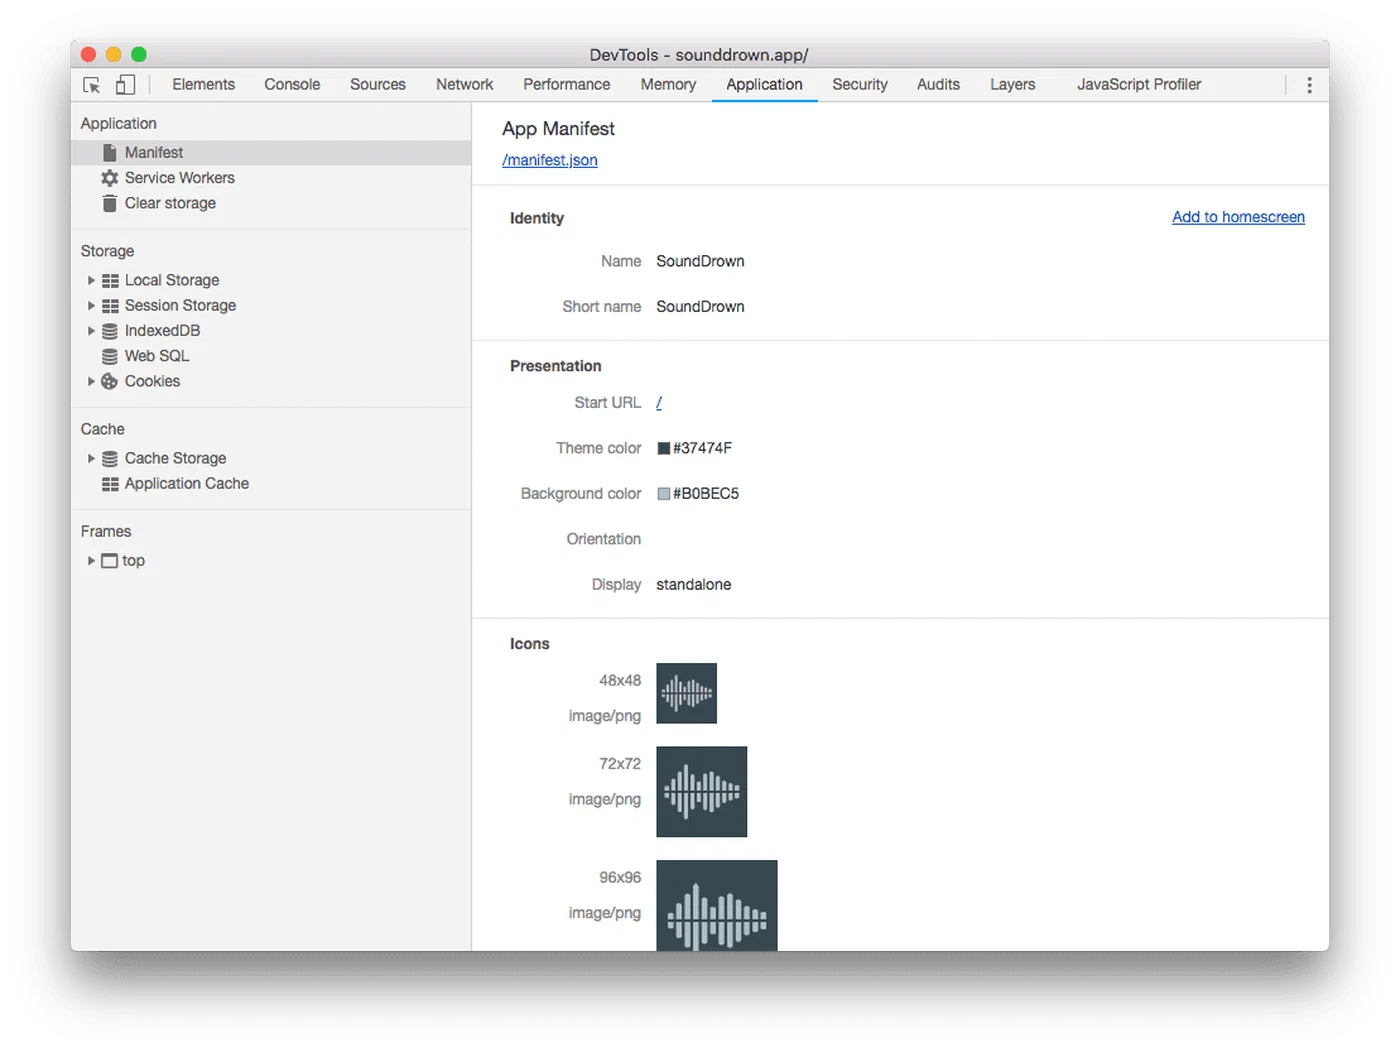
To verify everything works, open Chrome DevTools, go to the Application tab, and click Manifest. The Installability section flags missing icons, invalid fields, or HTTPS problems.
Service Workers: Offline Support and Caching Strategies
The service worker is what transforms a website into something that works without a network connection. It runs in a separate thread, intercepts fetch requests, and can serve cached responses when the user is offline.
Registration
In your main JavaScript file, register the service worker:
if ('serviceWorker' in navigator) {
  navigator.serviceWorker.register('/sw.js')
    .then(reg => console.log('SW registered:', reg.scope))
    .catch(err => console.error('SW registration failed:', err));
}
The service worker file must be served from the root path. If you place it at /js/sw.js, its scope is limited to /js/ and it cannot intercept requests for the rest of your site.
The Install Event and Precaching
When the service worker installs, cache your app shell - the minimal HTML, CSS, JS, and images needed to render the page:
const CACHE_NAME = 'v1';
const APP_SHELL = ['/', '/index.html', '/style.css', '/app.js'];

self.addEventListener('install', event => {
  event.waitUntil(
    caches.open(CACHE_NAME)
      .then(cache => cache.addAll(APP_SHELL))
  );
});
Three Caching Strategies You Need
The right caching strategy depends on the content type:
| Strategy | Best For | Behavior |
|---|---|---|
| Cache-first | CSS, JS, fonts, images | Check cache first, fall back to network. Fast loads for assets that change rarely. |
| Network-first | HTML pages, API data | Try network first, fall back to cache if offline. Users see fresh content when connected. |
| Stale-while-revalidate | Content that updates periodically | Return cached version immediately, fetch update in background. Next load gets fresh data. |
Here is cache-first for static assets:
self.addEventListener('fetch', event => {
  event.respondWith(
    caches.match(event.request)
      .then(cached => {
        if (cached) return cached;
        return fetch(event.request).then(response => {
          const clone = response.clone();
          caches.open(CACHE_NAME).then(cache => cache.put(event.request, clone));
          return response;
        });
      })
  );
});
For network-first, wrap the fetch in a try/catch and fall back to the cache:
async function networkFirst(request) {
  try {
    const response = await fetch(request);
    const cache = await caches.open(CACHE_NAME);
    cache.put(request, response.clone());
    return response;
  } catch (e) {
    return caches.match(request);
  }
}
Updating the Service Worker
When you need to push changes, rename the cache (e.g., v1 to v2) and clean up old caches in the activate event:
self.addEventListener('activate', event => {
  event.waitUntil(
    caches.keys().then(keys =>
      Promise.all(keys.filter(k => k !== 'v2').map(k => caches.delete(k)))
    )
  );
});
Call self.skipWaiting() in the install event and clients.claim() in the activate event if you want the new service worker to take over immediately without waiting for tabs to close.
Push Notifications Without Firebase
Push notifications are often tied to Firebase Cloud Messaging , but the Web Push API works independently with any backend using VAPID keys. VAPID (Voluntary Application Server Identification) is a spec for generating public-private key pairs that authenticate your server with push services.
Generate VAPID Keys
Using the web-push npm package:
npx web-push generate-vapid-keysThis gives you a public key (goes in your frontend) and a private key (stays on your server). Generate them once and store them permanently.
Request Permission and Subscribe
Always request notification permission after a user action like a button click - never on page load. Browsers penalize sites that spam permission requests.
async function subscribeToPush() {
  const permission = await Notification.requestPermission();
  if (permission !== 'granted') return;

  const reg = await navigator.serviceWorker.ready;
  const subscription = await reg.pushManager.subscribe({
    userVisibleOnly: true,
    applicationServerKey: urlBase64ToUint8Array(VAPID_PUBLIC_KEY)
  });

  // Send subscription to your server
  await fetch('/api/subscribe', {
    method: 'POST',
    headers: { 'Content-Type': 'application/json' },
    body: JSON.stringify(subscription)
  });
}
The PushSubscription object contains the endpoint URL and encryption keys. Send it to your server and store it in a database.
Handle Push Events in the Service Worker
self.addEventListener('push', event => {
  const data = event.data.json();
  event.waitUntil(
    self.registration.showNotification(data.title, {
      body: data.body,
      icon: '/icon-192.png',
      badge: '/badge-72.png',
      data: { url: data.url }
    })
  );
});

self.addEventListener('notificationclick', event => {
  event.notification.close();
  event.waitUntil(clients.openWindow(event.notification.data.url));
});
On the server side, send notifications using the web-push library for Node.js or pywebpush
for Python. Both handle the Web Push protocol encryption automatically.
Both Chrome and Safari require VAPID keys. Firefox is the only browser that does not require them, though it still supports them.
Testing, Debugging, and Deploying Your PWA
Chrome DevTools Is Your Primary Tool
The Application tab in Chrome DevTools shows the registered service worker and its lifecycle state (installing, waiting, active). You can manually trigger updates, unregister workers, and call skipWaiting. The Cache Storage section lists every cached URL by cache name.
Run a Lighthouse PWA audit via DevTools to check your manifest, service worker, HTTPS, offline capability, and load speed. Common failures: missing 512px icon, no offline fallback page.
Testing Offline
Use the Network tab’s Offline checkbox to simulate network loss. Verify that:
- Your app shell renders correctly
- Cached pages load without errors
- API-dependent features show an “offline” message instead of blank screens
During development, enable “Update on reload” in DevTools under Application > Service Workers. Without this, browsers only check for SW updates every 24 hours, which causes stale cache frustration during development.
Deployment
Host on any HTTPS-capable server - GitHub Pages
, Netlify
, Vercel
, Caddy, or Nginx with Let’s Encrypt
. The hard requirement is HTTPS. Service workers refuse to register on plain HTTP, with the exception of localhost for development.
iOS Safari Considerations
PWAs on iOS still carry meaningful limitations in 2026. Push notifications work as of iOS 16.4+, but only for apps added to the home screen - not from Safari tabs. Safari 18.4 introduced Declarative Web Push, which simplifies the mechanism by not requiring a service worker for basic push. There is no install prompt - users must manually use Share > Add to Home Screen. Background sync is not available, storage quotas are tighter than Chrome, and web app badges are not supported.
One positive change: iOS 26 now defaults every site added to the Home Screen to opening as a web app rather than a Safari tab.
Test on a real iPhone. Chrome DevTools device emulation does not replicate iOS Safari’s PWA behavior.
What This Covers and What It Doesn’t
This walkthrough gets you a working PWA with offline caching, an installable manifest, and push notifications using vanilla JavaScript. For production apps handling heavier caching logic, look at Workbox - Google’s service worker library that abstracts caching strategies into a configuration-driven API. It integrates natively with Vite, webpack, and Next.js build pipelines as of Workbox 7.
Features left for further exploration: the Background Sync API for queuing offline actions, Periodic Background Sync for scheduled background fetches, the shortcuts manifest array for jump-list actions, and navigator.storage.estimate() for monitoring cache storage usage.