How to Build a Whole-Home Audio System with Snapcast and Home Assistant

Yes, you can build a synchronized multi-room audio system that rivals Sonos for under $300 total - covering five rooms. Snapcast is an open-source server-client audio player that streams music to every room in your house with sub-millisecond synchronization, and Home Assistant turns the whole thing into a controllable smart home system with per-room volume, source switching, and automation. The total cost per room runs between $30 and $50 depending on your speaker choice, synchronization stays within 1ms across rooms (humans can’t detect delays under 5ms), and the entire system runs locally on your network with zero cloud dependency or monthly subscriptions.
This guide covers the complete setup: architecture, hardware selection, software installation, Home Assistant integration, and configuring multiple audio sources including local music, Spotify, AirPlay, and physical line-in from a turntable.
Architecture: How Snapcast Multi-Room Audio Works
Snapcast follows a straightforward server-client model. One central machine runs the Snapcast server, which captures audio from various sources - a music player piping output to a FIFO, Spotify Connect via librespot , an AirPlay receiver, or a physical line-in. The server chunks this audio into timestamped packets and distributes them to all connected clients over TCP.
The synchronization mechanism is what sets Snapcast apart from other networked audio solutions. Each audio chunk carries a server timestamp. Clients use NTP to maintain clock accuracy within roughly 1ms of the server, then calculate the exact playback delay needed to match the server’s intended playback time. The result is perceptibly simultaneous playback across every room - you can walk between rooms without hearing any echo or delay.
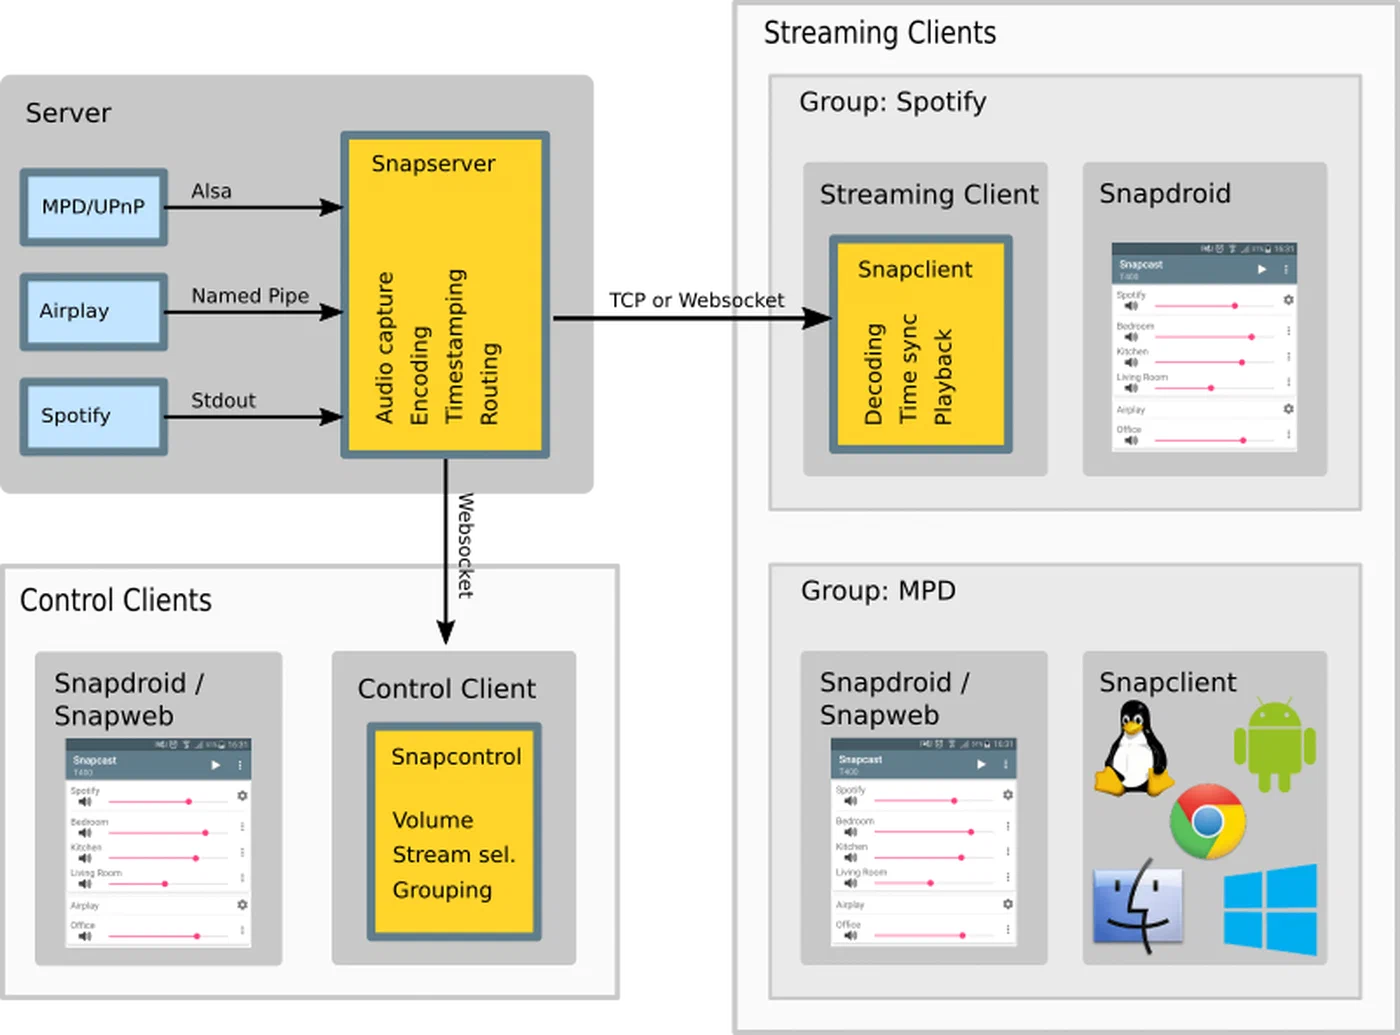
Snapcast v0.35 (the latest release as of early 2026) supports multiple simultaneous audio streams. Each client can be independently assigned to a different stream, so the kitchen can play Spotify while the office plays a podcast from MPD . Switching sources happens instantly through the Snapcast API or Home Assistant. The server supports four codecs for streaming:
| Codec | Type | Latency | Best For |
|---|---|---|---|
| FLAC | Lossless | ~26ms | Default, best quality-to-bandwidth ratio |
| PCM | Lossless, uncompressed | 0ms | Lowest latency, highest bandwidth |
| OGG | Lossy | Variable | Bandwidth-constrained networks |
| Opus | Lossy, low-latency | Low | Low-latency use cases (48kHz only) |
Network requirements are modest. Snapcast uses TCP for reliable delivery, and CD-quality audio (16-bit, 48kHz) consumes roughly 200 kbps per client. A typical 100 Mbps home network can handle 50+ rooms with bandwidth to spare. Wi-Fi works well for clients, though wired Ethernet is preferred for the server to keep latency consistent.
How It Compares to Alternatives
Before committing to a DIY build, it’s worth understanding what Snapcast replaces:
| System | Cost Per Room | Sync Quality | Ecosystem | Cloud Required |
|---|---|---|---|---|
| Sonos | $200-600 | Good | Closed, proprietary | Yes (setup, updates) |
| Apple AirPlay 2 | $100-350 | Good | Apple-only | Partial |
| Chromecast Audio | Discontinued | Noticeable lag in groups | Yes | |
| PulseAudio/PipeWire network | $0 (software) | No sync, noticeable delays | Linux | No |
| Snapcast | $30-50 | Sub-millisecond | Open, any source | No |
Snapcast is the only open-source option with proper time-synchronized playback. PulseAudio and PipeWire can stream audio over the network, but they weren’t designed for synchronized multi-room playback and it shows - delays between rooms are noticeable. Sonos provides good sync but locks you into expensive hardware and a cloud-dependent ecosystem. Snapcast gives you the sync quality of Sonos with the flexibility to use any hardware, any audio source, and any control interface.
Hardware: Server, Clients, DACs, and Speakers
Snapcast’s hardware requirements are minimal and flexible. The server runs on practically anything with a network connection, and clients range from a $15 Raspberry Pi Zero to a repurposed old laptop.
Server
A Raspberry Pi 4 (4GB model, around $55) is the most popular choice for the server. Audio streaming is lightweight on CPU, so even a Pi 4 is more than enough. A Raspberry Pi 5 works but is overkill. Any Linux machine with a network connection will do - an old laptop, a NAS, or a Docker container running on Proxmox. The server benefits from wired Ethernet for consistent latency, but this isn’t strictly required.
Clients (One Per Room)
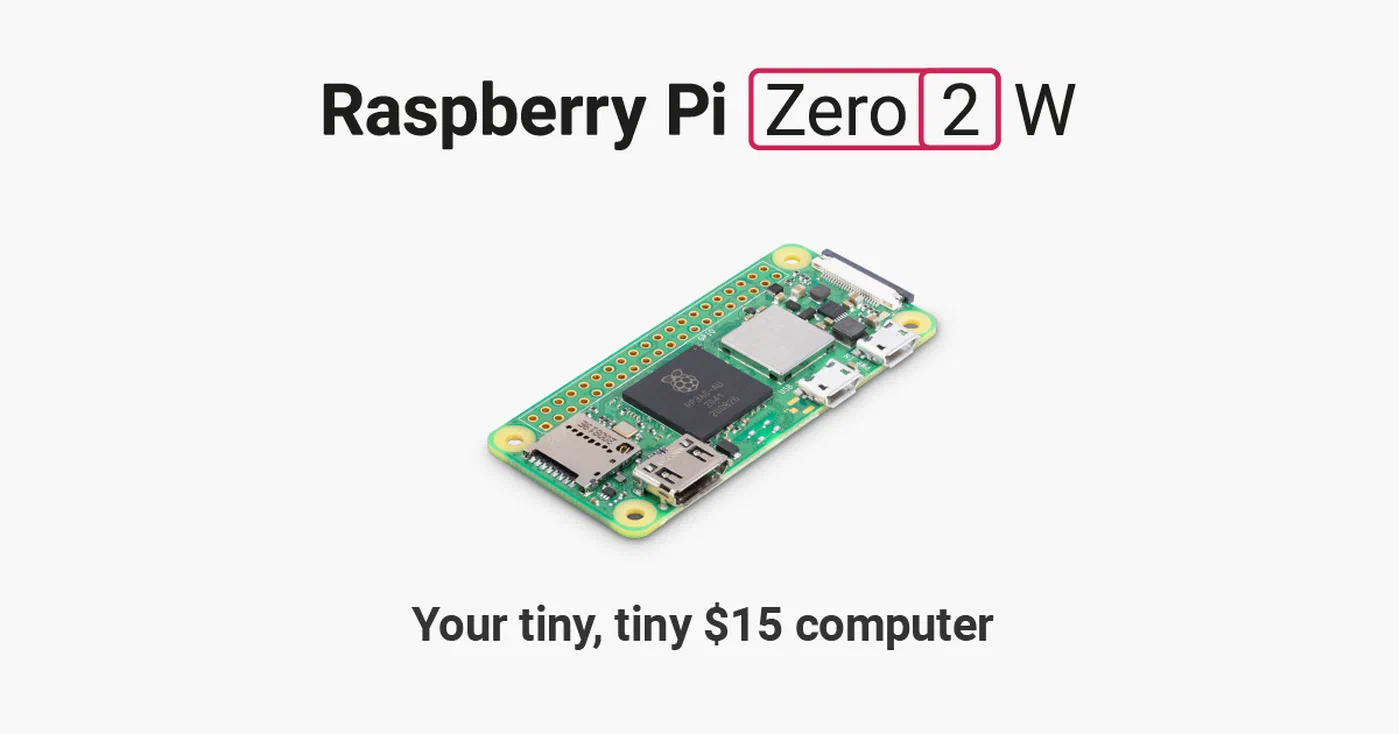
The Raspberry Pi Zero 2 W at $15 is the ideal client hardware. It’s physically tiny, has built-in Wi-Fi, draws about 1W at idle, and runs the Snapcast client headless without any trouble.
DACs
The Pi Zero’s built-in PWM audio output is noisy and low-quality - don’t use it. Add a DAC HAT for clean analog output:
| DAC | Price | Notes |
|---|---|---|
| HiFiBerry DAC+ Zero | ~$30 | Purpose-built for Pi Zero, 192kHz/24-bit, easy setup |
| Pimoroni pHAT DAC | ~$12 | Compact, decent quality |
| PCM5102A breakout board | ~$3 (AliExpress) | Cheapest option, requires soldering |
| HiFiBerry DAC2 HD | ~$60 | Audiophile-grade for Pi 4/5 clients in main listening rooms |

For most rooms, the HiFiBerry DAC+ Zero or a PCM5102A breakout gives you clean audio output that’s far better than anything Snapcast’s network streaming will bottleneck.
Speakers
Match your speakers to each room’s purpose:
- Living room / main listening: Powered bookshelf speakers like the Edifier R1280T (~$80/pair) connected via 3.5mm from the DAC
- Kitchen / bathroom: A single powered speaker like the JBL Go connected via 3.5mm
- Ceiling / distributed: Passive speakers driven by a mini amplifier like the Fosi Audio BT20A (~$65)
- Budget rooms: Any speaker plus a PAM8403 Class-D amp board ($2) for the cheapest possible setup
Cost Breakdown
Here’s what a five-room system looks like:
| Component | Cost |
|---|---|
| Server: Raspberry Pi 4 (4GB) | $55 |
| 5x Raspberry Pi Zero 2 W | $75 |
| 5x HiFiBerry DAC+ Zero | $150 |
| 5x Budget powered speakers | $100-200 |
| Power supplies, cables, SD cards | $50 |
| Total | $430-530 |
Compare that with five Sonos Era 100 speakers at $250 each ($1,250 total), and even a generous Snapcast build with nice speakers comes in at half the cost while giving you far more flexibility and no cloud dependency. Use cheaper PCM5102A DACs and budget speakers, and you can get the whole system under $300.
Power Supply Notes
Each Pi Zero draws about 1W, and a Pi 4 draws 3-5W. Use official Raspberry Pi power supplies or quality USB-C adapters. For clean cable-free installations, a PoE HAT on a Pi 3B+ lets you power the client over the Ethernet cable itself (requires a PoE-capable switch), eliminating separate power cables per room.
Installing and Configuring Snapcast
Server Setup
On a Debian-based system (Raspberry Pi OS, Ubuntu), download the latest .deb package from the Snapcast releases page
:
# Download and install (check releases page for latest version)
wget https://github.com/snapcast/snapcast/releases/download/v0.35.0/snapserver_0.35.0-1_armhf.deb
sudo dpkg -i snapserver_0.35.0-1_armhf.deb
sudo apt-get -f install  # resolve any dependencies
The server starts automatically via systemd. Configuration lives in /etc/snapserver.conf. Here’s a multi-source configuration example:
[http]
# Web UI for client management
doc_root = /usr/share/snapserver/snapweb

[stream]
# Global defaults
sampleformat = 48000:16:2
codec = flac
buffer = 1000
chunk_ms = 20

# Local music via MPD
source = pipe:///tmp/snapfifo?name=MPD&sampleformat=48000:16:2

# Spotify Connect via librespot
source = librespot:///librespot?name=Spotify&devicename=SnapHome&bitrate=320&volume=100

# AirPlay receiver
source = airplay:///shairport-sync?name=AirPlay&devicename=SnapHome&port=5000

# Physical turntable/line-in via USB sound card
source = alsa:///hw:1,0?name=Turntable&sampleformat=48000:16:2
After editing, restart the server:
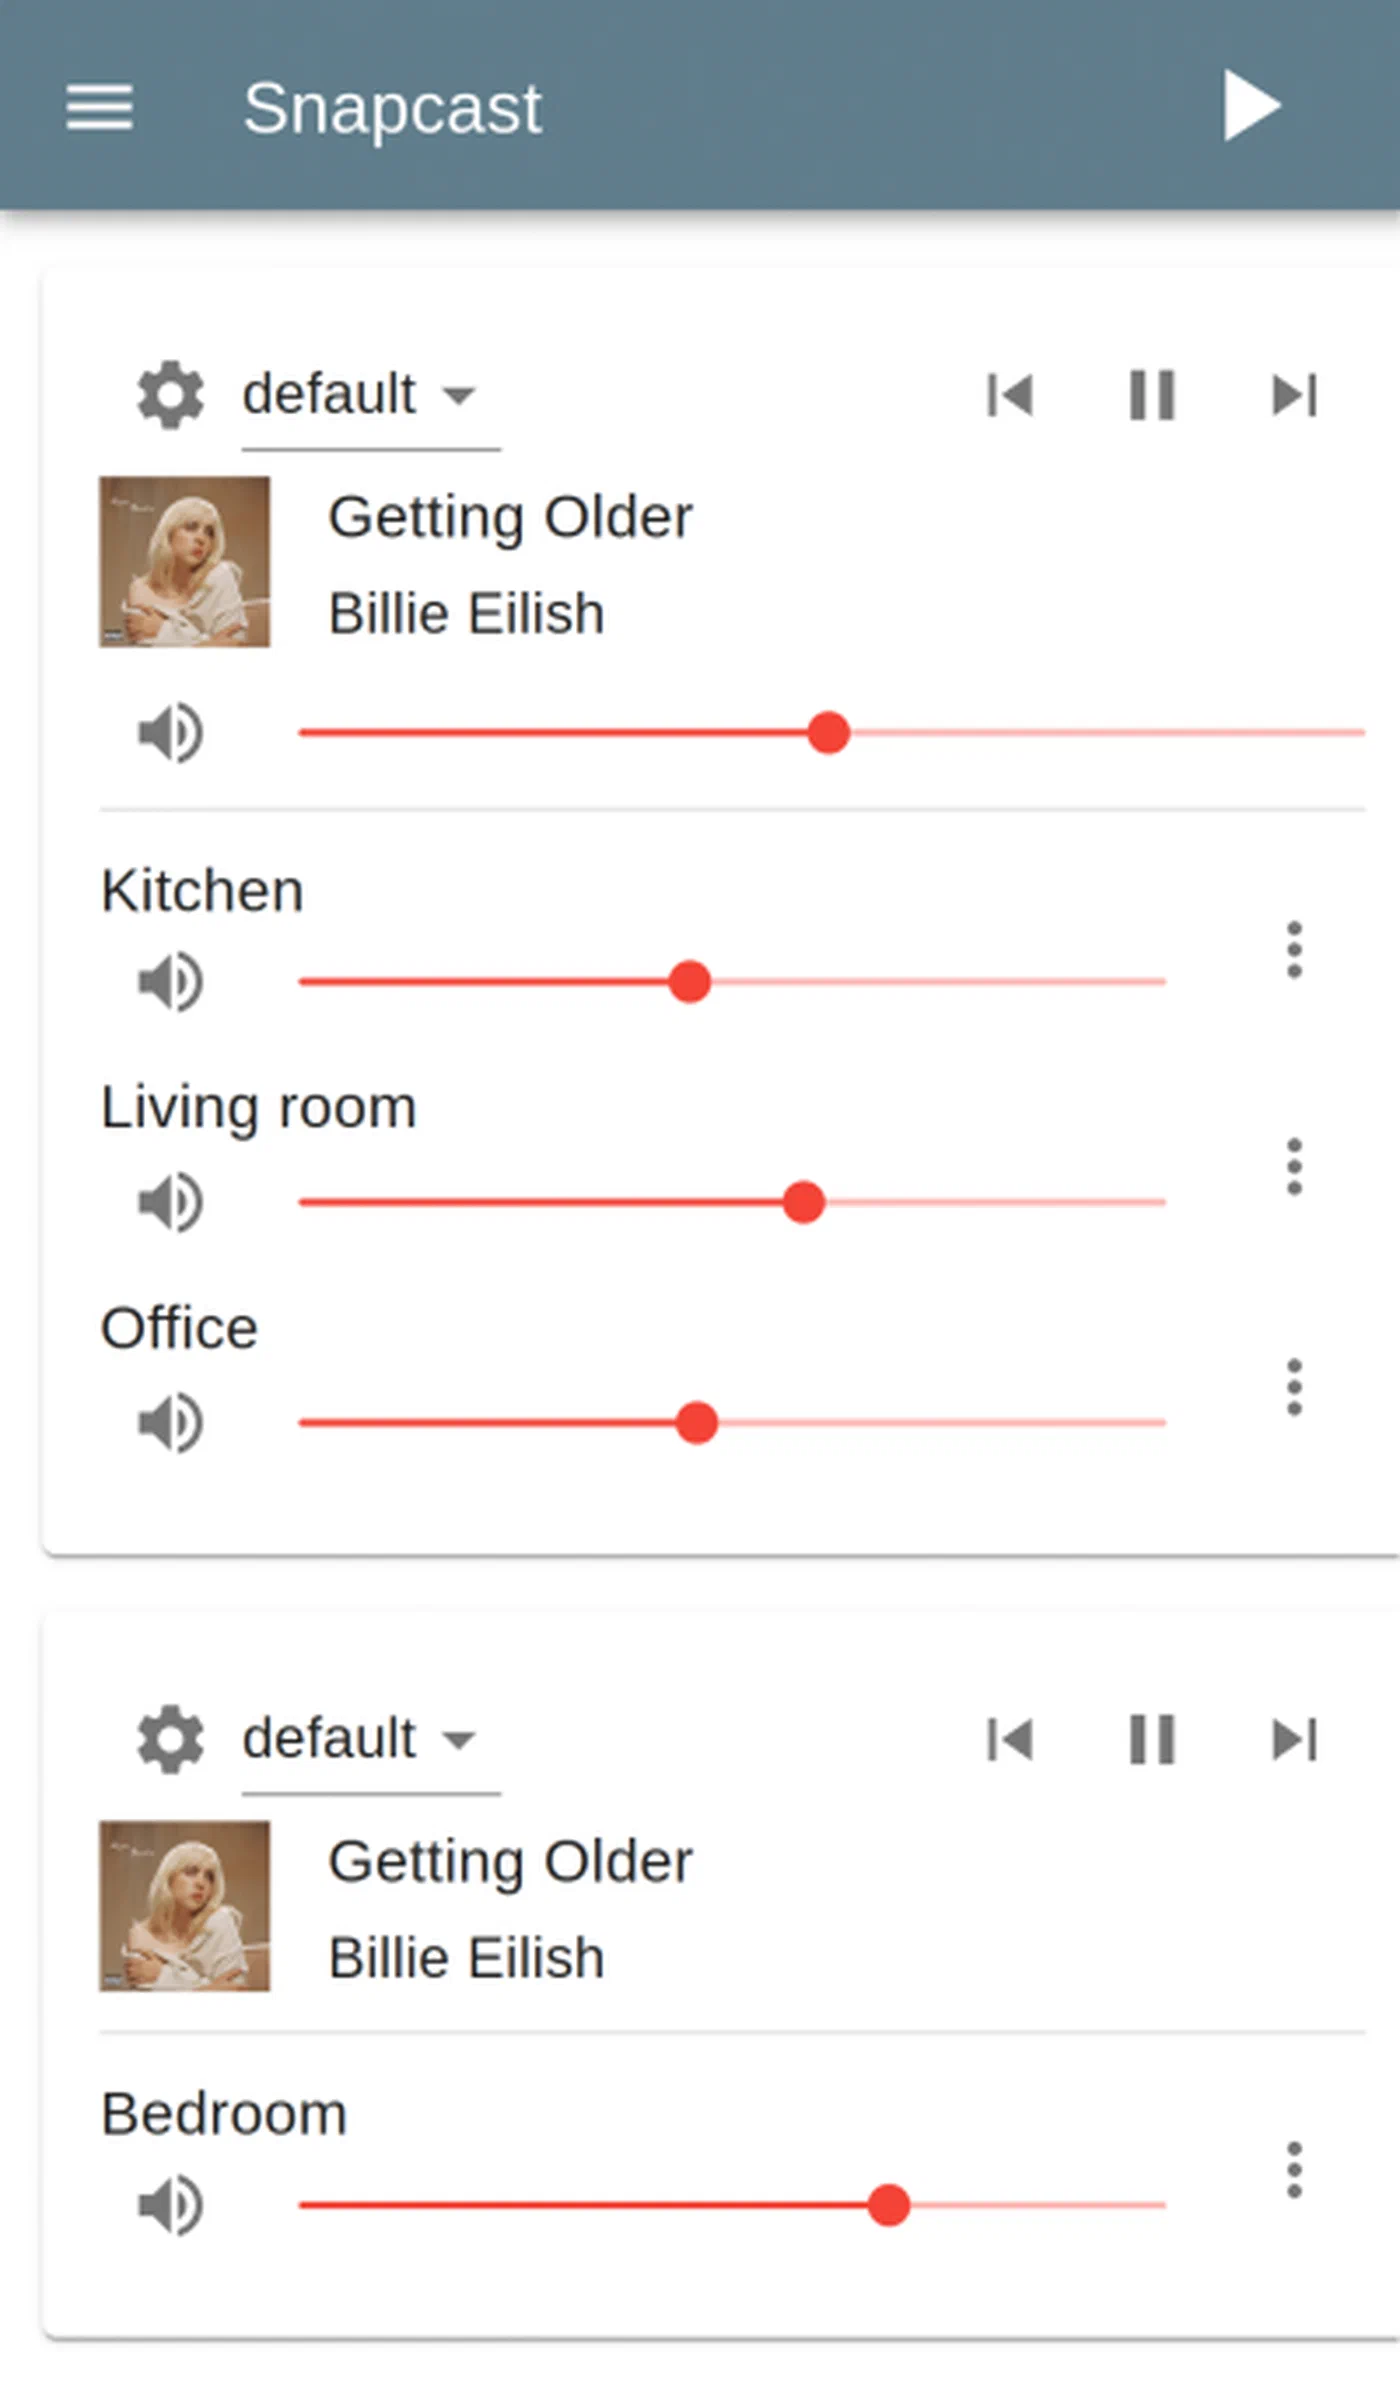
sudo systemctl restart snapserverThe Snapcast web UI is available at http://<server-ip>:1780 and lets you rename clients, assign them to groups, and switch audio sources.
Client Setup
On each room’s Raspberry Pi, install the client package:
wget https://github.com/snapcast/snapcast/releases/download/v0.35.0/snapclient_0.35.0-1_armhf.deb
sudo dpkg -i snapclient_0.35.0-1_armhf.deb
sudo apt-get -f install
Configure the server IP in /etc/default/snapclient:
SNAPCLIENT_OPTS="--host 192.168.1.100 --hostID kitchen"The --hostID gives this client a persistent identifier so it keeps its name and group assignment across reboots.
DAC Configuration
For HiFiBerry DAC HATs, add the appropriate device tree overlay to /boot/config.txt:
# For HiFiBerry DAC+ Zero
dtoverlay=hifiberry-dac
Then configure ALSA to use it as the default output device. Create or edit /etc/asound.conf:
pcm.!default {
    type hw
    card 0
}
ctl.!default {
    type hw
    card 0
}
Verify with aplay -l that the DAC appears as card 0. If it shows up as a different card number, adjust the configuration accordingly.
Audio Quality Tuning
The sample format is specified as <samplerate>:<bitdepth>:<channels>. Common configurations:
- 44100:16:2 - CD quality, lowest bandwidth (~170 kbps with FLAC)
- 48000:16:2 - Standard digital audio, good default
- 96000:24:2 - High-resolution, for audiophile setups with capable DACs
- 192000:24:2 - Maximum quality, high bandwidth, requires HiFiBerry DAC2 HD or equivalent
The FLAC codec is the best default: lossless compression reduces bandwidth by about 50% compared to PCM while adding only ~26ms of codec latency. For the absolute lowest latency (live audio from a turntable, for instance), use PCM codec at the cost of higher bandwidth.
Buffer and chunk settings affect stability and latency:
buffer(default 1000ms): End-to-end latency from server capture to client playback. Increase to 1500ms if you hear dropouts on Wi-Fi.chunk_ms(default 20ms): How many milliseconds the server reads from the source at a time. Smaller values reduce latency but increase CPU usage.
Initial Testing
Play something through MPD on the server:
mpc add http://stream.example.com/radio
mpc play
Walk between rooms to verify synchronized playback. If you hear dropouts, increase the client buffer size in /etc/default/snapclient:
SNAPCLIENT_OPTS="--host 192.168.1.100 --hostID kitchen --buffer 1500"Integrating Snapcast with Home Assistant
Home Assistant’s Snapcast integration exposes every client and group as a media player entity, giving you per-room volume control, source selection, grouping, and automation - all from the HA dashboard or voice assistants.
Setting Up the Integration
Go to Settings > Devices & Services > Add Integration > Snapcast. Enter your server’s IP address and port (1780). Home Assistant discovers all connected clients and creates entities:
media_player.snapcast_client_kitchen- individual room controlmedia_player.snapcast_client_bedroom- individual room controlmedia_player.snapcast_group_0- group control (all rooms playing the same stream)
Each entity supports standard media player actions: volume up/down, mute, play/pause, and source selection.
Dashboard Layout
For a clean multi-room audio dashboard, use the mini-media-player custom card from HACS. It gives you compact per-room controls with volume sliders, mute buttons, and source dropdowns. Group them in a grid layout:
type: grid
columns: 2
cards:
  - type: custom:mini-media-player
    entity: media_player.snapcast_client_kitchen
    name: Kitchen
    group: true
    volume_stateless: false
  - type: custom:mini-media-player
    entity: media_player.snapcast_client_bedroom
    name: Bedroom
    group: true
    volume_stateless: false
  - type: custom:mini-media-player
    entity: media_player.snapcast_client_office
    name: Office
    group: true
    volume_stateless: false
  - type: custom:mini-media-player
    entity: media_player.snapcast_group_0
    name: All Rooms
    group: true
    volume_stateless: false
Automation Examples
Snapcast combined with Home Assistant automations opens up practical multi-room control scenarios.
Volume by time of day - reduce volume after 10 PM and restore it in the morning:
automation:
  - alias: "Night volume reduction"
    trigger:
      platform: time
      at: "22:00:00"
    action:
      service: media_player.volume_set
      target:
        entity_id: media_player.snapcast_group_0
      data:
        volume_level: 0.3

  - alias: "Morning volume restore"
    trigger:
      platform: time
      at: "08:00:00"
    action:
      service: media_player.volume_set
      target:
        entity_id: media_player.snapcast_group_0
      data:
        volume_level: 0.6
Source switching scripts - one-button switches between audio modes:
script:
  music_mode:
    alias: "Music Mode"
    sequence:
      - service: media_player.select_source
        target:
          entity_id: media_player.snapcast_group_0
        data:
          source: "Spotify"

  podcast_mode:
    alias: "Podcast Mode"
    sequence:
      - service: media_player.select_source
        target:
          entity_id:
            - media_player.snapcast_client_kitchen
            - media_player.snapcast_client_bedroom
        data:
          source: "MPD"
TTS Announcements Through Snapcast
You can route Home Assistant’s text-to-speech output through your Snapcast speakers. Configure a dedicated pipe as a Snapcast stream source, then point HA’s TTS platform at it. When an automation triggers a TTS message (“Front door motion detected”), it plays through whichever Snapcast speakers you choose. The Snapcast integration also supports snapshot and restore actions - take a snapshot of current playback, play the announcement, then restore to resume the music right where it left off.
Voice Assistant Control
Expose your Snapcast media player entities to Google Home or Alexa through Home Assistant Cloud or manual integration. “Hey Google, play music in the kitchen” can trigger an HA automation that starts playback on the kitchen client. “Set bedroom volume to 50%” adjusts the Snapcast client’s volume through the HA media player entity.
Audio Sources: MPD, Spotify, AirPlay, and Line-In
Snapcast can accept audio from practically anything you throw at it. Each source appears as a selectable stream that any room can independently switch to.
MPD for Local Music
MPD (Music Player Daemon) is the most common pairing with Snapcast for local music libraries. Install it and configure the output to write to a FIFO that Snapcast reads:
sudo apt install mpdIn /etc/mpd.conf:
audio_output {
    type        "fifo"
    name        "snapcast"
    path        "/tmp/snapfifo"
    format      "48000:16:2"
    mixer_type  "software"
}
Control playback with mpc on the command line, ncmpcpp
as a terminal UI, or web interfaces like Rompr
. MPD scans your local music library and supports FLAC, MP3, OGG, and M3U/PLS playlists.
Spotify via Librespot
Snapcast has built-in librespot
integration. With the librespot source configured in snapserver.conf, your server appears as a Spotify Connect device in the Spotify app. Open Spotify on your phone, select “SnapHome” as the playback device, and audio routes through Snapcast to every room. This requires a Spotify Premium account. Audio streams at 320kbps OGG quality.
The configuration in snapserver.conf is a single line:
source = librespot:///librespot?name=Spotify&devicename=SnapHome&bitrate=320&volume=100An alternative is go-librespot
, which offers better metadata support and volume normalization. It runs as a process source type and needs its own config.yml, but provides a smoother Spotify Connect experience.
AirPlay via Shairport-Sync
Install shairport-sync
and configure it as a Snapcast source. Apple devices see it as an AirPlay receiver, making it useful for podcasts, audiobooks, and Apple Music users. The airplay source type in Snapcast handles launching and managing shairport-sync automatically:
source = airplay:///shairport-sync?name=AirPlay&devicename=SnapHome&port=5000For AirPlay 2 support, set port=7000 instead.
Bluetooth Input
Pair a phone via Bluetooth to the server Pi and route the audio through bluealsa or PipeWire to a Snapcast FIFO. This is particularly useful for guests who want to play audio from their phone without needing Spotify Connect or an Apple device.
Physical Line-In (Turntable or TV)
Connect a turntable or TV audio output to a USB sound card plugged into the server. Snapcast captures the audio directly via ALSA:
source = alsa:///hw:1,0?name=Turntable&sampleformat=48000:16:2This digitizes the analog audio and distributes it to every room in perfect sync. Morning vinyl in the living room, heard throughout the house.
Internet Radio
Use MPD to play internet radio streams directly:
mpc add http://stream.example.com/jazz
mpc play
Or use ffmpeg to capture a stream and pipe it to a dedicated Snapcast FIFO for a separate selectable source. Create Home Assistant script buttons for your favorite stations and switch between them from the dashboard.
Music Assistant: The Friendly Frontend
Music Assistant is a Home Assistant add-on that provides a unified music library interface across streaming services and local files. It supports Snapcast as a player provider, meaning you can use Music Assistant’s polished UI to browse and queue music while Snapcast handles the synchronized multi-room playback underneath.
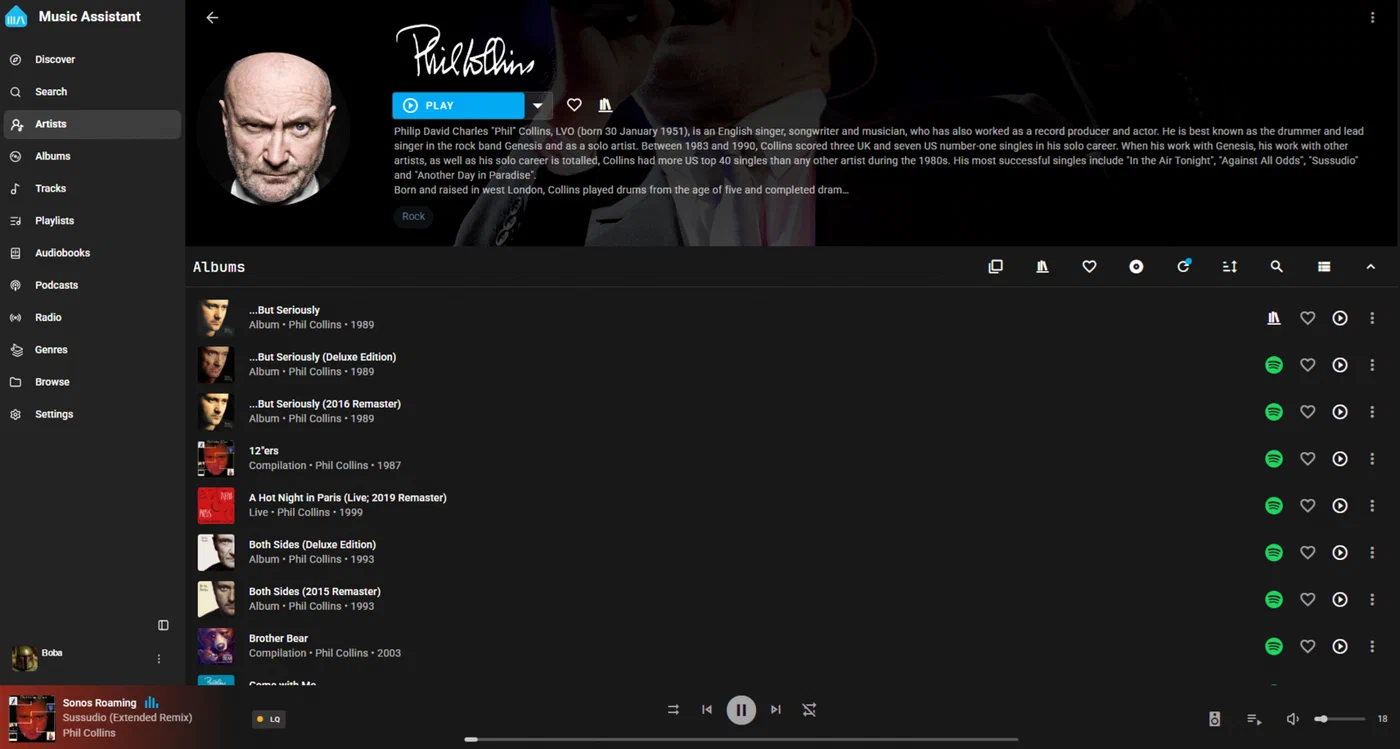
Music Assistant includes a built-in Snapcast server, though you can also point it at an external one. As of early 2026, Music Assistant also offers its own multi-room streaming protocol called Sendspin, but community reports indicate Snapcast remains more reliable for synchronized playback. The two aren’t mutually exclusive - you can run Music Assistant as your music browser and library manager while using Snapcast as the transport layer for multi-room sync.
Client Provisioning at Scale
Setting up one or two rooms by hand is fine, but if you’re wiring five or more rooms, automating the client setup saves time and ensures consistency. A basic provisioning script for a fresh Raspberry Pi OS Lite image:
#!/bin/bash
# provision-snapclient.sh - Run on a fresh Pi Zero 2 W
# Usage: ./provision-snapclient.sh <server-ip> <room-name>

SERVER_IP=$1
ROOM_NAME=$2
SNAP_VERSION="0.35.0"

# Install Snapcast client
wget -q "https://github.com/snapcast/snapcast/releases/download/v${SNAP_VERSION}/snapclient_${SNAP_VERSION}-1_armhf.deb"
sudo dpkg -i "snapclient_${SNAP_VERSION}-1_armhf.deb"
sudo apt-get -f install -y

# Configure server and room ID
echo "SNAPCLIENT_OPTS=\"--host ${SERVER_IP} --hostID ${ROOM_NAME}\"" | sudo tee /etc/default/snapclient

# Enable HiFiBerry DAC overlay
echo "dtoverlay=hifiberry-dac" | sudo tee -a /boot/config.txt

# Set ALSA defaults
cat <<'ALSA' | sudo tee /etc/asound.conf
pcm.!default {
    type hw
    card 0
}
ctl.!default {
    type hw
    card 0
}
ALSA

# Restart services
sudo systemctl restart snapclient
echo "Client '${ROOM_NAME}' configured for server ${SERVER_IP}"
Flash Raspberry Pi OS Lite to an SD card, boot the Pi, SSH in, run this script with the server IP and room name, and reboot. The room appears in the Snapcast web UI within seconds.
For larger deployments, wrap this in an Ansible playbook that targets all your room Pis by hostname, handles OS updates, and manages the Snapcast client version centrally.
Troubleshooting Common Issues
Audio dropouts on Wi-Fi: Increase the client buffer from 1000ms to 1500-2000ms. If dropouts persist, check for Wi-Fi congestion or consider wired Ethernet for problem rooms.
FIFO pipe permission errors: Newer kernels restrict FIFO pipes in world-writable directories like /tmp. Run sudo sysctl fs.protected_fifos=0 and add it to /etc/sysctl.conf to persist across reboots.
Client not appearing in web UI: Verify the server IP is correct in /etc/default/snapclient. Check that port 1704 (audio) and 1705 (control) are not blocked by a firewall.
DAC not detected: Run aplay -l to list sound devices. If the DAC doesn’t appear, verify the device tree overlay in /boot/config.txt and reboot. Some DAC HATs require disabling the onboard audio (dtparam=audio=off).
Latency between server and clients: Check NTP synchronization on both server and clients (timedatectl status). Snapcast’s sync depends on accurate clocks. If NTP isn’t running, install and enable chrony or systemd-timesyncd.
One room out of sync: In the Snapcast web UI, check the client’s latency offset. You can manually adjust per-client latency to compensate for hardware differences in DAC or amplifier processing time.