WCAG 2.2 Web Forms: Error Handling, Validation, ARIA

Accessible web forms start with semantic HTML and use ARIA only to fill gaps native elements can’t reach. Use aria-live for error announcements and aria-describedby to link messages to fields. Following WCAG
2.2 AA ensures every user can perceive, navigate, and complete your forms using only a keyboard.
Most form accessibility failures are not caused by missing ARIA. They come from developers skipping basic HTML semantics like labels and fieldsets. Patching this damage with ARIA often makes things worse. The W3C’s first rule is simple: no ARIA is better than bad ARIA. Misapplied roles or redundant labels create noise instead of clarity.
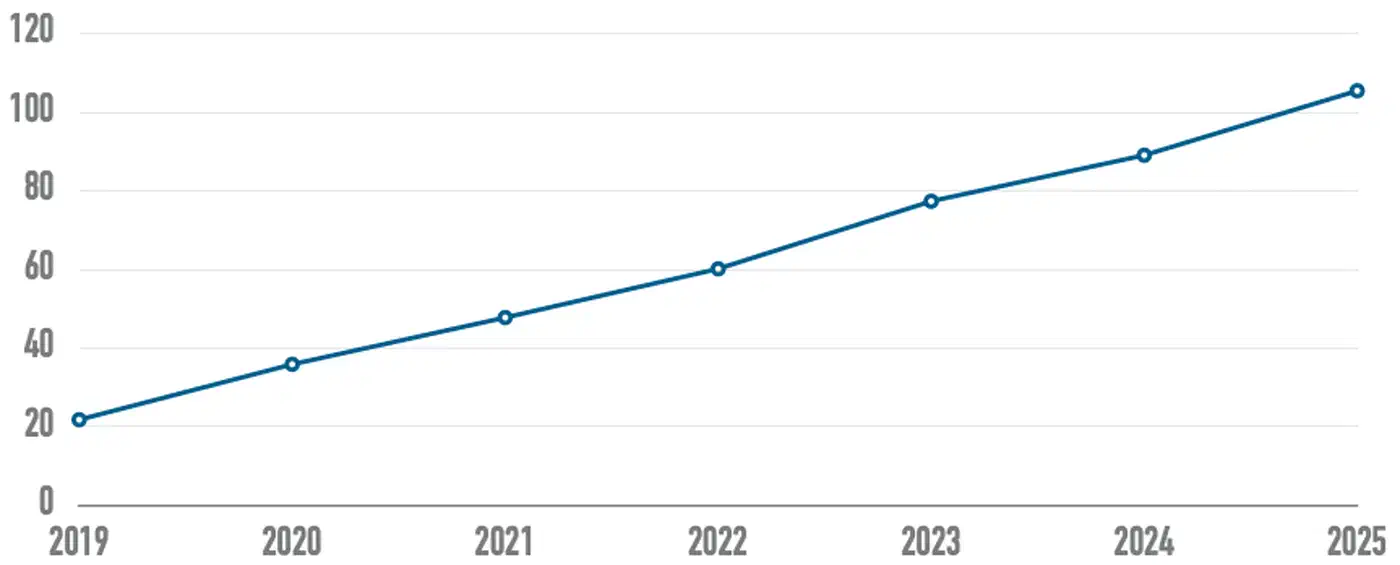
Compliance is vital. As of April 2026, ADA Title II requires public entities to meet WCAG 2.1 Level AA. The European Accessibility Act also pushes these mandates across the EU. Even without legal pressure, about 15% of people live with a disability. Inaccessible forms lock out a huge part of your audience.

Start with Semantic HTML Before Reaching for ARIA
The most common mistake is using div and span instead of native HTML. Native elements provide keyboard support, focus management, and screen reader compatibility for free.
Every input needs a <label> with a for attribute that matches the input’s id. This links them so screen readers can announce the label. It also makes the label clickable, which helps users with motor impairments.
<label for="email">Email address</label>
<input type="email" id="email" name="email" autocomplete="email" required>
Use <fieldset> and <legend> to group related inputs. Radio buttons and checkbox sets need this grouping. Screen readers announce the legend before each field inside, providing vital context for the user.
<fieldset>
  <legend>Shipping Address</legend>
  <label for="street">Street</label>
  <input type="text" id="street" name="street" autocomplete="street-address">
  <label for="city">City</label>
  <input type="text" id="city" name="city" autocomplete="address-level2">
</fieldset>
Picking the right input type is important. type="email" provides format validation and a mobile keyboard with the @ symbol. type="date" gives you a native date picker that works well in modern browsers. Using the correct type reduces your JavaScript and helps users interact with your data.
The required attribute marks a field as mandatory. It triggers native browser validation and adds aria-required="true" automatically. You don’t need JavaScript for basic enforcement.
The autocomplete attribute helps both usability and accessibility. Setting it for fields like email or name per the WHATWG spec
enables browser autofill. WCAG 2.2 requires this for inputs that collect user data. It also meets WCAG 3.3.7 since users shouldn’t have to re-enter known info.
If a native element does the job, use it. Replacing a <button> with a <div role="button"> creates more code and more bugs. It often degrades the experience for screen reader users.
When and How to Use ARIA Attributes in Forms
ARIA fills gaps where native HTML can’t explain the relationship between elements. The key is to use it only for those gaps. If you’re adding ARIA to elements that already work, stop and rethink your approach.
aria-describedby for Help Text and Errors
aria-describedby links an input to the id of elements with extra text. Use this to connect help text, hints, and error messages to a field. Screen readers will then announce them when the user focuses the input.
<label for="password">Password</label>
<input type="password" id="password"
       aria-describedby="password-help password-error"
       autocomplete="new-password">
<span id="password-help">Must be at least 12 characters</span>
<span id="password-error"></span>
When a user focuses the password field, the screen reader announces the help text. If validation later fills the error field, that text is also read. Multiple IDs are read in order with a pause between them.
If you want error messages as floating popovers, use CSS Anchor Positioning . It lets you attach UI elements to any anchor without using JavaScript libraries.
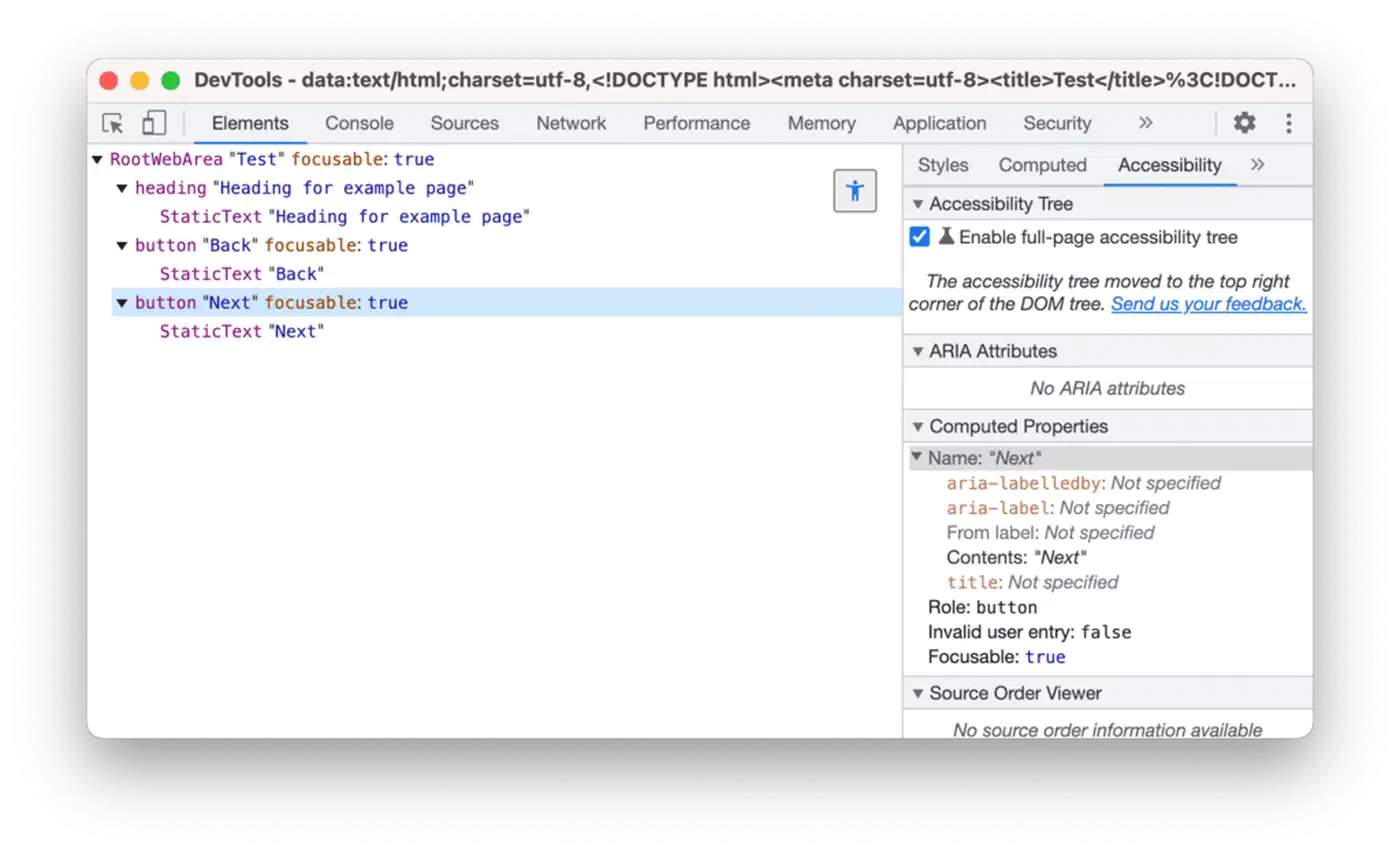
aria-invalid for Error States
Set aria-invalid="true" when an input fails validation. Screen readers will announce “invalid entry” to alert the user. Remove the attribute when the field passes. Don’t set it to "false", as some readers may announce “invalid false.”
if (!input.checkValidity()) {
  input.setAttribute('aria-invalid', 'true');
  errorSpan.textContent = 'Enter a valid email address (e.g., name@example.com)';
} else {
  input.removeAttribute('aria-invalid');
  errorSpan.textContent = '';
}
aria-live for Dynamic Announcements
Users need to know when errors appear without a page reload. An aria-live="polite" region waits for the reader to finish before speaking. Use polite for inline errors. Reserve assertive or role="alert" for critical errors like a failed form submission.
What About aria-errormessage?
The aria-errormessage
attribute links an input to an error element. It only activates when aria-invalid="true" is set. While cleaner in theory, support is still inconsistent. NVDA
and VoiceOver
don’t always announce it. Stick with aria-describedby for a safer choice. Check a11ysupport.io
for the latest data.
ARIA Attributes to Avoid on Native Elements
Don’t add role="textbox" to an <input>. Don’t add role="checkbox" to a checkbox. Never use aria-label when a visible <label> exists. Redundant or conflicting roles can confuse screen readers and hide the element’s real purpose.
Inline Validation That Works for Everyone
Validation serves three groups: sighted users, screen reader users, and keyboard users. A good validation pattern helps all three at once.
Validation Timing
Validate on blur when a user leaves a field. This gives quick feedback. Also validate on submit as a safety net. Avoid validating on every keystroke. It causes constant interruptions for screen reader users. Password strength indicators are an exception since they give helpful feedback.
Visual Error Pattern
Show a red border on the invalid input and a red error icon. Hide the icon from screen readers with aria-hidden="true". Add a text message below the field and link it using aria-describedby.
input[aria-invalid="true"] {
  border-color: #d32f2f;
  border-width: 2px;
}

.error-message {
  color: #d32f2f;
  font-weight: 600;
  font-size: 0.875rem;
  margin-top: 0.25rem;
}
WCAG 1.4.1 says color alone shouldn’t convey info. Add an icon or bold text so colorblind users can see the change. A red border should only reinforce the message, not be the only sign. If you use a dark theme, ensure your error colors stay compliant. Using CSS Custom Properties for dark mode helps you keep contrast ratios high.
Screen Reader Announcement Flow
When validation fails on blur:
- Set
aria-invalid="true"on the input. - Put the error message in the linked
<span>. aria-describedbyensures the screen reader says the error when the user returns.- Use an
aria-live="polite"region for an immediate announcement.
<div aria-live="polite">
  <span id="email-error" class="error-message"></span>
</div>
Error Message Quality
Be specific. Use “Enter a valid email address” instead of “Invalid input.” Every error message should explain what went wrong and how to fix it.
The Constraint Validation API
Modern browsers support the Constraint Validation API
. It lets you use native validation while changing the messages. You can also use <form novalidate> and handle everything in JavaScript. This gives you full control over the design and style of your error bubbles.
const form = document.querySelector('form');
form.setAttribute('novalidate', '');

form.addEventListener('submit', (e) => {
  e.preventDefault();
  let firstInvalid = null;

  form.querySelectorAll('input, select, textarea').forEach((field) => {
    const errorSpan = document.getElementById(`${field.id}-error`);
    if (!field.checkValidity()) {
      field.setAttribute('aria-invalid', 'true');
      errorSpan.textContent = field.validationMessage || 'This field is required';
      if (!firstInvalid) firstInvalid = field;
    } else {
      field.removeAttribute('aria-invalid');
      errorSpan.textContent = '';
    }
  });

  if (firstInvalid) {
    // Show error summary and manage focus (see next section)
    return;
  }

  // Form is valid - submit it
  form.submit();
});
Error Summaries and Focus Management After Submission
Users need a clear path to fix problems when a form fails. An error summary at the top of the form helps. Combined with focus management, it ensures no user gets stuck wondering what went wrong.
The Error Summary Pattern
When a form fails, show a <div role="alert"> at the top. Use an <h2> like “There are 3 errors” and list the issues. Link each error to its input field so users can jump right to it.
<div role="alert" id="error-summary" tabindex="-1">
  <h2>There are 3 errors in this form</h2>
  <ul>
    <li><a href="#email">Email address is required</a></li>
    <li><a href="#password">Password must be at least 12 characters</a></li>
    <li><a href="#terms">You must accept the terms of service</a></li>
  </ul>
</div>
role="alert" tells the screen reader to announce the summary right away. Use tabindex="-1" to make the div focusable with JavaScript without adding it to the tab order.
Focus Management
After showing the summary, focus it with document.getElementById('error-summary').focus(). This moves the user’s focus so they hear the problems. Linked errors then let them jump straight to the fields that need fixing.
Without focus management, a screen reader user hears nothing after hitting submit. The error summary is there, but their focus stays on the button. They won’t know there’s a problem unless they scroll back up.
Preserving User Input
Don’t clear form fields when a submission fails. Making users re-type their data is frustrating and violates WCAG 3.3.1. Only clear password fields after a rejection, and leave the rest of the form as it is.
Success Feedback
When a form succeeds, redirect to a new page or show a message with role="status".
<div role="status">
  <h2>Your message has been sent</h2>
  <p>We will respond within 2 business days.</p>
</div>
role="status" works like aria-live="polite". Screen readers will announce it without cutting off other speech.
Server-Side Validation
Client-side validation helps the user, but you still need server-side checks for security. Always validate on the server and return errors in the same style. This ensures the form works for everyone, even without JavaScript.
Testing Accessibility with Real Tools
You can’t ship accessible forms without testing them. Users with disabilities use real tools, and you should too. Automated scans catch some issues, but manual testing catches the rest.
Automated Testing with axe-core
axe-core
catches about 57% of WCAG issues automatically. It finds missing labels, low contrast, and duplicate IDs. You can run it in your browser or add it to your CI pipeline with @axe-core/cli:
npx @axe-core/cli https://localhost:1313/contact/Since automated tools miss nearly half the problems, don’t rely on them alone. A passing scan doesn’t mean your form is fully accessible.
Keyboard-Only Testing
Unplug your mouse and tab through the form. Check that:
- You can reach every field with the Tab key.
- The focus order matches the visual layout.
- Focus indicators are clear. Never use
outline: nonewithout a backup style. - The submit button is easy to reach.
- You can finish and submit the form without a mouse.
This test takes only five minutes. It catches many problems that automated tools miss.
Screen Reader Testing
Test your form with at least one screen reader. The big three are:
| Screen Reader | Platform | Cost | Browser Pairing |
|---|---|---|---|
| NVDA | Windows | Free | Firefox or Chrome |
| VoiceOver | macOS / iOS | Built-in | Safari |
| Orca | Linux (GNOME) | Free | Firefox |
Screen readers can behave differently. Check that they announce every label when a field is focused. They should also announce errors on blur and the error summary on failure. Finally, ensure the success message is read aloud.
NVDA has two modes: browse and focus. It switches to focus mode when you enter a form. If a field seems invisible, the mode switch might be failing. This usually means your HTML semantics are wrong.
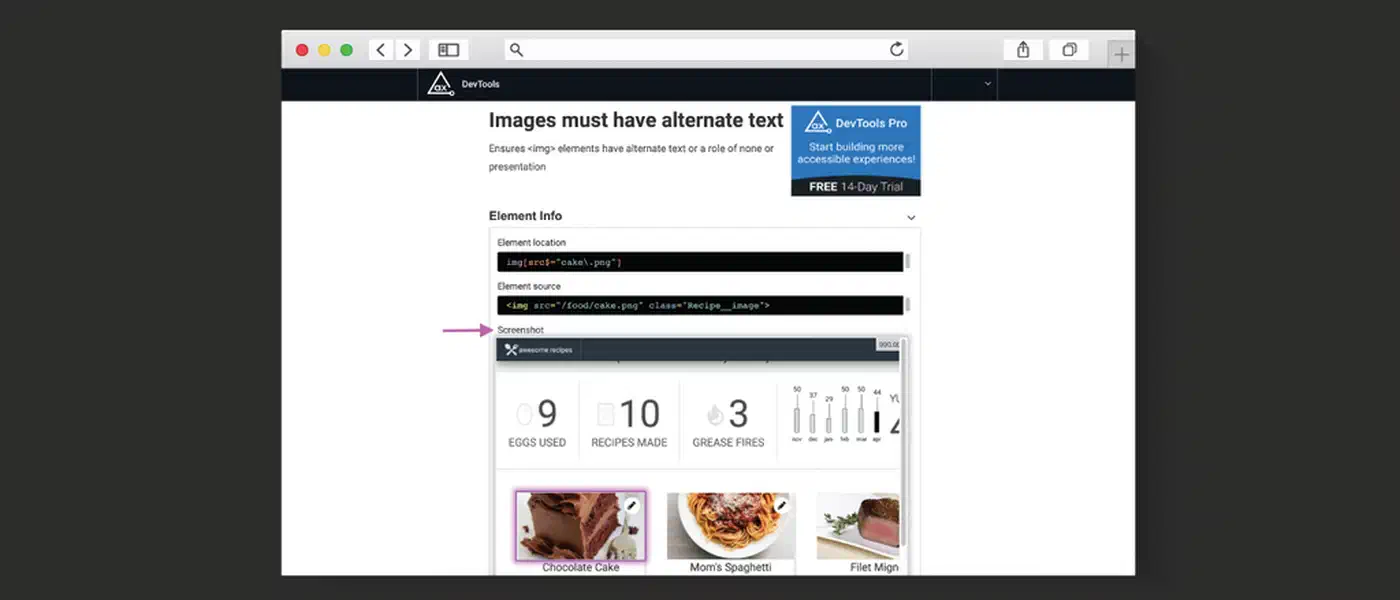
WAVE Extension
The WAVE extension shows issues directly on the page. It’s faster than axe-core for quick checks. You see errors right where they happen instead of in a console. WAVE errors match WCAG 2.2 requirements.
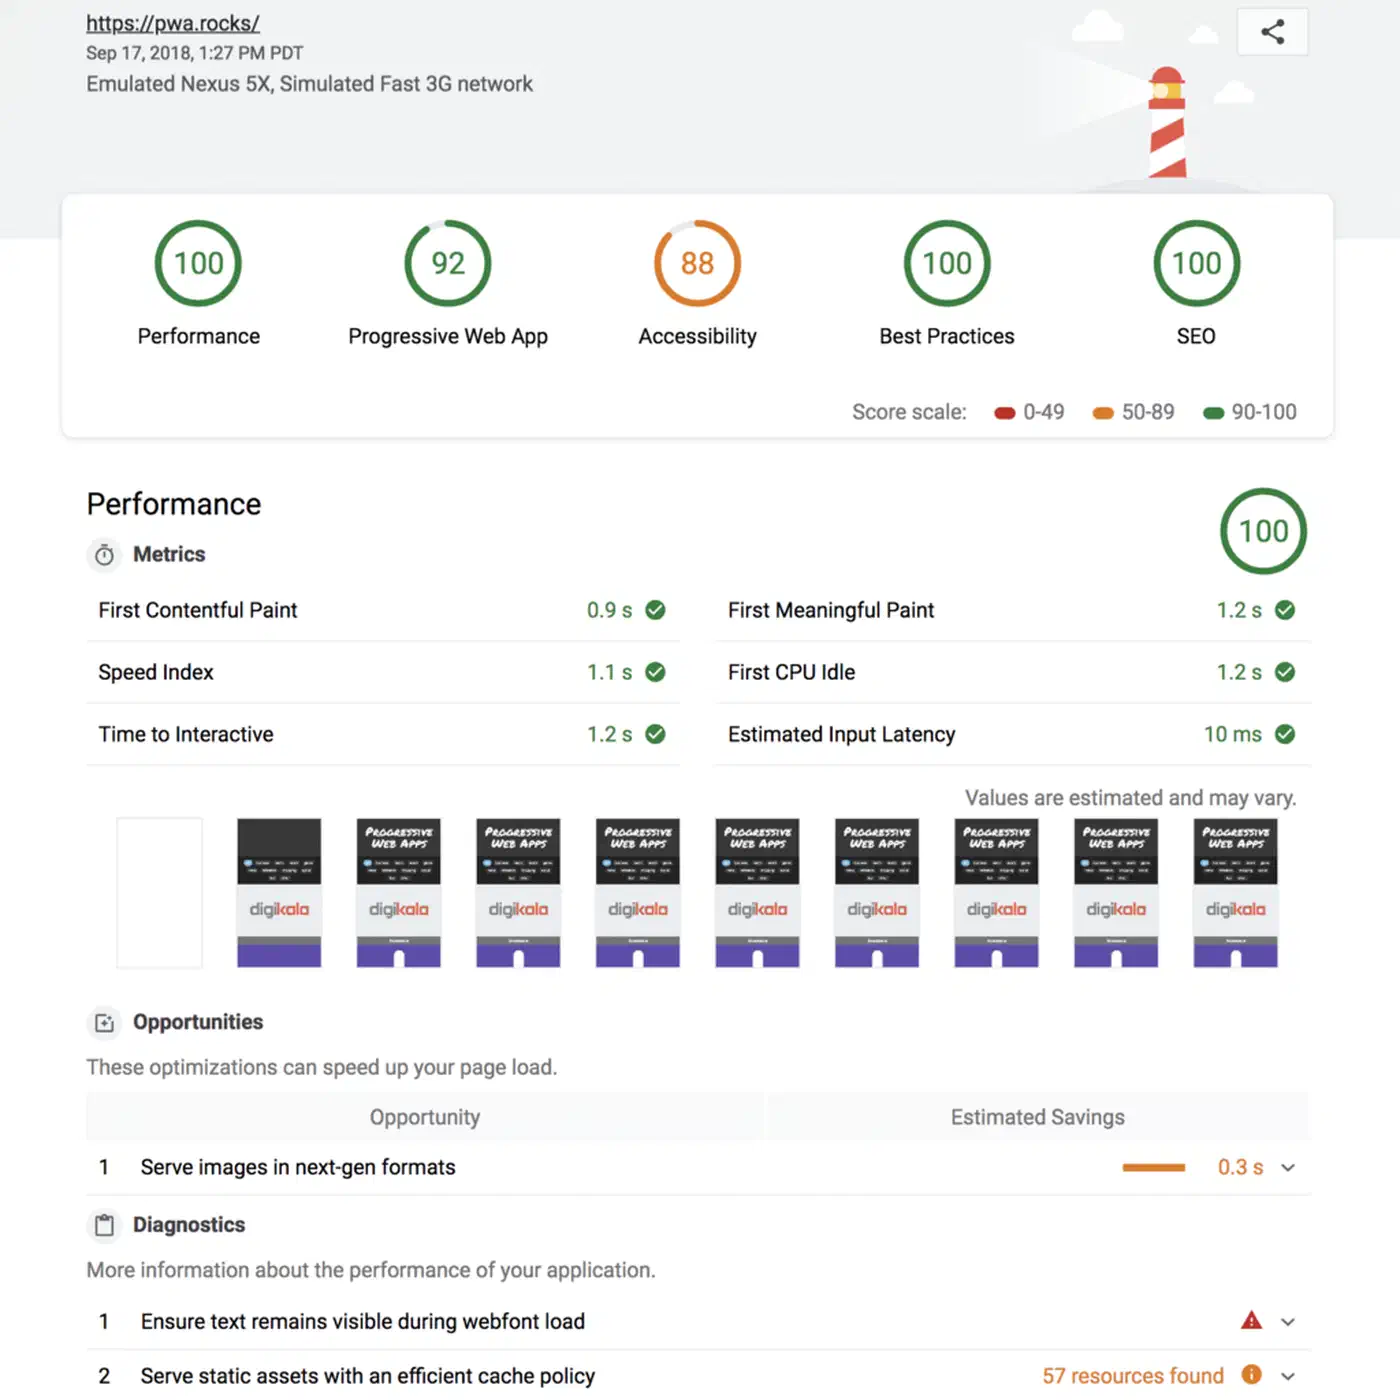
Lighthouse Accessibility Audit
Lighthouse gives you a quick score and flags major issues. Aim for 100, but remember that a perfect score is only a start. It doesn’t cover every WCAG requirement.
WCAG 2.2 AA Checklist for Forms
These are the key WCAG criteria for forms:
| Criterion | Requirement |
|---|---|
| 1.3.1 Info and Relationships | Labels, fieldsets, and legends create programmatic structure |
| 1.3.5 Identify Input Purpose | autocomplete attributes on user-related fields |
| 1.4.1 Use of Color | Error states not conveyed by color alone |
| 2.4.6 Headings and Labels | Descriptive, unique labels for every field |
| 3.3.1 Error Identification | Errors are identified and described in text |
| 3.3.2 Labels or Instructions | Every field has a visible label or instruction |
| 3.3.3 Error Suggestion | Error messages suggest how to fix the problem |
| 3.3.7 Redundant Entry | Do not ask for the same information twice |
| 4.1.2 Name, Role, Value | Custom controls expose name, role, and state to AT |
Check each criterion for every form you build. Automated tools help, but you still need manual checks.
Putting It All Together
Accessible forms need a strong foundation. Use semantic elements first and ARIA only for gaps. Ensure validation helps every user and error handling moves focus to the right place. Don’t rely only on automated scans.
The effort is small. A well-built form with labels and fieldsets covers most needs. Adding ARIA and testing takes only about 30 minutes.
This is a small price to pay. Otherwise, you risk locking out 15% of your users or facing legal issues.