Smart Home Network Segmentation: VLANs and Firewall Rules

Placing IoT devices on a dedicated VLAN with firewall rules that block all traffic to your main network - except specific connections to your Home Assistant server - prevents a compromised smart bulb or camera from becoming a pivot point into your personal computers and NAS. This setup works with consumer-grade managed switches and either UniFi or OpenWrt routers, and takes about an hour to configure properly.
The core idea is straightforward: instead of trusting every device on your network, you divide the network into isolated segments and only allow the traffic you explicitly approve. Your smart plugs, cameras, and voice assistants get their own network segment where they can reach the internet and your home automation server, but nothing else. If one of them gets compromised, the attacker is stuck in a sandbox with no path to your laptop or file server.
Why IoT Devices Are a Network Security Risk
Most IoT devices run outdated Linux kernels with known vulnerabilities and never receive security patches after the first year of their release. Tuya-based devices, cheap IP cameras, and budget smart plugs are the worst offenders. Manufacturers treat firmware updates as an afterthought, and many devices have hardcoded credentials or debug interfaces that never get disabled in production.
A compromised IoT device on your main network can do real damage. It sits on the same Layer 2 broadcast domain as your laptop, NAS, and everything else. From there, an attacker can ARP-spoof to intercept traffic, port-scan to discover services, and attack any device it finds. Your password manager sync, banking sessions, and personal files are all within reach if there is no network boundary separating them.
IoT devices also phone home constantly. Many send telemetry to cloud servers in jurisdictions with weak privacy laws, transmitting data that can include your network topology, usage patterns, device names, and sometimes even audio or video snippets. You might have bought a smart speaker to control your lights, but it is also mapping your entire home network for a company you have never heard of.
The Mirai botnet and its 2025-2026 variants continue to target IoT devices for DDoS attacks. An infected device on your network consumes your upstream bandwidth and can get your IP address blacklisted by abuse databases. Your ISP may throttle or suspend your service if your connection becomes a DDoS source.
Even devices marketed as “local only” present risks. Zigbee coordinators , Thread border routers, and similar hubs run web interfaces and REST APIs that could be exploited if exposed to the broader network. A vulnerability in your Zigbee coordinator’s web UI could give an attacker on the same network full control over every Zigbee device in your home.
Network segmentation is the single most effective defense against all of these threats because it does not depend on trusting any individual device’s security posture. The network itself enforces the boundaries. A compromised smart bulb on a properly segmented VLAN can only talk to other IoT devices and the specific services you have allowed through the firewall. Everything else is unreachable.
VLAN Architecture Design for a Smart Home
Before you touch any configuration interface, plan your VLAN topology on paper. A good architecture is simple to maintain and scales naturally as you add devices. Overcomplicating it with too many VLANs creates a maintenance burden that leads to mistakes.
Here is a recommended minimum VLAN layout:
| VLAN ID | Name | Subnet | Purpose |
|---|---|---|---|
| 1 | Management | 192.168.1.0/24 | Router, switches, access points |
| 10 | Trusted | 192.168.10.0/24 | Laptops, phones, NAS, desktop computers |
| 20 | IoT | 192.168.20.0/24 | Smart home devices, cameras, smart TVs |
| 30 | Guest | 192.168.30.0/24 | Visitor devices, untrusted connections |

Each VLAN gets its own /24 subnet with a separate DHCP scope. This gives you 254 usable addresses per segment, which is plenty for a home network. The management VLAN (VLAN 1) holds your network infrastructure - router, switches, and access points. Keep this separate so that compromised IoT devices cannot reconfigure your network equipment.
Your Home Assistant server belongs on the trusted VLAN (VLAN 10). Firewall rules then allow IoT devices on VLAN 20 to connect to Home Assistant’s IP on specific ports: 8123 for the web interface and 1883 for MQTT if you use it. All other traffic from IoT to trusted gets dropped.
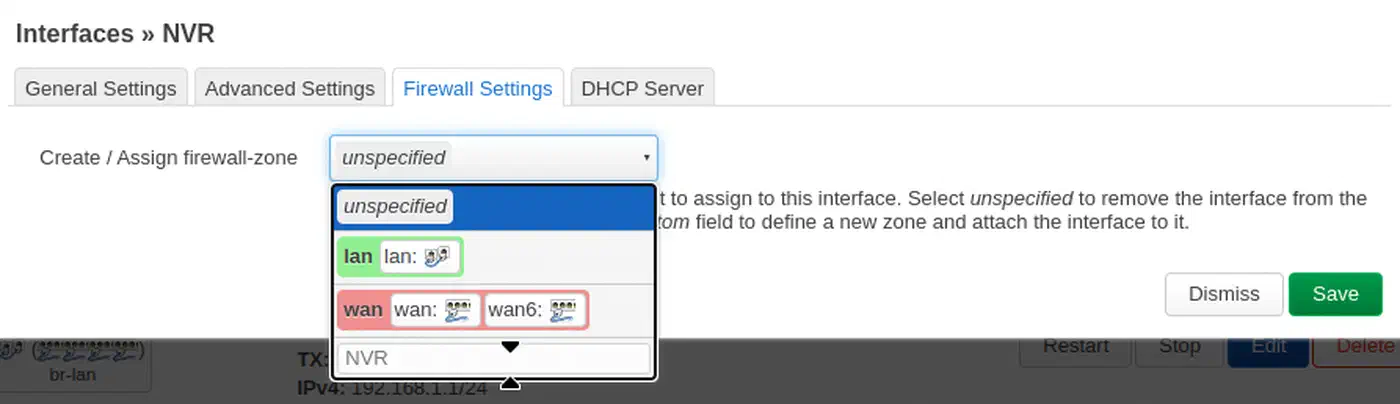
If you run IP cameras, consider a dedicated camera VLAN (VLAN 25). Cameras are particularly risky because they process video and often have terrible security. Put them on their own segment where only your NVR - whether that is Frigate , Blue Iris, or something else - can pull video streams. Cameras should never initiate outbound internet connections. If a camera needs cloud access, that is a red flag worth investigating. For a full guide to local AI camera detection that keeps all footage on-premise, see how to set up Frigate NVR with a Google Coral TPU .
One thing that trips people up is mDNS and DNS-SD. Protocols like Chromecast and AirPlay use multicast DNS to discover devices, and multicast traffic does not cross VLAN boundaries by default. You will need to enable mDNS reflection to let your phone on the trusted VLAN discover a Chromecast on the IoT VLAN. This slightly reduces isolation, but it is a practical necessity for most smart home setups.
The general firewall policy is:
- IoT to Trusted: Block everything except specific ports on specific IPs (Home Assistant, MQTT broker)
- IoT to Management: Block everything, no exceptions
- IoT to Internet: Allow, since many IoT devices require cloud connectivity
- Trusted to IoT: Allow, so you can manage and configure IoT devices from your main network
- Guest to everything: Block except internet access
Implementation on UniFi
UniFi is probably the most popular prosumer networking platform, and it handles VLANs well through its controller UI. If you are running a UDM Pro, USG, or UCG Ultra with managed switches and UniFi access points, the whole setup can be done from the web interface.
Creating Networks
In the UniFi Network app (version 9.x as of 2026), go to Settings > Networks. Create a new network for each VLAN. Set the VLAN ID, subnet, DHCP range, and domain name. For example, create a network called “IoT” with VLAN ID 20, subnet 192.168.20.0/24, and DHCP range 192.168.20.100 to 192.168.20.254.
Creating WiFi Networks
Create separate WiFi SSIDs for each VLAN:
- “HomeNet” on VLAN 10 with WPA3 Personal for your laptops and phones
- “IoT” on VLAN 20 with WPA2, because many older IoT devices do not support WPA3 and will silently fail to connect if you force it
- “Guest” on VLAN 30 with guest isolation enabled so guest devices cannot see each other
Switch Port Assignments
On your managed switch (USW-24 or similar), assign ports to VLAN profiles. Your wired smart home hub, Philips Hue bridge, and PoE cameras get assigned to the IoT VLAN port profile. Your desktop, NAS, and any wired workstations stay on the trusted VLAN profile. The trunk port connecting your switch to your router should carry all VLANs tagged.
Firewall Rules
This is where the actual security happens. Go to Settings > Security > Traffic & Firewall Rules and create the following rules in this order (order matters because rules are evaluated top to bottom):
- Allow IoT to HA - Allow TCP from IoT network to your Home Assistant IP on ports 8123, 1883, and 5353. Put this rule first.
- Block IoT to Trusted - Drop all traffic from IoT network to Trusted network. This catches everything not matched by the allow rule above.
- Block IoT to Management - Drop all traffic from IoT network to the gateway/management subnet. This prevents compromised IoT devices from reaching the UniFi controller (usually at 192.168.1.1).
mDNS Reflection
Enable the mDNS reflector under Settings > Networks > Global Network Settings. This allows Chromecast and AirPlay discovery to work across VLANs. Without it, your phone on the trusted network will not see casting targets on the IoT network.
Implementation on OpenWrt
OpenWrt gives you complete control over VLANs, firewall zones, and traffic rules on affordable hardware. The configuration is more involved than UniFi but offers greater flexibility. These instructions assume OpenWrt 24.x with DSA (Distributed Switch Architecture), which is the current standard.
Creating VLAN Interfaces
In LuCI, go to Network > Interfaces and create a new interface for each VLAN. For the IoT VLAN, create an interface named iot with protocol set to Static Address, IP address 192.168.20.1/24. Attach it to a new VLAN device - on DSA-based routers this will be something like br-lan.20.
Configuring VLAN Tagging
Under Network > Devices, edit your bridge device (usually br-lan) and configure VLAN filtering. Tag VLAN 20 on the trunk port that connects to your managed switch. If you have IoT devices plugged directly into the router, untag VLAN 20 on those specific ports.
DHCP Setup
For each VLAN interface, go to Network > Interfaces > Edit and configure the DHCP Server tab. Set the start address, number of addresses, and lease time. For the IoT VLAN, a start of 100, limit of 150, and a 12-hour lease time works well.
Firewall Zones
Go to Network > Firewall and create a new zone called iot:
- Input: REJECT
- Output: ACCEPT
- Forward: REJECT
- Add the
iotinterface to this zone
This default policy means IoT devices cannot initiate connections to the router itself or forward traffic to other zones. They can still reach the internet because outbound traffic is accepted.
Traffic Rules
Under Network > Firewall > Traffic Rules, create the following:
- Allow IoT to HA: Source zone
iot, destination zonelan, destination IP (your HA server), destination port8123 1883, protocol TCP, action ACCEPT - Allow IoT to WAN: Source zone
iot, destination zonewan, action ACCEPT. This is usually handled by the output ACCEPT on the zone, but add it explicitly if needed. - Allow established/related from LAN to IoT: Under the
lanzone settings, addiotas an allowed forwarding destination. This lets you initiate connections from your trusted network to manage IoT devices.
mDNS Reflection
Install avahi-daemon on OpenWrt:
opkg update
opkg install avahi-daemon
Edit /etc/avahi/avahi-daemon.conf and enable the reflector:
[reflector]
enable-reflector=yes
Restart the service with /etc/init.d/avahi-daemon restart. This reflects mDNS queries across the lan and iot interfaces so device discovery works across VLANs.
Testing, Validation, and Ongoing Maintenance
A misconfigured VLAN setup is worse than no VLANs at all because it gives you a false sense of security. After finishing your configuration, test every rule before assuming things work.
Testing Isolation
Connect a laptop to the IoT VLAN (either via the IoT WiFi SSID or by plugging into a switch port assigned to VLAN 20). Then run these tests:
# This should FAIL (timeout or destination unreachable)
ping 192.168.10.100  # any device on the trusted VLAN

# This should SUCCEED
ping 192.168.20.1    # IoT VLAN gateway

# This should SUCCEED
curl http://192.168.10.50:8123  # Home Assistant on trusted VLAN (allowed by firewall rule)

# This should FAIL
curl http://192.168.10.50:22    # SSH to HA server (not in allowed ports)
Network Scanning
Run an nmap scan from the IoT VLAN to verify nothing leaks through:
nmap -sn 192.168.10.0/24Every host on the trusted subnet should show as filtered or no response. If any host appears as up, your firewall rules have a gap.
mDNS Verification
From your phone on the trusted VLAN, check that Chromecast devices on the IoT VLAN show up in casting apps. If they do not appear, your mDNS reflector is not configured correctly or a firewall rule is blocking multicast traffic on port 5353.
Monitoring Cross-VLAN Traffic
On UniFi, use the Traffic Analytics dashboard to watch for unexpected connections between VLANs. On OpenWrt, use conntrack -L to list active connections and filter for cross-VLAN flows:
conntrack -L | grep "192.168.20" | grep "192.168.10"Any results here that are not your allowed HA connections warrant investigation.
Ongoing Maintenance
When you add a new device, assign it to the correct VLAN at the switch port or WiFi network level immediately. Do not leave it on the default VLAN “temporarily” - temporary configurations in networking have a way of becoming permanent.
Keep a document listing which devices sit on which VLAN and their IP assignments if you use static leases. This does not need to be anything fancy - a text file or a simple spreadsheet works fine. When you remove a device from your network, remove its static lease and any device-specific firewall rules.
Periodically audit your firewall rules. Remove rules for devices you no longer own. Tighten broad subnet-level allow rules to specific IP-level rules where possible. Review DNS query logs from the IoT VLAN to spot devices phoning home to suspicious domains - you can do this with Pi-hole or AdGuard Home configured as the DNS server for the IoT VLAN.
What This Setup Does Not Cover
VLAN segmentation handles the big risks, but a few adjacent topics did not fit into this guide and are worth knowing about.
Thread and Matter border routers may need specific multicast forwarding rules beyond basic mDNS reflection. If you use Thread devices, check whether your border router needs IPv6 multicast groups forwarded between VLANs.
UPnP and SSDP are protocols that some devices use for automatic port mapping and discovery. These should generally be disabled on the IoT VLAN because they can punch holes in your firewall. If a specific device breaks without UPnP, create a manual port forward instead.
Performance impact is minimal on modern hardware. Inter-VLAN routing happens at wire speed on any device with hardware offloading, which includes all current UniFi and most OpenWrt-supported routers. You will not notice any throughput difference in normal use.
If you want to go further, pfSense and OPNsense offer even more granular control with intrusion detection (Suricata/Snort), traffic shaping per VLAN, and detailed logging. They are worth considering if you outgrow what UniFi or OpenWrt provides. For secure remote access to your trusted VLAN from outside the home without opening firewall ports, pair this setup with a self-hosted WireGuard VPN.