Upgrade Your 3D Printer with Klipper: A Complete Setup Guide

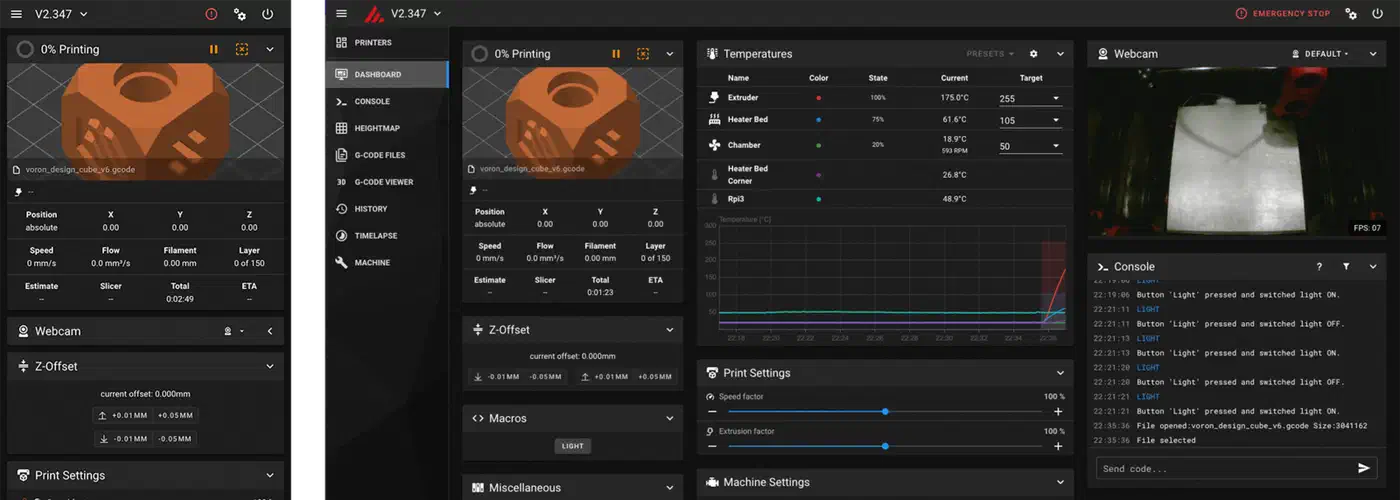
Klipper is a 3D printer firmware that moves motion planning off the printer’s microcontroller. The work runs on a Raspberry Pi or similar single-board computer instead. You get faster print speeds (300-500mm/s on a tuned Voron), pressure advance for cleaner corners, input shaping to kill ringing artifacts, and live config changes with no re-flashing. Klipper paired with a Mainsail or Fluidd web UI on a Raspberry Pi 5 is now the default stack for serious 3D printing.
If you’re still running Marlin or stock Creality firmware, this guide covers what Klipper does differently and what hardware you need. It also walks through install and config from scratch. Then it shows how to tune input shaping and pressure advance. Those two changes make the biggest visual difference to your prints.
What Klipper Does Differently (and Why It Matters)
The core difference between Klipper and older firmware like Marlin is the architecture. On a Marlin printer, the mainboard’s microcontroller handles everything: G-code parsing, motion planning, acceleration math, and the step pulse generation. That 32-bit MCU is doing a lot of work. It hits a ceiling fast at higher speeds.
Klipper splits the job across two systems. A host computer runs the main Klipper process and handles all the G-code parsing and motion planning. This can be a Raspberry Pi 5, an Orange Pi 5 Plus, or even a small x86 mini PC. The printer’s existing mainboard runs a stripped-down Klipper MCU firmware. That firmware only executes pre-computed step sequences with microsecond-level timing. More than 90% of the compute work moves off the microcontroller onto the host.

This architecture makes several things possible that stock firmware can’t do:
Input shaping (resonance compensation) starts with an ADXL345 accelerometer mounted to the toolhead carriage. The Pi measures resonance frequencies at various print speeds. It then computes an input shaping filter (ZV, MZV, EI, or 2HUMP_EI) that cancels the ringing artifacts. Those artifacts show up as ghosting around sharp edges. A printer that rings at 80mm/s on Marlin can run cleanly at 200mm/s or more under Klipper with a tuned input shaper.
Pressure advance fixes a separate problem. Filament pressure builds up inside the hotend as it speeds up and releases as it slows down. That causes corner blobs and gaps. Klipper fixes it by adjusting the extruder motor ahead of direction changes. It works better than Marlin’s linear advance, and you can tune it per filament profile.
Live config is simpler than it sounds. Edit printer.cfg in the Mainsail web interface, run FIRMWARE_RESTART, and the change takes effect at once. No recompiling, no SD card, no reflashing. For iterative calibration work, that saves real time.
The Moonraker API layer ties it all together. It connects Crowsnest for webcam streaming, timelapse plugins, KlipperScreen for touchscreen control, Klipper Expander boards for extra I/O, and direct slicer links to OrcaSlicer and PrusaSlicer.
Hardware Requirements and Compatible Printers
Choosing a Host Computer
The Raspberry Pi 5 4GB ($60) is the recommended host. It handles webcam streaming, Klipper processing, and Moonraker with no bottleneck. The Orange Pi 5 Plus ($55) is a faster, slightly cheaper option with 8GB RAM and more USB ports. It’s a fine swap if you can’t get a Pi 5.
Older Pi 3B or Pi 4 units work, but they struggle under load. That load means streaming a webcam, running Klipper at high speed, and serving the Mainsail UI all at once. If you already have a Pi 4 lying around, it’s fine to start with. But budget for a Pi 5 if you’re buying new hardware. The headroom is the same reason the Pi 5 has become a go-to base for everything from this print farm controller to a Raspberry Pi 5 pentesting rig .
Printer Compatibility
Most printers with a replaceable or flashable mainboard work with Klipper. The table below covers the common ones:
| Printer | Klipper Status |
|---|---|
| Creality Ender 3 / S1 / Pro | Fully compatible, most common entry point |
| Creality Ender 3 V3 SE / KE | Fully compatible, recommend BTT SKR Mini E3 V3 board swap |
| Voron 2.4 / Trident | Built for Klipper, use BTT Octopus or Manta M8P |
| Creality K1 / K1 Max | Uses locked Klipper fork, rootable with jailbreak |
| Prusa MK4 | Caveats - uses proprietary XBuddy board, custom firmware |
| Bambu Lab X1C | Not compatible - closed proprietary firmware |
For an Ender 3 on the stock Creality 4.2.7 board, you can flash Klipper straight to the STM32F103 target. The cheapest way to run Klipper is about $60 for a Pi Zero 2W, plus $0 if you flash the existing board. For a cleaner install with better headroom, a Pi 5 4GB ($60) plus a BTT SKR Mini E3 V3 ($30) is a better base.
For Voron-class builds, the BigTreeTech Octopus v1.1 and Manta M8P are the go-to control boards. Both support several TMC2209/2226 stepper drivers, CAN bus for the toolhead, and 24V input.
CANBUS Toolhead Boards
The BigTreeTech EBB36 and EBB42 toolhead boards connect via a single 4-wire CAN cable. They carry all toolhead signals: thermistor, heater, fans, ADXL345, and probe. This shrinks the cable chain on an enclosed printer by a lot. If you’re doing a Voron build or a big Ender 3 rebuild, adding CAN bus from the start is worth it.
Installing Klipper, Moonraker, and Mainsail
The KIAUH Installer
The standard install path is KIAUH (Klipper Installation And Update Helper). Clone it onto a fresh Raspberry Pi OS Lite install and run the menu:
git clone https://github.com/dw-0/kiauh && cd kiauh && ./kiauh.shKIAUH installs Klipper, Moonraker, and your choice of web UI in 10-15 minutes. It handles service setup, Python virtual environments, and dependencies for you. When it asks which UI to install, choose one:
- Mainsail has a cleaner UI, better macro management, and is the default for Voron builds
- Fluidd is slightly more beginner-friendly with better inline documentation
Either works. Pick Mainsail unless you have a specific reason to prefer Fluidd.
Flashing the MCU
After KIAUH finishes, flash the printer’s mainboard with Klipper’s MCU firmware:
cd ~/klipper && make menuconfigSelect the correct target for your board. Common examples:
- Ender 3 4.2.7 stock board: STM32F103
- BTT SKR Mini E3 V3: STM32G0B1
- BTT Octopus v1.1: STM32F446
Compile with make. Then copy the resulting klipper.bin to an SD card, or flash via USB DFU mode. The right method depends on your board. For most Creality boards, rename the file to firmware.bin first.
Initial printer.cfg Configuration
Download the community config file from the Klipper config directory for your printer. Adjust three things before first boot:
- The
serial:path. Find yours withls /dev/serial/by-id/after connecting via USB. - The
[stepper_*]endstop pin assignments for your wiring. - The
[extruder]thermistor type (NTC 100K B3950, ATC Semitec 104GT-2, etc.).
Connect to Mainsail at http://klipper.local (or the Pi’s IP). Open the terminal tab and run STATUS. You should see “Klipper state: Ready”. Jog the axes by hand to check motor direction and endstop behavior before you try a print.
Moonraker Configuration
In moonraker.conf, set update_manager to pull upstream updates for Klipper, Moonraker, and Mainsail on its own. Add the timelapse plugin config if you’re running a webcam. Moonraker’s API also lets you print straight from OrcaSlicer or PrusaSlicer.
Tuning Input Shaping and Pressure Advance
These two calibration steps give the biggest visible boost to print quality. Do them before you tweak anything else.
Mounting and Running the ADXL345
Mount an ADXL345 accelerometer to the toolhead carriage with M3 screws. Don’t mount it to the nozzle or fan duct. Those spots pick up noise from cooling and hotend vibration. Print the right mount for your printer from Printables or the Klipper community.
Wire the ADXL345 to the Pi’s SPI GPIO pins:
- MOSI: GPIO10
- MISO: GPIO9
- SCK: GPIO11
- CS: GPIO8
Keep connections short and secure. If you’re building a toolhead board from scratch or adding breakout headers, a reliable soldering station makes a real difference in joint quality and rework time.
Add the following sections to printer.cfg:
[adxl345]
cs_pin: rpi:None
spi_software_sclk_pin: rpi:gpio11
spi_software_mosi_pin: rpi:gpio10
spi_software_miso_pin: rpi:gpio9

[resonance_tester]
accel_chip: adxl345
probe_points: 100, 100, 20
Run the calibration from the Mainsail terminal:
TEST_RESONANCES AXIS=X
TEST_RESONANCES AXIS=Y
Klipper writes CSV data files to /tmp/. Generate the calibration graphs:
~/klipper/scripts/calibrate_shaper.py /tmp/resonances_x_*.csv -o /tmp/shaper_calibrate_x.pngInterpreting Shaper Output
The script recommends a shaper type and frequency. Look at the “remaining vibrations” percentage for each option. ZV is the fastest but the weakest on high-resonance printers. MZV gives a fair balance of speed and vibration cut. EI smooths a bit harder and handles higher resonance. 2HUMP_EI cuts the most resonance but costs some speed.
MZV or EI are the right pick for most printers. Apply the recommendation to printer.cfg:
[input_shaper]
shaper_freq_x: 48.2
shaper_type_x: mzv
shaper_freq_y: 41.6
shaper_type_y: mzv
Pressure Advance Tuning
Print a pressure advance calibration tower using:
SET_VELOCITY_LIMIT SQUARE_CORNER_VELOCITY=1 ACCEL=500Inspect the corners at different PA values. Typical ranges:
- Direct drive extruder: 0.03-0.06
- Bowden extruder: 0.4-0.8
Once you find the right value, store it in the slicer’s filament start G-code:
SET_PRESSURE_ADVANCE ADVANCE=0.045OrcaSlicer 2.2 is the slicer most Klipper users reach for. It has built-in Klipper calibration prints and a direct Moonraker link for sending prints from the slicer.
Advanced Klipper: Macros, Multi-Material, and CANBUS
G-code Macros
Klipper macros are Jinja2 templates. They can branch on printer state, call other macros, and take parameters. The macro you most need to get right is PRINT_START. A solid one does this:
- Heat the bed to target temperature
- Run
BED_MESH_CALIBRATEfor automatic bed leveling - Heat soak for ABS/ASA until chamber hits target temperature
- Run a purge line
- Hand off to the print
The community repo A-better-print_start-macro has a ready-to-use version worth copying as a starting point.
Exclude Objects is another macro feature worth turning on. With OrcaSlicer and Klipper’s [exclude_object] module, you can cancel one failing object mid-print without stopping the whole plate. If something starts warping, run EXCLUDE_OBJECT NAME=object_name in the console and Klipper skips it.
CANBUS with EBB36/42
To add a CAN bus toolhead board, set up the can0 interface on the Pi and add an MCU section to printer.cfg:
[mcu EBBCan]
canbus_uuid: your-uuid-here
Find the UUID with python3 ~/klipper/lib/canboot/flash_can.py -q. The EBB36/42 boards carry all toolhead signals over a single 4-wire cable. That cleans up the wiring on enclosed printers with long cable chains.
The Klipper Shake&Tune plugin improves on the default resonance calibration. It gives better graphs, clearer recommendations, and standalone per-axis frequency readouts. Install it via KIAUH’s extension menu.
Multi-Material Printing
The ERCF (Enraged Rabbit Carrot Feeder) and Tradrack are the two main multi-material systems for Klipper. Both run Happy Hare MMU firmware . It adds automatic filament loading, unloading, tip forming, and purge tower control. A tuned ERCF setup can handle 6-12 colors on a single printhead.
Troubleshooting Common Klipper Issues
“MCU not found” almost always means the USB serial path is wrong. Run ls /dev/serial/by-id/ and check the path matches the serial: value in printer.cfg. Also check the MCU firmware flashed correctly. If the board still has stock firmware, Klipper won’t see it.
A lost USB connection during a print is usually a cable problem. Use a good shielded USB cable and add ferrite cores near both ends. If it keeps happening, switch to UART between the Pi and the mainboard. UART is more stable than USB across long prints.
Homing failures are often a pin assignment problem. Run QUERY_ENDSTOPS in the Mainsail terminal while you trigger each endstop by hand to see what Klipper reports. The most common culprit is inverted endstop logic: a missing ! prefix in the pin definition.
Check thermal safety before your first print. Klipper’s runaway protection lives in the [verify_heater] config section. Make sure it’s in your printer.cfg:
[verify_heater extruder]
max_error: 120
check_gain_time: 20
hysteresis: 5
heating_gain: 2
Without this section, Klipper won’t catch a runaway heater. Check it’s there before printing.
Klipper has no native power-loss resume, unlike Marlin. The third-party power_loss_recovery plugin adds it, but it’s less reliable than Marlin’s version. On an enclosed ABS printer running multi-hour prints, a UPS beats software recovery.
Backing Up Your Klipper Configuration
printer.cfg represents weeks or months of tuning work. Treat it like production code.
The simplest approach is git version control:
cd ~/printer_data/config
git init
git add printer.cfg moonraker.conf
git commit -m "initial config"
Moonraker’s backup plugin can push to a private GitHub or Gitea repo after every config change. Set it up in moonraker.conf:
[backup]
host: github.com
port: 22
folder: ~/printer_data/config
service: git_repo
path: your-repo-name
A corrupted SD card, a failed OS upgrade, or an accidental rm during maintenance can wipe everything. A remote git backup means recovery is a git clone away. This is doubly important for CAN bus setups and multi-material configs, where the config is far more complex. If you want full BIOS-level remote access to the Pi host itself, not just the Mainsail UI, PiKVM gives you a console before the OS even boots. That helps a lot when you’re recovering from a bad OS upgrade.
Running Klipper changes how 3D printing works, not just how fast it goes. The first input shaping run is the turning point: you watch ringing vanish on prints that used to look like corduroy at speed. That’s the moment most people stop treating Klipper as optional.