Build a Low-Cost Air Quality Sensor with ESPHome

A DIY air quality monitor built around an ESP32 and a modern particle sensor is one of the highest-value home automation projects you can complete in a single afternoon. Connect a PMS5003 or the newer Sensirion SEN66 to an ESP32, flash ESPHome , and within minutes Home Assistant discovers the device over your local network - no cloud account, no monthly fee, no privacy concerns.
Why Monitor Air Quality at Home?
Most people think of air pollution as an outdoor problem. The reality is that indoor air quality is frequently worse. Cooking on a gas stove, burning candles, running a laser printer, using cleaning sprays, or simply having new furniture off-gassing formaldehyde can push indoor particle and chemical concentrations well above outdoor levels for hours at a time.
The pollutants that matter most in a residential setting fall into a few key categories. PM2.5 (fine particulate matter, diameter ≤ 2.5 µm) is the most closely watched because particles this small penetrate deep into lung tissue and enter the bloodstream. The EPA’s 24-hour average standard is 35 µg/m³ - a level that cooking a single pan of food can briefly exceed in an unventilated kitchen. Short-term spikes above 150 µg/m³ produce measurable respiratory effects within hours. PM10 covers coarser particles like dust and pollen. VOCs (volatile organic compounds) include benzene, formaldehyde, and hundreds of other compounds emitted from furniture, paints, adhesives, and cleaning products. CO2 is a direct proxy for ventilation quality - a well-ventilated room stays below 800 ppm, while a bedroom with a sleeping person and no airflow can exceed 2000 ppm by morning. NOx gases come primarily from gas appliances and outdoor traffic.
Commercial monitors from brands like Airthings, IQAir, and Kaiterra cost between $150 and $600, and most of them funnel your air quality data through proprietary cloud servers. If the company’s API changes or the subscription lapses, you lose access to your own data. A DIY build using ESPHome costs $25–50 in components and reports directly to Home Assistant over your local Wi-Fi network - zero intermediaries, infinite flexibility.
Hardware Bill of Materials
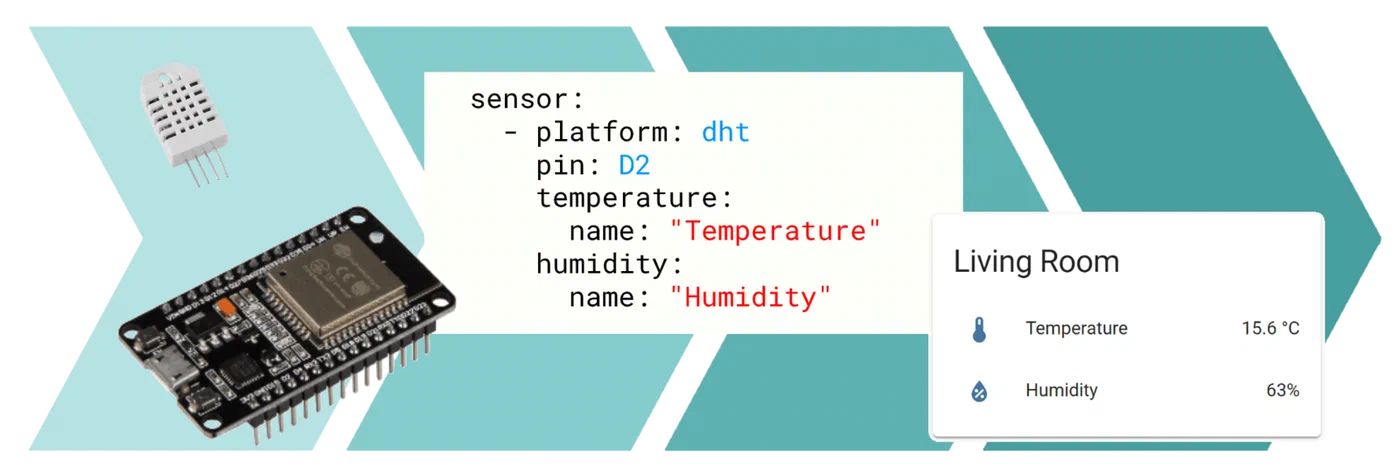
The exact component list depends on which sensors you choose, but the core platform is always an ESP32 development board. The ESP32-WROOM-32 is the de-facto standard: it is well-documented, has native ESPHome support, costs roughly $4 from AliExpress or $8 from Amazon, and provides enough GPIO pins and flash for any sensor combination you can imagine.
| Component | Approximate Cost | Notes |
|---|---|---|
| ESP32-WROOM-32 dev board | $4–8 | Any standard 38-pin variant works |
| PMS5003 particle sensor | $15–20 | UART interface, 5V power |
| Sensirion SEN66 (recommended) | $25 | I2C, all-in-one: PM, VOC, NOx, RH, T, CO2 |
| SCD40 or SCD41 CO2 sensor | $20 | Optional if using SEN66; true photoacoustic CO2 |
| USB-C power supply (5V 1A) | $5 | Wall adapter or power bank |
| Dupont wires (20–30 cm) | $2 | Jumper cables for breadboard prototyping |
| Perfboard + pin headers | $3 | For a permanent, solderable version |
| 3D-printed or ABS enclosure | $0–5 | Print from STL or use a Hammond 1551GFLBK |
The most important sourcing decision is which sensor combination you choose. If you already own a PMS5003 or want the cheapest possible build, it works fine. For a new build in 2026, the Sensirion SEN66 is the better choice for reasons explained in the next section. If you do not need true CO2 measurement, the SEN65 (which excludes the embedded SCD40) saves a few dollars.
For an enclosure, Printables has several community-designed STL files for ESPHome air quality sensor boxes. Search for “ESP32 air quality sensor enclosure” - many are designed specifically for the 38-pin ESP32 form factor with ventilation slots for the sensor inlet. If you do not have a printer, a standard off-the-shelf ABS project box from Hammond Manufacturing works well and is available from electronics distributors for around $4.
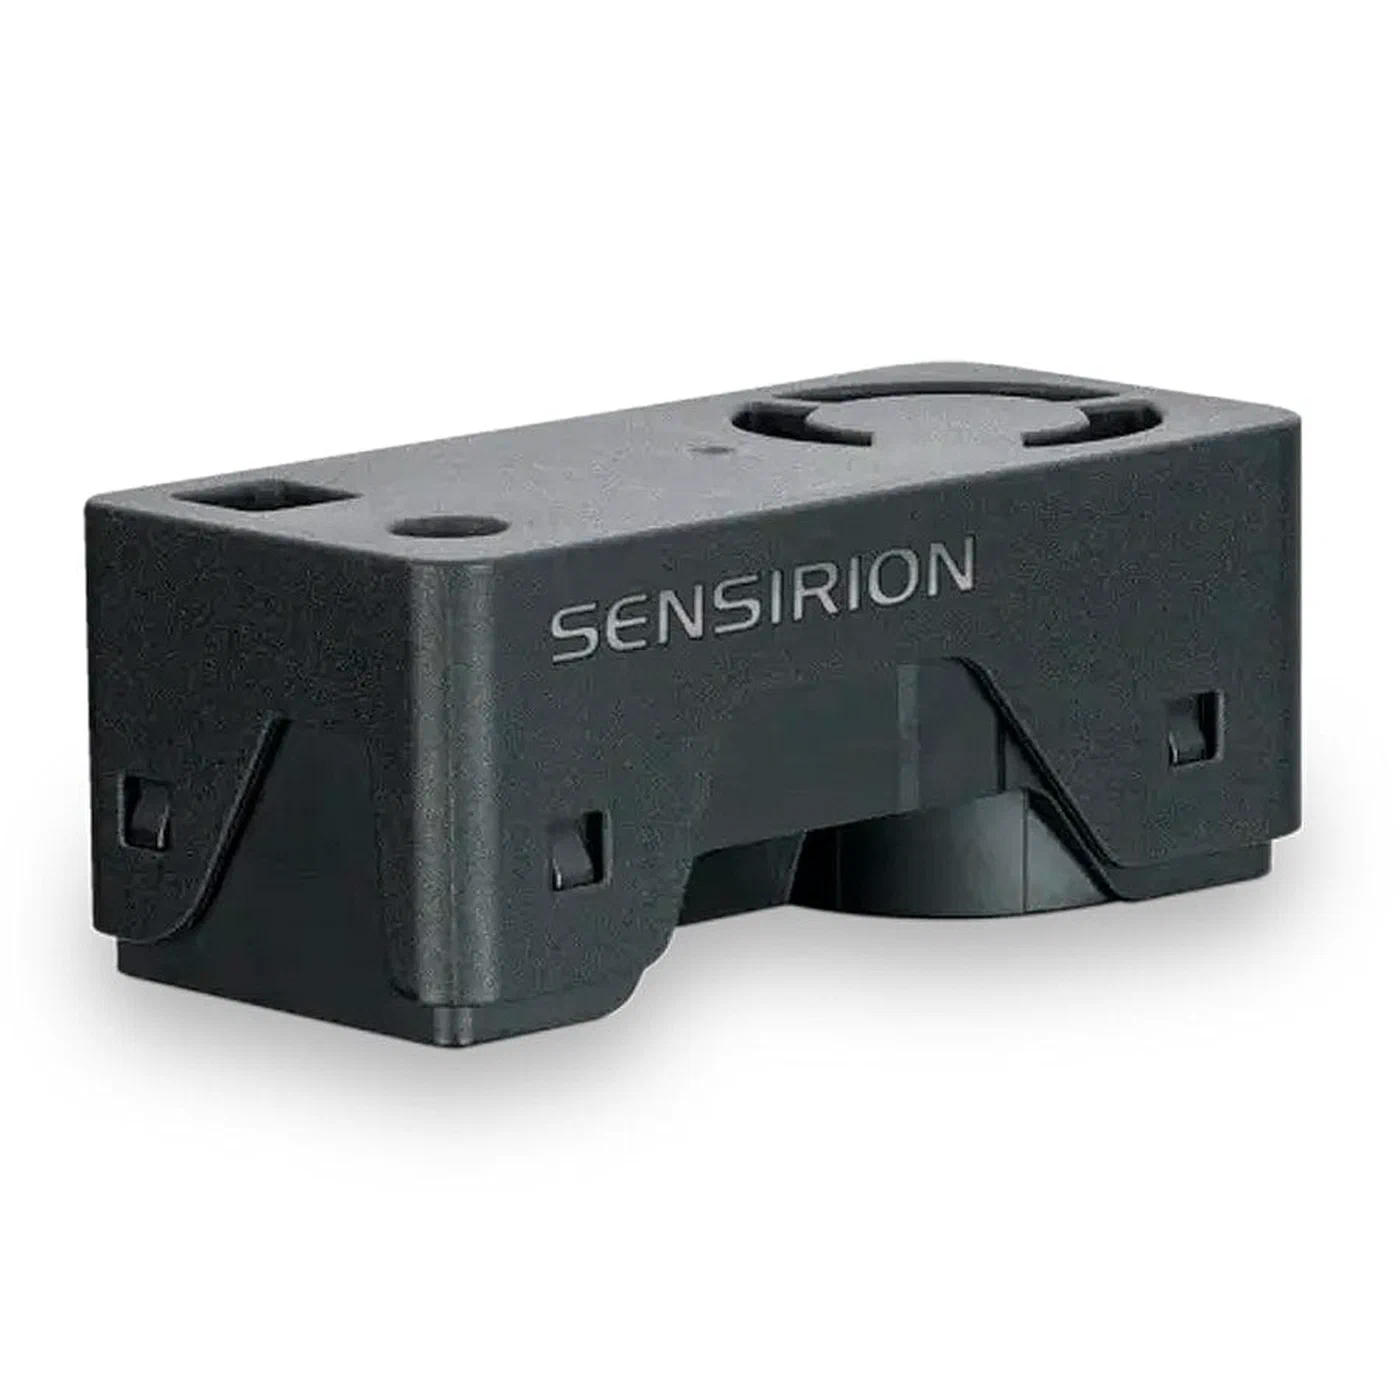
The Sensirion SEN6x Sensor Family
The SEN6x product line from Sensirion represents a significant simplification over the previous generation of multi-sensor builds. Where a 2022-era ESPHome air quality node might have combined a PMS5003 (particles), an SGP41 (VOC/NOx), and an SHT45 (temperature/humidity) - three separate sensors, three different wiring harnesses, and three separate ESPHome platform definitions - the SEN6x replaces all of that with a single 22 × 22 mm module connected over I2C with four wires.
The product family breaks down as follows:
- SEN60: PM1.0, PM2.5, PM4.0, PM10, temperature, and relative humidity. No VOC or CO2.
- SEN63C: Adds a true CO2 sensor (SCD30 NDIR) to the SEN60 measurements.
- SEN65: PM plus VOC Index and NOx Index, temperature, humidity. No CO2.
- SEN66: The complete package - PM1.0 through PM10, VOC Index, NOx Index, temperature, humidity, and a true CO2 reading from an embedded SCD40 NDIR sensor. This is the recommended choice for home air quality monitoring.
The ESPHome sen5x component supports the full SEN6x family via the same I2C protocol. You specify the exact model in your YAML, and ESPHome handles the rest. Wiring is minimal: VCC connects to the ESP32’s 3.3V pin, GND to GND, SDA to GPIO 21, and SCL to GPIO 22 - the default hardware I2C bus on ESP32. You do not need to set pull-up resistors for cable runs under about 30 cm; the sensor module includes them internally.
Accuracy on the SEN66 is competitive with standalone sensor combinations: PM2.5 ±10 µg/m³ or ±10% (whichever is greater), VOC Index relative to a self-calibrated baseline (not absolute µg/m³), and CO2 ±75 ppm ±5% of reading. The VOC and NOx numbers are dimensionless indices (1–500 scale) rather than concentration values - they indicate relative change from a learned baseline rather than absolute chemical concentrations.
Wiring the Circuit
Wiring is straightforward for both sensor options, but there are a few mistakes that are easy to make.
Wiring the SEN66 (recommended path):
SEN66 VCC  → ESP32 3.3V
SEN66 GND  → ESP32 GND
SEN66 SDA  → ESP32 GPIO 21
SEN66 SCL  → ESP32 GPIO 22
That is genuinely the complete wiring. No level shifting, no pull-up resistors for short runs, no additional power rail. For cable runs longer than about 30 cm, add 4.7 kΩ pull-up resistors from SDA and SCL to 3.3V to maintain I2C signal integrity.
Wiring the PMS5003 (alternative path):
The PMS5003 requires 5V, not 3.3V - this is the single most common wiring mistake. The ESP32 GPIO pins are 3.3V logic, but the PMS5003’s UART TX output is also 3.3V compatible despite the 5V supply, so no level shifting is needed for the data line.
PMS5003 VCC   → ESP32 5V (VIN pin)
PMS5003 GND   → ESP32 GND
PMS5003 TX    → ESP32 RX GPIO (e.g., GPIO 16)
PMS5003 SET   → 3.3V (pull high for continuous operation)
PMS5003 RESET → 3.3V (pull high to keep sensor active)
Leave the PMS5003’s RX pin disconnected unless you plan to send active mode/sleep commands. The SET and RESET pins must be pulled high with a 10 kΩ resistor or tied directly to 3.3V, or the sensor will stay in sleep mode and produce no readings.
For prototyping, a breadboard and standard female-to-female Dupont jumper cables are sufficient. Once you have verified your configuration works, transfer everything to a piece of perfboard with header sockets. Solder the ESP32 into one set of headers and run short wire jumpers to a second header where the sensor connector mates. This approach makes the sensor replaceable without desoldering anything.
ESPHome Configuration YAML
Once your hardware is wired, the ESPHome YAML configuration is the only software you need to write. The following is a complete, production-ready configuration for the SEN66. Replace the Wi-Fi credentials and OTA password with your own values.
esphome:
  name: air-quality-sensor
  friendly_name: Air Quality Sensor

esp32:
  board: esp32dev
  framework:
    type: arduino

# Enable logging over USB serial for initial setup
logger:
  level: INFO

# Home Assistant API - generates encryption key on first compile
api:
  encryption:
    key: !secret ha_api_key

# Over-the-air firmware updates
ota:
  - platform: esphome
    password: !secret ota_password

wifi:
  ssid: !secret wifi_ssid
  password: !secret wifi_password
  # Static IP optional but recommended for reliable mDNS
  # manual_ip:
  #   static_ip: 192.168.1.150
  #   gateway: 192.168.1.1
  #   subnet: 255.255.255.0

  ap:
    ssid: "Air Quality Fallback AP"
    password: "fallback1234"

captive_portal:

# Web server for standalone debugging without Home Assistant
web_server:
  port: 80

# I2C bus - default ESP32 hardware I2C pins
i2c:
  sda: GPIO21
  scl: GPIO22
  scan: true

sensor:
  - platform: sen5x
    id: sen66_sensor
    pm_1_0:
      name: "PM 1.0"
      unit_of_measurement: µg/m³
    pm_2_5:
      name: "PM 2.5"
      unit_of_measurement: µg/m³
    pm_4_0:
      name: "PM 4.0"
      unit_of_measurement: µg/m³
    pm_10_0:
      name: "PM 10.0"
      unit_of_measurement: µg/m³
    temperature:
      name: "Temperature"
      accuracy_decimals: 1
    humidity:
      name: "Humidity"
      accuracy_decimals: 0
    voc_index:
      name: "VOC Index"
    nox_index:
      name: "NOx Index"
    co2:
      name: "CO2"
      unit_of_measurement: ppm
    address: 0x6B
    update_interval: 60s
    acceleration_mode: low
    store_baseline: true
For a PMS5003 build, replace the i2c and sensor blocks with:
uart:
  rx_pin: GPIO16
  baud_rate: 9600

sensor:
  - platform: pmsx003
    type: PMS5003
    pm_1_0:
      name: "PM 1.0"
    pm_2_5:
      name: "PM 2.5"
    pm_10_0:
      name: "PM 10.0"
    update_interval: 60s
An update_interval of 60 seconds is a deliberate choice. The PMS5003 and SEN66 both have laser-driven optical counters that generate a small amount of heat when running continuously. Reading every minute gives the sensor adequate time to settle between measurements, produces a manageable volume of data in Home Assistant’s history database, and extends sensor lifespan. For rooms where you suspect rapid air quality changes - kitchens during cooking, for instance - you can drop this to 30 seconds without any issues.
The store_baseline: true setting on the SEN66 tells ESPHome to persist the VOC/NOx calibration baseline to flash memory across reboots. Without it, the sensor restarts its self-calibration algorithm every time the device loses power, which takes several days of continuous operation to converge.
OTA Firmware Updates
One of ESPHome’s best features is over-the-air updating. After the initial USB flash (using esphome run air-quality-sensor.yaml from your workstation), all subsequent firmware changes can be pushed wirelessly. From the ESPHome dashboard in Home Assistant, navigate to your device and click “Install” - the updated binary uploads to the ESP32 over Wi-Fi in about 30 seconds. No USB cable needed, no need to open the enclosure.
Keep your secrets.yaml file (which stores your Wi-Fi password, API key, and OTA password) committed separately from your public ESPHome configurations. The OTA password in particular should be treated like any other device credential - a default or blank password leaves your sensor open to unauthorized firmware flashing by anyone on your local network.
Home Assistant Integration and Automations
ESPHome devices announce themselves on your local network using mDNS. When you power on the sensor for the first time after flashing, Home Assistant detects it within a minute or two and presents a notification on the Integrations page: “New device discovered: Air Quality Sensor.” Click “Configure,” enter the API encryption key from your secrets.yaml, and all sensor entities become immediately available. No IP address to find, no manual YAML to add to configuration.yaml.
A useful starting dashboard is a history graph card showing PM2.5 and CO2 over a 24-hour window. Add a Lovelace card with type history-graph, set the hours to 24, and add sensor.air_quality_sensor_pm_2_5 and sensor.air_quality_sensor_co2 as entities. Watching this graph for a week gives you a baseline understanding of your home’s air quality patterns - the morning coffee spike, the cooking dinner bump, the overnight CO2 rise in bedrooms.
Automation 1 - Air Purifier Trigger:
alias: "Air Quality: Activate Purifier on High PM2.5"
description: Turn on the air purifier when PM2.5 stays elevated for 5 minutes
trigger:
  - platform: numeric_state
    entity_id: sensor.air_quality_sensor_pm_2_5
    above: 35
    for:
      minutes: 5
condition: []
action:
  - service: fan.turn_on
    target:
      entity_id: fan.xiaomi_air_purifier
  - service: notify.mobile_app_your_phone
    data:
      title: "Air Quality Alert"
      message: "PM2.5 is {{ states('sensor.air_quality_sensor_pm_2_5') }} µg/m³. Purifier activated."
mode: single
The for: minutes: 5 guard prevents the automation from firing on a brief spike - someone walking by with a box of dusty books, for example. Sustained elevation above 35 µg/m³ for five minutes is a meaningful air quality event that warrants action.
Automation 2 - CO2 Ventilation Alert:
alias: "Air Quality: CO2 Ventilation Alert"
description: Notify when CO2 exceeds 1000 ppm
trigger:
  - platform: numeric_state
    entity_id: sensor.air_quality_sensor_co2
    above: 1000
    for:
      minutes: 10
action:
  - service: notify.mobile_app_your_phone
    data:
      title: "Ventilation Needed"
      message: "CO2 reached {{ states('sensor.air_quality_sensor_co2') }} ppm. Open a window."
mode: single
To simplify these automations further, you can create a binary_sensor template in Home Assistant that encapsulates the threshold logic:
template:
  - binary_sensor:
      - name: "Air Quality Poor"
        state: >
          {{ states('sensor.air_quality_sensor_pm_2_5') | float(0) > 35
             or states('sensor.air_quality_sensor_co2') | float(0) > 1000 }}
        device_class: problem
This binary sensor turns on whenever either threshold is breached, and you can use it as a single trigger in automations and as a visual indicator in your dashboard.
Calibration and Accuracy
Out-of-the-box accuracy from the SEN66 is good enough for action-triggering automations, but if you want precise absolute values, a calibration step is worthwhile. The simplest approach is to place your DIY sensor next to a reference-class instrument - an IQAir AirVisual Pro or a Temtop LKC-1000E - for 48 hours in a room where you can induce measured air quality variation (cooking, burning a candle, opening windows). Record both readings at the same timestamps and calculate the mean offset.
Apply the offset in ESPHome using the filters key on any sensor:
sensor:
  - platform: sen5x
    pm_2_5:
      name: "PM 2.5"
      filters:
        - offset: -3.5   # subtract 3.5 µg/m³ if your sensor reads high
        - sliding_window_moving_average:
            window_size: 5
            send_every: 1
For VOC and NOx indices, calibration against an absolute reference is not meaningful because the values are dimensionless indices relative to the sensor’s own learned baseline. What matters for VOC is the trend - a sudden spike from 100 to 280 indicates a meaningful chemical event even if the index does not map cleanly to a specific µg/m³ value.
Outdoor Air Quality Comparison
A DIY indoor sensor becomes significantly more informative when you can compare its readings to outdoor air quality data. The OpenAQ API provides free access to government and community air quality station data worldwide. The IQAir AirVisual API offers a free tier as well.
In Home Assistant, you can integrate outdoor AQI data using the RESTful sensor platform:
sensor:
- platform: rest
name: "Outdoor AQI"
resource: "https://api.openaq.org/v2/latest?location_id=YOUR_STATION_ID¶meter=pm25&limit=1"
value_template: "{{ value_json.results[0].measurements[0].value }}"
unit_of_measurement: "µg/m³"
scan_interval: 900With both indoor and outdoor PM2.5 values on the same dashboard, you can make more intelligent automation decisions: if outdoor air is cleaner than indoor (after cooking, for instance), trigger the ventilation fan rather than the recirculating purifier.
Sensor Placement
Where you put the sensor matters as much as the sensor itself. Several placement rules are worth following:
Height: Place the sensor between 1 and 1.5 meters from the floor - breathing height for a seated adult. Ceiling placement will give you lower particle readings because heavy particles settle; floor placement will give you elevated readings from foot traffic and pet activity.
Distance from walls: Keep the sensor at least 30 cm from any wall. Air circulation is poor near wall surfaces, and the microclimate immediately adjacent to a wall is not representative of the room air.
Avoid HVAC vents: Both supply and return vents create local airflow that is not representative of room average conditions. Place the sensor at least one meter away from any vent opening.
Avoid direct sunlight: The SEN66 and PMS5003 are both temperature-sensitive. A sensor baked by afternoon sun through a window will report inflated temperature readings that throw off humidity (relative humidity is temperature-dependent) and cause the VOC/NOx baseline to drift.
Multiple sensor strategy: A single sensor works for a small apartment. For a multi-room home, consider deploying one sensor per floor at a minimum, with additional units in high-pollution rooms like the kitchen and any bedroom where windows are kept closed.
Power Consumption and Battery Operation
The ESP32 combined with a SEN66 draws roughly 200–350 mA at 3.3V during active measurement - around 0.7–1.2 W. Running from a USB wall adapter is the simplest and most reliable approach, and at that power level, the operating cost is negligible (roughly $0.50 per month at typical US electricity rates).
Battery-powered operation is feasible but requires trade-offs. In deep sleep mode, the ESP32 draws about 10 µA, but the SEN66 itself requires a 60-second warm-up period after power-on before its readings are stable. A typical duty cycle for a battery-powered build is: wake up, power the sensor, wait 90 seconds for stabilization, take a reading, send it to Home Assistant, go back to sleep for 10 minutes. This cycle consumes roughly 2–3 mAh per measurement event. A 2500 mAh LiPo battery would provide approximately 800–1200 measurement cycles before needing a charge - about one week of 10-minute-interval readings.
If you want battery operation with Home Assistant integration, use ESPHome’s deep sleep component combined with the MQTT or HTTP POST integration mode rather than the native API, since the ESPHome native API requires a persistent connection that is incompatible with deep sleep.
Bringing It All Together
Building an air quality sensor with ESPHome and an ESP32 takes a couple of hours end-to-end - an hour for the hardware assembly, thirty minutes to write and flash the configuration, and another thirty minutes to get it integrated and set up automations in Home Assistant. The result is a permanent piece of household infrastructure that quietly protects your family’s health by making invisible air quality events visible and actionable.
The Sensirion SEN66 in particular makes this project significantly more capable than anything available in the DIY space two years ago. Replacing three separate sensors with one $25 module that delivers seven measurement streams over a single four-wire I2C connection lowers the barrier enough that this is now a genuinely beginner-friendly build, not just an advanced maker project.
Once you have one sensor deployed and running, the logical next step is to add a second unit to a different room and start building a whole-home air quality picture. The data will surprise you.