 Botmonster Tech
ControlNet for Stable Diffusion: Sketch-to-Image, Depth Control
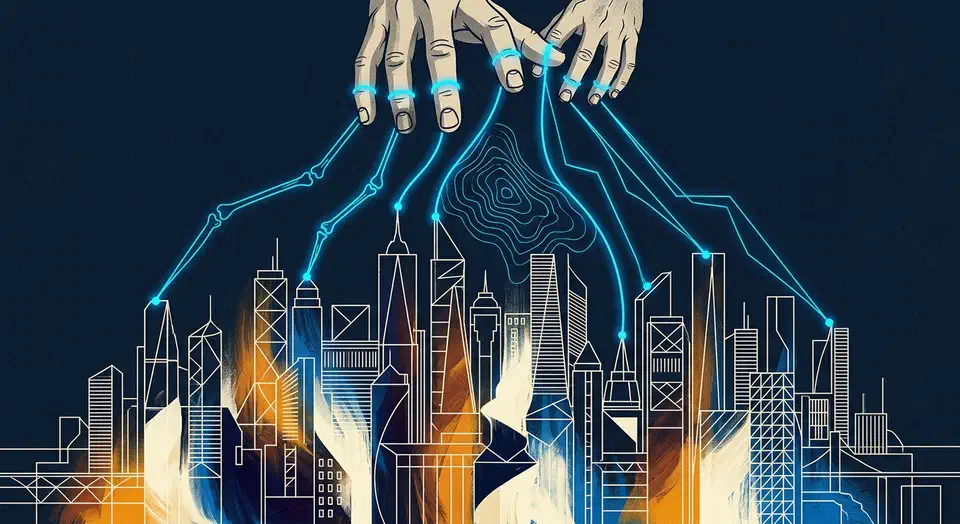
ControlNet lets you steer Stable Diffusion with spatial inputs: hand-drawn sketches, Canny edge maps, depth images, or OpenPose skeletons. The output then follows your layout, not your prompt alone. You feed a control image next to your text prompt. The model builds artwork that matches the structure of your input. It then fills in texture, lighting, and detail from the prompt. You get pixel-level control that no prompt tweak can match.
Have you ever spent twenty minutes rewording a prompt to fix a character’s arm or a building angle? ControlNet solves that for you. You draw the shape, photograph it, or pull it from an image, and the model respects it.
What ControlNet Is and How It Works
ControlNet (Zhang et al., 2023) adds a trainable copy of the UNet encoder blocks next to the frozen Stable Diffusion model. Your control image runs through this copy. It then feeds the main UNet through zero-convolution layers. These layers start with weights set to zero, so ControlNet begins with no effect. It learns to inject spatial cues as training runs. The result keeps the base model’s image quality and adds precise structural guidance.
This works differently from img2img. With img2img, the model starts from a noised version of your input image. So you inherit its color palette and texture. A rough pencil sketch run through img2img still looks like a rough pencil sketch. With ControlNet, that same sketch can yield a photo, an oil painting, or a 3D render. The sketch controls only where things sit, not how they look.
Each ControlNet model is trained on one conditioning type. Here are the main ones you will use:
- Canny edges - extracts hard edges from images, good for preserving structural detail
- Depth maps - grayscale depth information that controls spatial relationships and perspective
- OpenPose skeletons - body, hand, and face keypoints for character pose control
- Scribble/sketch - rough hand-drawn lines interpreted as compositional guidance
- Lineart - clean line drawings for illustration workflows
- Segmentation masks - color-coded regions that control what objects appear where
- Normal maps - surface orientation data for controlling lighting and 3D structure
- MLSD - straight line detection, useful for architectural scenes
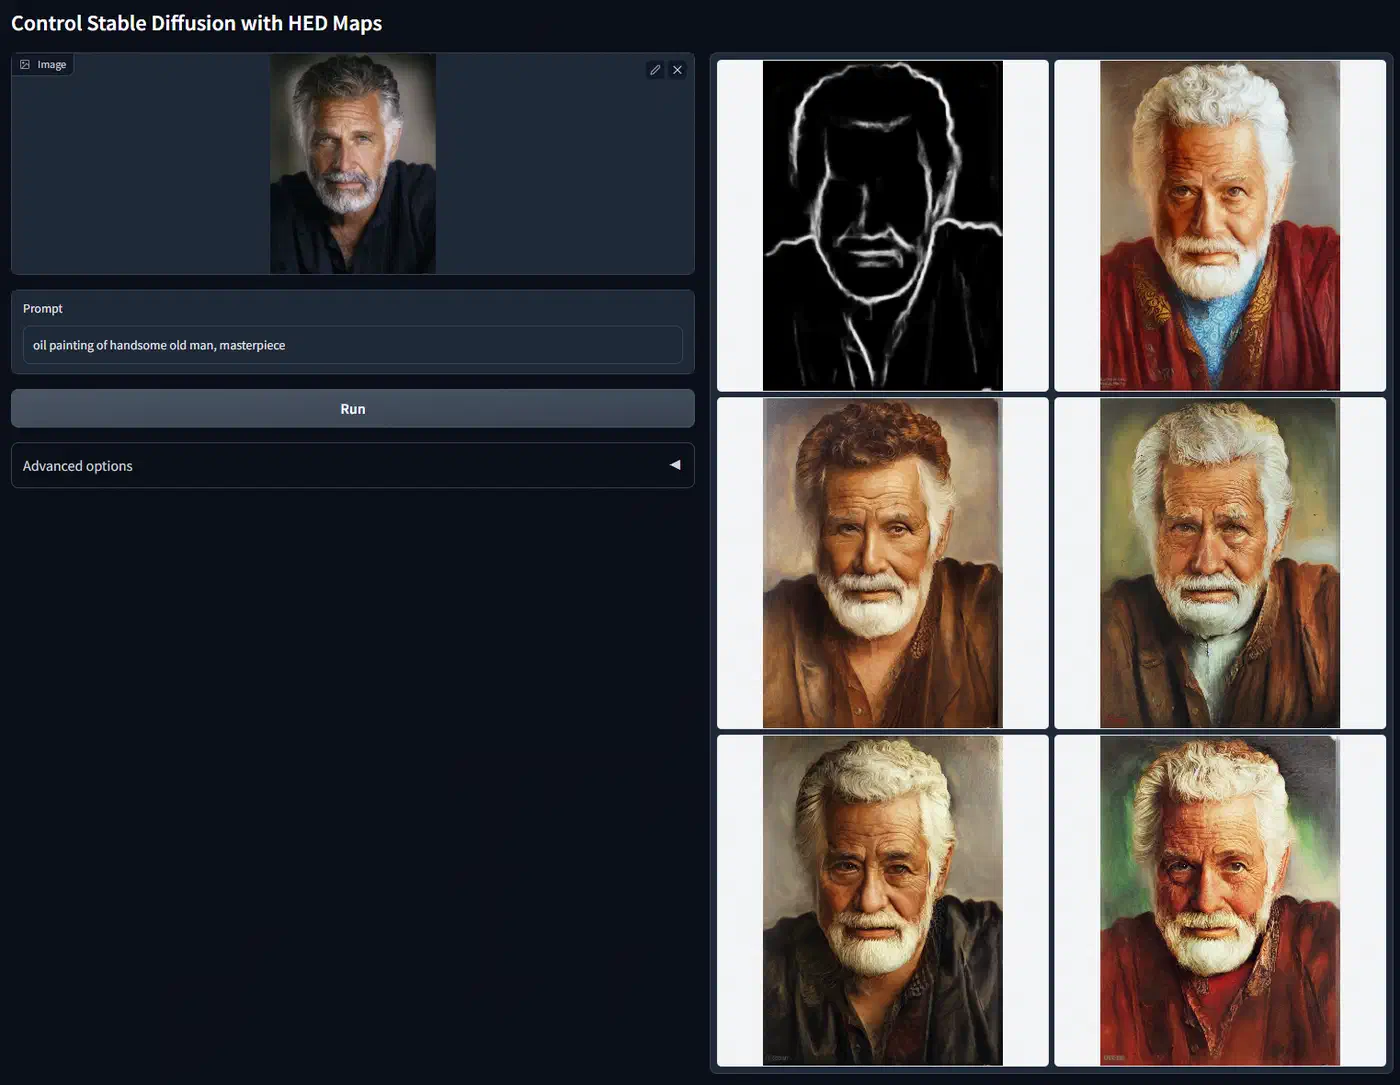
- Soft edges (HED/PiDiNet) - softer edge detection that captures broader shapes
The control_weight parameter (0.0 to 2.0, default 1.0) sets how strongly the control image shapes the output. Values above 1.3 tend to add artifacts. The 0.4 to 0.7 range gives a loose hint rather than a strict match. Most workflows land between 0.6 and 1.0, depending on how tightly you need the output to follow the input.
You can also stack several ControlNets at once: depth plus OpenPose plus Canny, each with its own weight. This gives layered control over composition, pose, and edge detail in a single pass. Stacking is what makes scenes with many constraints workable.
ControlNet models exist for SDXL (best for quality), SD 1.5 (widest model choice), and SD 3.5 (newest, with better detail). FLUX.1 ControlNet variants from Jasper AI and InstantX are showing up, but they are still less mature.
Setting Up Your ControlNet Environment
You have two main ways to run ControlNet locally: ComfyUI or A1111 Forge. Both work well, but they suit different workflows.
ComfyUI Setup
ComfyUI is the option I suggest. Its node-based workflow gives you clear control over every pipeline stage. It also handles memory better than the alternatives.
Install it with:
git clone https://github.com/comfyanonymous/ComfyUI.git
cd ComfyUI
pip install -r requirements.txt
Then install the ComfyUI-ControlNet-Aux
custom node pack for built-in preprocessors. This gives you all the standard preprocessors (Canny, depth, OpenPose, lineart, and more) as drag-and-drop nodes. Place ControlNet models in models/controlnet/ inside your ComfyUI directory. Preprocessor models auto-download to annotator/ on first use.
A1111 Forge Setup
A1111 Forge
is a better start if you prefer a classic UI with dropdown menus. Install the sd-forge-controlnet extension. It gives you preprocessor and model choices through a simple interface. It is less flexible than ComfyUI for stacked workflows, but it gets you generating images faster. Place ControlNet models in extensions/sd-forge-controlnet/models/.
Models to Download
For SDXL ControlNet, grab these from HuggingFace:
| Model | Size | Use Case |
|---|---|---|
diffusers/controlnet-canny-sdxl-1.0 | 2.5 GB | Edge-guided generation |
diffusers/controlnet-depth-sdxl-1.0 | 2.5 GB | Depth-guided composition |
xinsir/controlnet-union-sdxl-1.0 | 2.5 GB | 8 control types in one model |
The ControlNet Union model from xinsir is handy. It packs Canny, depth, pose, and five other control types into a single 2.5 GB file. So you don’t need a separate model for each type.
VRAM Requirements
SDXL with one ControlNet needs 8 GB VRAM at minimum in FP16. With two stacked ControlNets, budget 10 to 12 GB. If you hit out-of-memory errors on an 8 GB card like the RTX 4060, use the --lowvram or --medvram flags in A1111/Forge.
On a 16 GB card (RTX 5070 Ti) or the RTX 4090 (24 GB), turn on FP16 inference with no memory tweaks for top speed. Expect 4 to 8 seconds per 1024x1024 SDXL image with one ControlNet on a 5070 Ti.
Preprocessing Your Control Images
The quality of your ControlNet output rests on how well you prepare the control image. A sloppy preprocessing step gives sloppy results, no matter how good your prompt is.
Canny Edge Detection
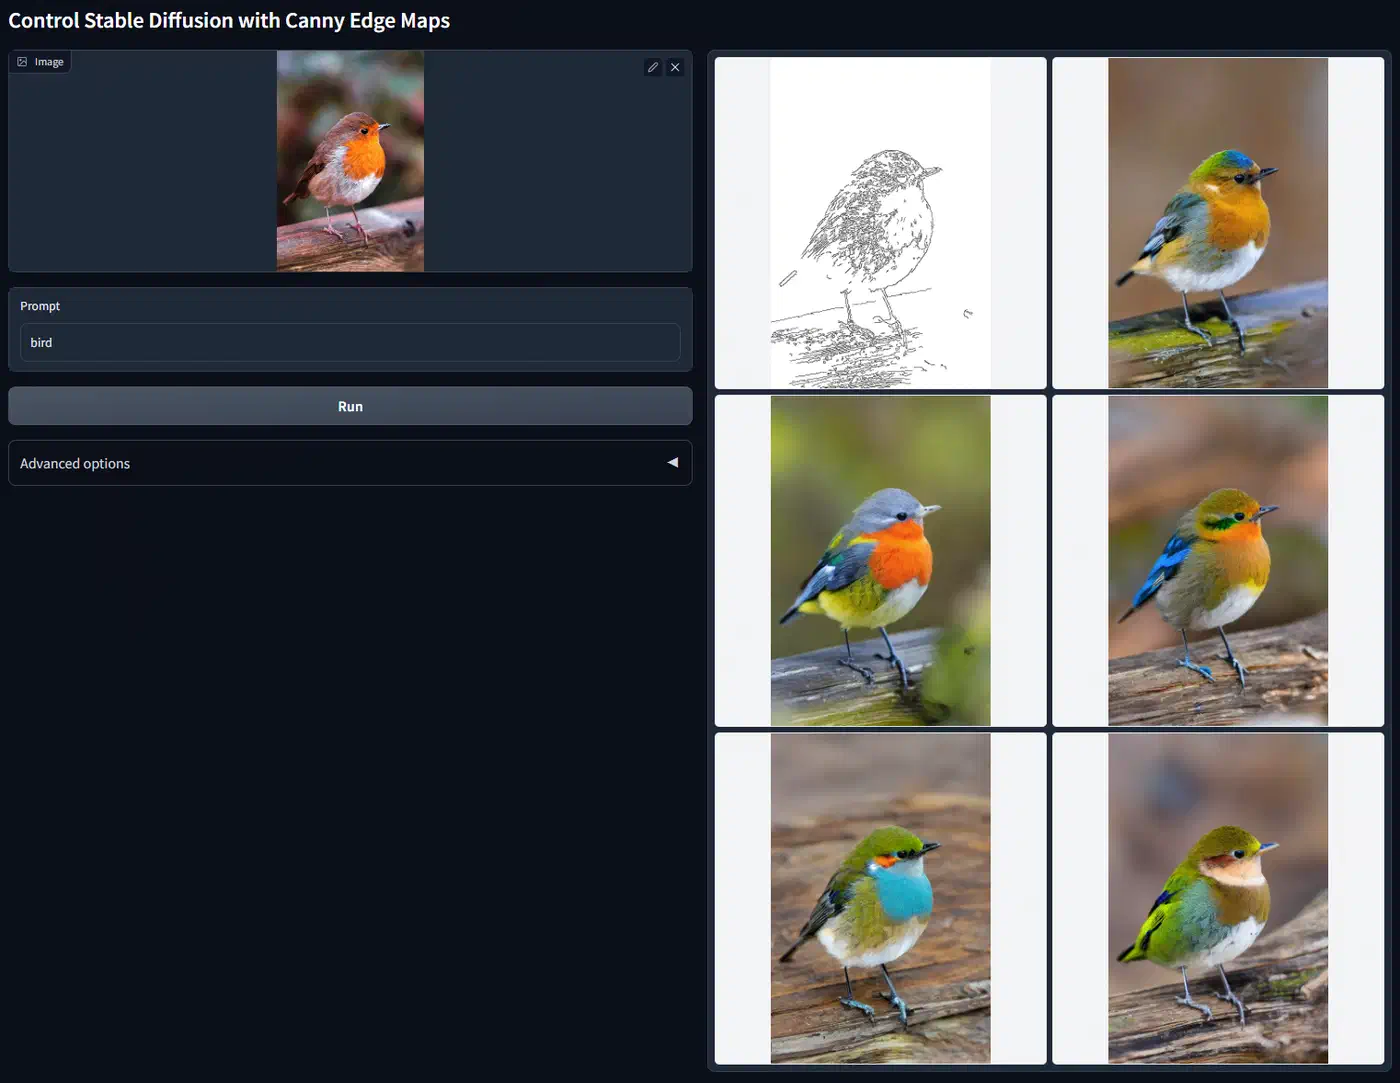
Best for turning photos or detailed drawings into edge maps. The two key settings are the low threshold (50 to 100) and high threshold (100 to 200). Lower thresholds catch more detail but can add noise. For most photos, start with low=100 and high=200. Then drop the low threshold if you need finer detail. The output is a black-and-white image where white lines mark the edges it found.
Depth Estimation
Depth Anything v2 (2024) is the best option for single-image depth estimation. It is more accurate than MiDaS 3.1 and runs at 30fps on an RTX 4060. The output is a grayscale image where lighter areas sit closer and darker areas sit farther away. It is most useful when you want to swap a scene’s content but keep its layout.
OpenPose Skeleton Detection
Pulls body, hand, and face keypoints from photos. Use this for character art when you need a precise pose but want to change clothing, style, or identity. The full OpenPose pass (body, hands, and face) gives the tightest control but also the most constraints. For looser pose guidance, use body-only detection.
Scribble and Sketch Mode
The most forgiving preprocessor. Draw black lines on a white canvas at any skill level: stick figures, rough shapes, loose compositions. The model reads your intent, not your exact geometry. This is the fastest path from idea to image because it takes truly rough input. If you draw on paper, scan or photograph it, then run it through the Scribble preprocessor to clean it up.
Lineart
Comes in Anime and Realistic variants. It turns images into clean line drawings or takes hand-drawn lineart as is. Pair the anime variant with a checkpoint like Animagine XL when you want to go from rough lineart to a finished, colored illustration. For custom styles or characters, pair ControlNet with a style LoRA you trained on SDXL . That gives you both layout control and a steady style across a series.
Segmentation Masks
With OneFormer or SAM2 , you color-code image regions using the ADE20K palette (sky=blue, ground=green, building=red) to set which objects go where. This works well for landscape and architecture scenes when you want precise layout control without drawing edges.
Practical Workflows: From Sketch to Finished Image
The next three workflows cover the most common ControlNet use cases. You can adapt them to most projects.
Sketch to Concept Art
Start with a rough pencil sketch. Scan it from paper or draw it as black lines on a white background. If you scan it, run it through the Scribble preprocessor to clean it up. If you draw it on screen, you can often use it as is.
Set control_weight to 0.8. Write a detailed prompt for materials, lighting, and style. For example: “fantasy castle on a cliff, dramatic sunset lighting, stone walls covered in moss, volumetric fog, highly detailed digital painting.” Generate at 1024x1024 with 30 sampling steps using the DPM++ 2M Karras scheduler.
The sketch sets the composition: where the castle sits, the cliff angle, the horizon line. The prompt sets everything else: materials, lighting, mood, and style.
Depth-Guided Scene Transformation
Take a phone photo of a room or landscape. Run it through Depth Anything v2 to get the depth map. Load controlnet-depth-sdxl-1.0 with control_weight set to 0.7, then prompt for a wholly different setting.
Try a living room depth map with the prompt “underwater coral reef, tropical fish, sunlight filtering through water, volumetric lighting.” The result keeps your living room layout. The couch becomes a coral formation at the right distance. The bookshelf becomes a reef wall. Every surface and object changes. This trick is useful for concept art, game environment design, and architecture visuals, where you want to explore many themes for the same space.
Pose-Controlled Character Art
Find a reference photo with the pose you want, or photograph yourself. Pull the OpenPose skeleton with body, hands, and face keypoints. Set control_weight to 0.9 for a strict pose match. Write a prompt with your character description.
For more control over clothing or accessories, stack a second ControlNet. Feed it Canny edges from a clothing reference at weight 0.3. The OpenPose skeleton sets the body position. The Canny edges hint at outfit details.
Prompt Strategy with ControlNet
Prompt writing works differently with ControlNet, since the model already knows where things go. Your prompt should focus on what fills the scene, not where things sit. Front-load quality terms (“masterpiece, best quality, highly detailed”), add style tags (“oil painting,” “3D render,” “photograph”), and describe materials, lighting, and mood.
Negative prompts count for more with ControlNet than in plain generation. Include “deformed hands, extra fingers, blurry, low quality, watermark.” The model can add artifacts at control points, above all around hand keypoints, where the skeleton data is densest.
Batch Generation and Refinement
Generate 4 to 8 images per setup with different seeds. Take the best result and run it through img2img at 0.3 to 0.4 denoise strength to refine it. For extra polish, pull Canny edges from your best output and run a second ControlNet pass. This tightens detail and keeps the composition you already approved.
Advanced Techniques: Multi-ControlNet and ControlNet Unions
Once you are at ease with single-ControlNet workflows, you can stack control types and pair them with IP-Adapter for much finer control over the output.
Multi-ControlNet Stacking
In ComfyUI, chain several Apply ControlNet nodes in a row, each with its own model, control image, and weight. A strong mix for character scenes is Depth (weight 0.6) for layout, OpenPose (weight 0.8) for pose, and Canny (weight 0.3) for edge detail. The weights need balancing. If one ControlNet takes over, drop its weight and raise the others until the result reflects all three inputs.
ControlNet Union Models
The xinsir/controlnet-union-sdxl-1.0 model handles many control types in one file. Pass a control_mode value (0 for Canny, 1 for depth, 2 for pose, and so on) to pick the conditioning type. This cuts VRAM use from about 7.5 GB (three separate models) to 2.5 GB (one union model). That makes stacked workflows work on 8 GB cards.
IP-Adapter Plus ControlNet
IP-Adapter pulls style or subject identity from a reference image, while ControlNet sets the composition. The main use is steady character art: use IP-Adapter to lock a character’s face and look, then use ControlNet with a new pose for each frame. This pair is key for comic pages, storyboards, or any project that needs the same character across many images.
ControlNet Inpainting
Mask a region of an existing image, give a ControlNet condition for just that region, and regenerate only the masked area. The most common use is fixing hands: apply OpenPose to just the hand region with correct finger positions, then regenerate. You can also use depth-guided inpainting to swap backgrounds while keeping foreground subjects intact.
T2I-Adapter as a Lightweight Alternative
T2I-Adapters reach about 70 to 80 percent of ControlNet’s conditioning strength with roughly half the VRAM. If you are on a 6 GB card where full ControlNet plus SDXL does not fit, T2I-Adapter may be your only path to spatial control. The quality gap shows, but it is small for most use cases.
FLUX.1 ControlNet
InstantX and Jasper AI have released Canny, depth, and pose ControlNets for FLUX.1-dev . Quality rivals SDXL ControlNet. But FLUX.1 needs 12 GB or more VRAM, and inference runs 2 to 3 times slower because the model is larger. If you already run FLUX.1 for its better text rendering and prompt following, the ControlNet variants are worth a test. If you pick a base model mainly for ControlNet work, SDXL is still the more practical choice. It has wider model support and better speed per watt.
Quick Start Path
Want to try ControlNet with as little setup as possible? Install ComfyUI, download the ControlNet Union SDXL model, take a phone photo of anything, run Depth Anything v2 on it, and generate with a creative prompt. The whole run takes about ten minutes from install to first image. Once you see a depth map of your living room turn into an alien landscape or a medieval tavern, the appeal of spatial control is clear. From there, try other preprocessors, stack ControlNets, and build workflows around your own projects.