 Botmonster Tech
Thread border routers for Matter smart home: 2 min, 1500+ devices

Deploy at least two Thread border routers and connect them to the same Thread network. Each can be an Apple HomePod Mini, a Google Nest Hub (2nd gen), or a DIY OpenThread Border Router (OTBR) on a Raspberry Pi. This gives your Matter-compatible smart locks, sensors, and lights a reliable IPv6 path to your IP network. They can then talk to Home Assistant, Apple Home, and Google Home at once through Matter’s multi-admin feature. Two routers is the minimum for any network you depend on. If one goes down, the other keeps your mesh alive.
Below: how Thread and Matter relate, which border router hardware to pick, a full OTBR setup on a Raspberry Pi, mesh tuning, and device commissioning.
Thread and Matter - How They Work Together
Thread and Matter work together but do different jobs, and people confuse them all the time in smart home forums. Thread is a low-power IPv6 mesh network protocol built on IEEE 802.15.4 radio at 2.4 GHz. It replaces the network layer that Zigbee uses, with one key difference. Thread devices form a self-healing mesh where any router-capable device can relay traffic, and the network supports many border routers at once. There is no single coordinator that becomes a point of failure.
Matter works one layer up. It is an app-layer protocol that sets how devices talk: on/off, brightness, temperature, lock/unlock. Matter can run over Thread, WiFi, or Ethernet. Thread is just one transport option. It is the best one for battery-powered devices because it draws so little power.
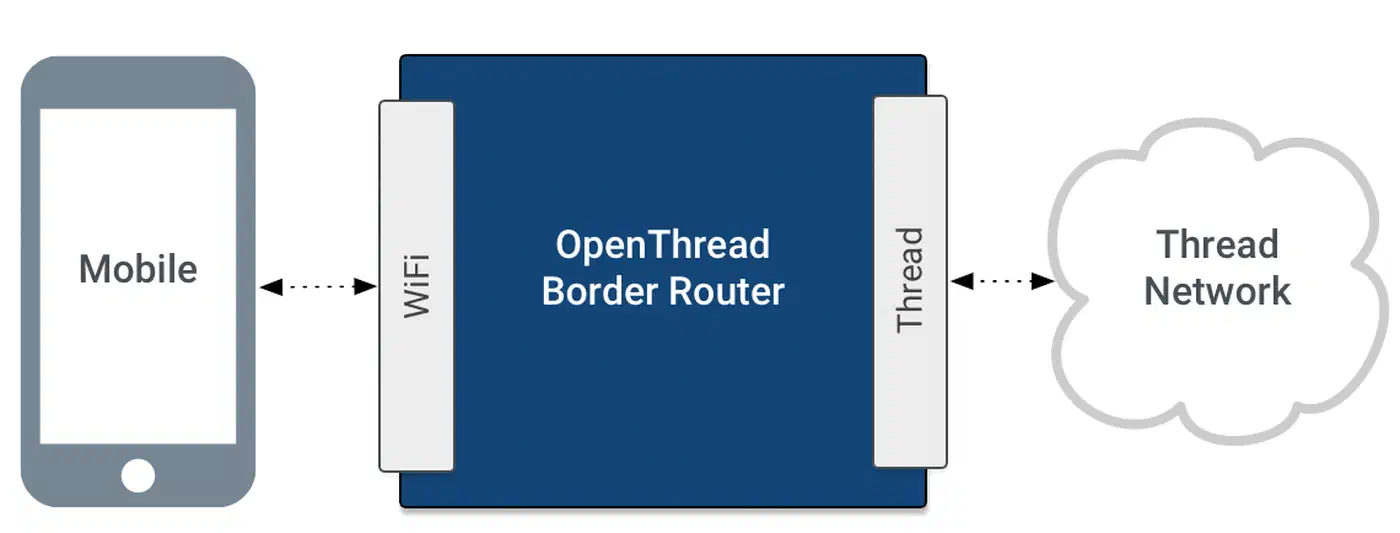
A Thread border router bridges the 802.15.4 radio mesh to your IP network, over WiFi or Ethernet. That gives Thread devices internet and LAN access over IPv6. Without at least one border router, Thread devices sit alone on their own radio network. They have no way to reach your controller or the internet.
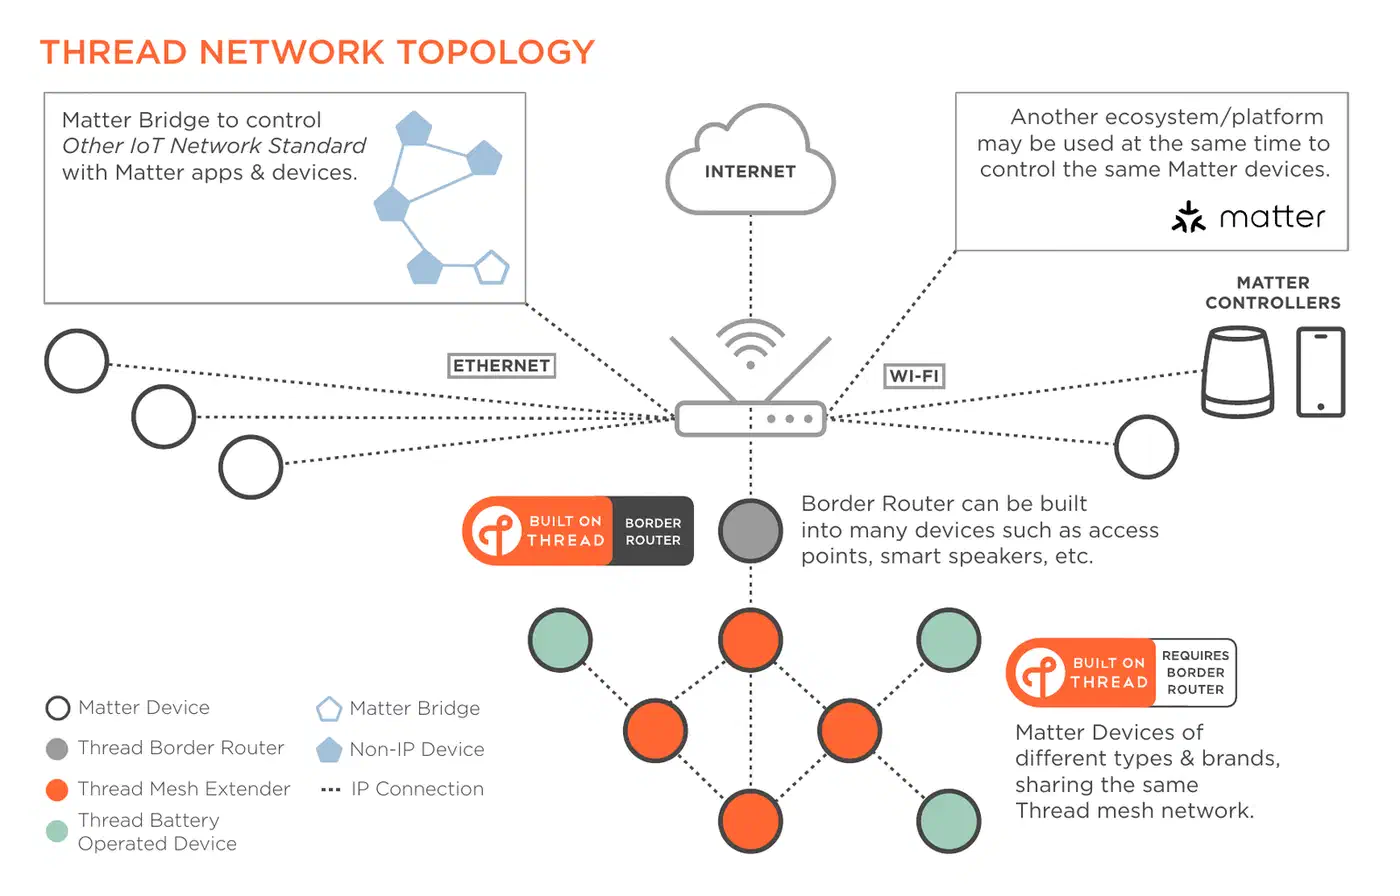
What changed recently: Matter 1.4 shipped in November 2024 and added the Home Router and Access Point (HRAP) device type. These devices pair a WiFi access point with a Thread border router, and they set a standard way to store and share Thread credentials. Matter 1.4 also added better multi-admin, with one user consent for multi-ecosystem pairing. It added energy device types for solar, batteries, and heat pumps, plus better battery life for sleeping devices. Thread 1.4 arrived in fall 2024. It made credential sharing standard, so new border routers join your existing network instead of starting rival ones. Since January 2026, new hardware can no longer use Thread 1.3 certification. Everything shipping now must be Thread 1.4 certified. The latest spec, Matter 1.4.2, asks Thread border routers to support at least 150 devices and WiFi access points to handle 100 links at once.
In plain terms, Thread 1.4 credential sharing means a new border router from any ecosystem joins your existing Thread network. It does not split your mesh into many separate networks. This was a real pain point before Thread 1.4. You could end up with Apple, Google, and Home Assistant each running their own Thread network on a different channel.
Thread Border Router Hardware Options Compared
Border routers are not equal on reliability, ecosystem fit, or flexibility. Here is how the three main types compare.
| Feature | Apple HomePod Mini / Apple TV 4K | Google Nest Hub 2nd Gen / Nest WiFi Pro | OpenThread Border Router (Raspberry Pi) |
|---|---|---|---|
| Price | $99 (HomePod Mini) / $129 (Apple TV 4K 3rd gen) | $99 (Nest Hub 2nd gen) / $199 (Nest WiFi Pro) | ~$60-80 total (Pi + nRF52840 dongle) |
| Thread Version | 1.3+ (varies by firmware) | 1.3+ (varies by firmware) | Latest (you control firmware) |
| Credential Sharing | Automatic with Apple ecosystem | Automatic with Google ecosystem, shares with Apple/Samsung | Manual (via Home Assistant) |
| Matter Controller | Yes (Apple Home) | Yes (Google Home) | No (pairs with Home Assistant) |
| Ecosystem Lock-in | Apple Home primary | Google Home primary | None |
| Setup Difficulty | Plug and play | Plug and play | Moderate (Linux knowledge needed) |
Apple devices: The HomePod Mini and Apple TV 4K (3rd gen) are built-in Thread border routers. They form and join Apple’s Thread network on their own. They work well for Apple Home users and also expose devices to Home Assistant via Matter. In small to medium homes, a central HomePod Mini plus an Apple TV 4K near the TV often gives a strong Thread backbone. The catch: credential sharing is automatic inside the Apple ecosystem, but cross-ecosystem sharing needs Thread 1.4.
Google devices: The Nest Hub (2nd gen), Nest Hub Max, Nest WiFi Pro, and the newer Google TV Streamer (4K) all include Thread border routers tied to Google Home. Google was early to ship Thread 1.3+ credential sharing with Apple and Samsung. The eero 7 from Amazon is among the first Thread 1.4 certified border routers, and IKEA’s Dirigera hub also supports Thread 1.4.
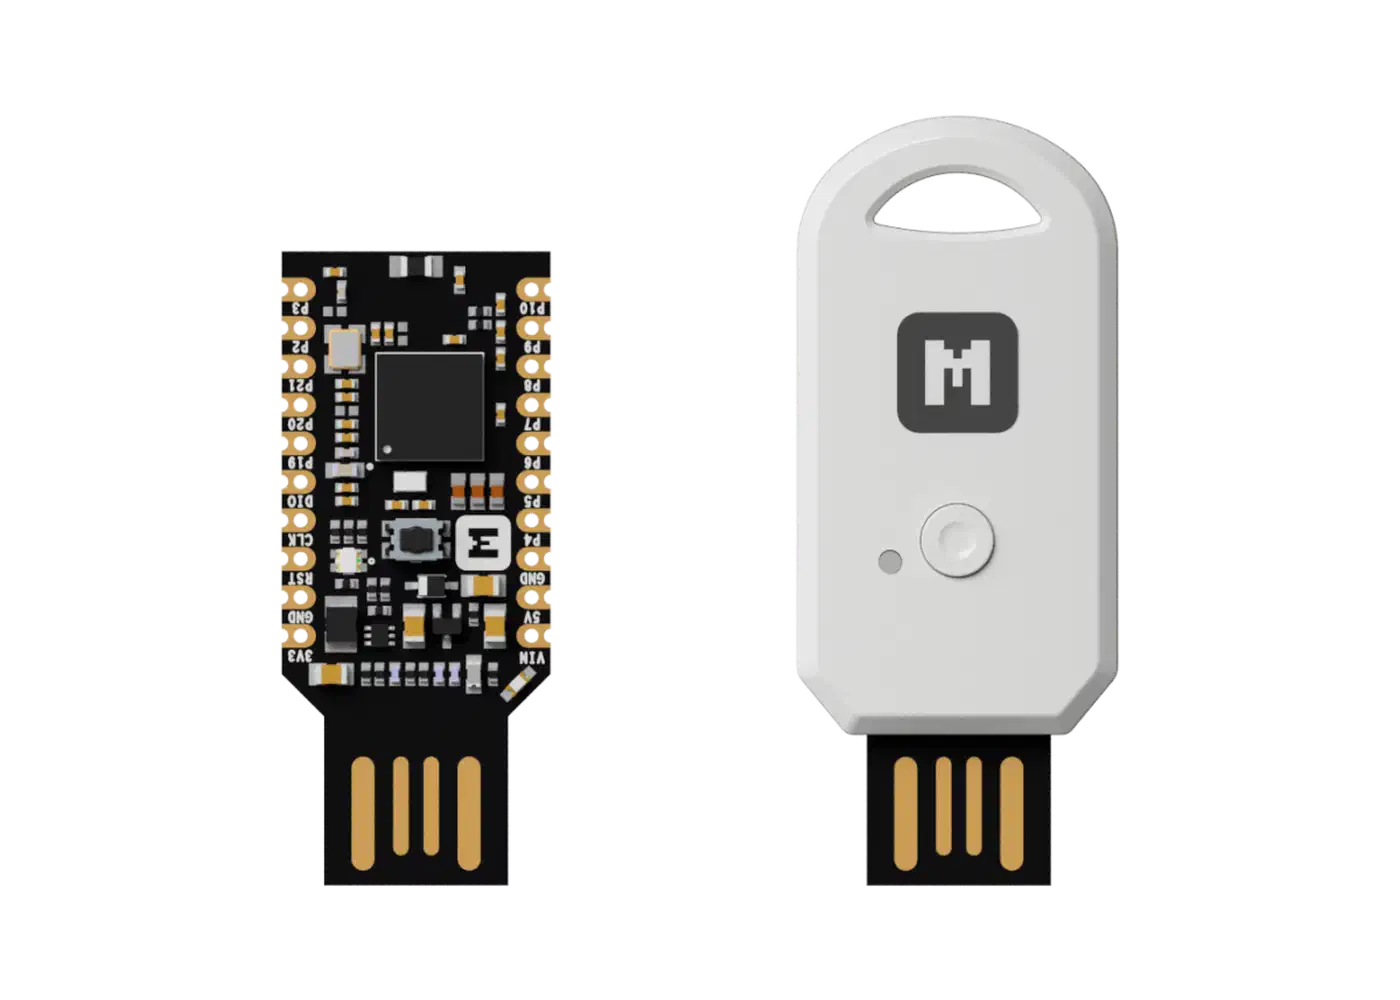
OpenThread Border Router (OTBR): A Raspberry Pi 4 or 5 plus a Nordic nRF52840 USB dongle ($15-20) gives you full control. The OTBR ties straight into Home Assistant’s Thread integration, runs open-source firmware, and is not locked to any ecosystem. Total cost is under $80. The tradeoff: you flash RCP firmware onto the dongle, run the OTBR software (Docker or native), and manage Thread settings yourself. There is no automatic credential sharing with Apple or Google. You use Home Assistant as the Thread admin or join devices by hand. The same Pi runs happily on a 30W solar panel and a battery if mains power is not where you need the radio.
Recommendation: Start with one ecosystem border router, a HomePod Mini or Nest Hub, for an easy first setup. Then add an OTBR or a second ecosystem router for backup. Two border routers is the minimum for any Thread network you depend on. If you are also weighing your WiFi backbone, see the guide on WiFi 7 mesh routers for smart homes. Several of those systems now include built-in Thread border routers.
Setting Up an OpenThread Border Router on Raspberry Pi
If you run Home Assistant on a Pi or want full control over your Thread network, an OTBR makes sense. Here is what the process looks like end to end.
Flash the nRF52840 Dongle with RCP Firmware
The nRF52840 dongle runs in Radio Co-Processor (RCP) mode. It handles only the 802.15.4 radio, while the Raspberry Pi runs the Thread stack. You need RCP firmware on the dongle.
Option A, pre-built firmware: Download the pre-built RCP firmware from the Nabu Casa firmware repository or from the Home Assistant SkyConnect/Yellow pages. This is the easiest path if you use Home Assistant.
Option B, build from source: Clone the ot-nrf528xx repository and build the RCP image. The output is build/bin/ot-rcp. Convert it to .hex format for flashing.
Flashing: Use nRF Connect for Desktop (the Programmer tool) or the nrfjprog command-line tool. In nRF Connect, pick the dongle from the device list, add the .hex file, select Erase & Write, and click Write. With nrfjprog, use the --sectorerase flag to keep the bootloader.
Install OTBR via Docker
Docker is the fastest way to get the OTBR stack running. First, turn on IPv6 forwarding on the host:
curl -sSL https://raw.githubusercontent.com/openthread/ot-br-posix/refs/heads/main/etc/docker/border-router/setup-host | bashCreate an environment file otbr-env.list:
OT_RCP_DEVICE=spinel+hdlc+uart:///dev/ttyACM0?uart-baudrate=1000000
OT_INFRA_IF=wlan0
Run the container:
docker run --name=otbr \
  --detach \
  --network=host \
  --cap-add=NET_ADMIN \
  --device=/dev/ttyACM0 \
  --device=/dev/net/tun \
  --volume=/var/lib/otbr:/data \
  --env-file=otbr-env.list \
  --restart=always \
  openthread/border-router
The --network=host flag is required. The OTBR needs direct access to the host’s network interfaces for IPv6 routing.
Form a Thread Network
Access the OTBR web UI at http://<pi-ip>:8080. Click “Form Network” and configure:
- Network name: something descriptive like “HomeThread”
- PAN ID: leave the default or choose one
- Channel: pick channel 15, 20, or 25 to cut overlap with common WiFi channels (1, 6, 11). Use a 2.4 GHz WiFi analyzer app to see which channels are least busy in your area.
Verify Border Router Operation
Check the OTBR status from the command line:
docker exec -it otbr ot-ctl stateThe output should say leader (if this is the first border router) or router. Then check that it advertises itself right:
docker exec -it otbr ot-ctl netdata showYou should see an IPv6 prefix entry indicating the OTBR is advertising border router service.
Connect to Home Assistant
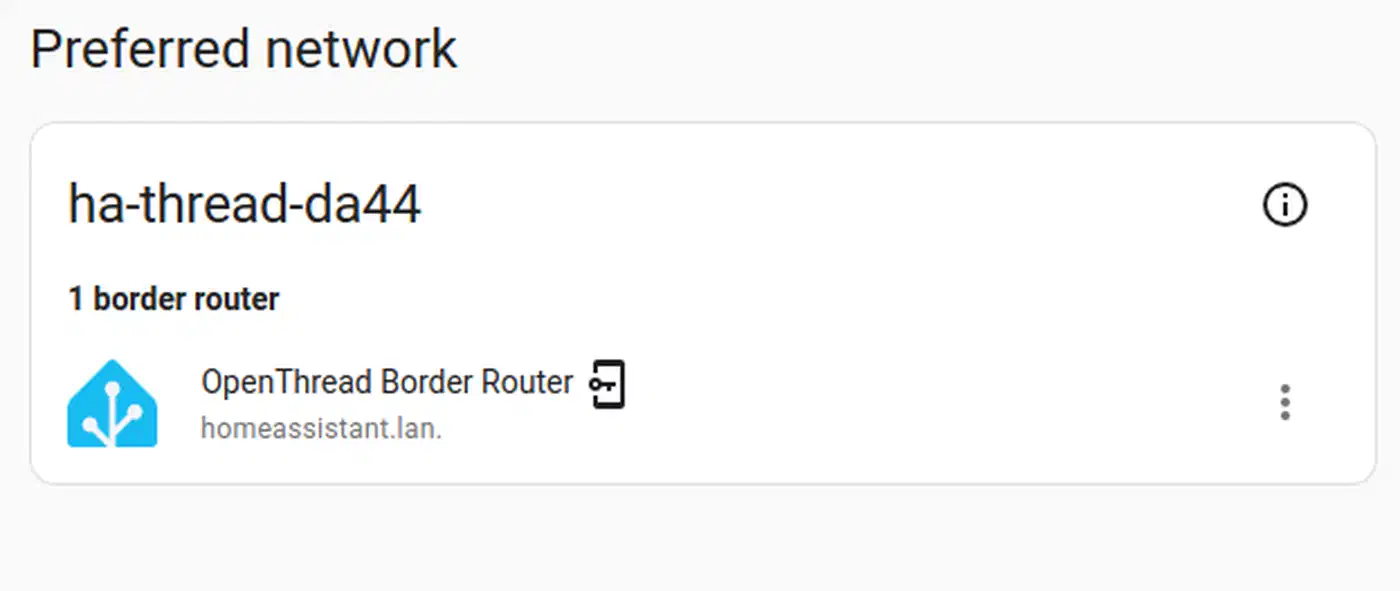
Go to Settings > Devices & Services > Thread in Home Assistant. It should find the OTBR on its own and show the Thread network map. If it does not appear, make sure the Home Assistant host can reach the Pi over mDNS: same subnet, no VLAN rule blocking mDNS.
Optimizing Thread Mesh Coverage and Reliability
A Thread mesh is only as good as its layout. To get coverage right, you need to know device roles, where to place gear, and how to spot problems.
Device Roles
Thread assigns roles dynamically:
- Border routers and routers (mains-powered devices like smart plugs and bulbs) relay traffic for the entire mesh
- End devices (battery-powered sensors and locks) are leaf nodes that sleep most of the time and communicate only through their parent router
The more mains-powered Thread devices you have, the denser and more reliable your mesh gets. Smart plugs and light bulbs running Thread firmware act as routers on their own. The Eve Energy plug and Nanoleaf Essentials bulbs are good examples.
Placement Strategy
Place border routers near the center of your home, at least 5 meters apart. Two routers on opposite ends of the house create overlapping coverage zones. For density, aim for a mains-powered Thread device every 10-15 meters. In a typical 2000 sq ft house, 3-4 mains-powered Thread devices plus 2 border routers give solid coverage.
Channel Selection
Thread runs in the 2.4 GHz band, same as WiFi. Thread channels 15, 20, and 25 overlap the least with the three common WiFi channels (1, 6, 11). Before you form your Thread network, run a WiFi analyzer app. Find the quietest part of the 2.4 GHz band where you live, then pick a Thread channel to match.
Diagnostic Tools
Home Assistant’s Thread integration panel shows the network map, device roles, and link quality. For a deeper look, the ot-ctl CLI gives detailed mesh data:
docker exec -it otbr ot-ctl router table    # list all routers and their link quality
docker exec -it otbr ot-ctl child table      # list all end devices and their parent routers
docker exec -it otbr ot-ctl networkdiagnostic get <address> <type>  # per-device diagnostics
Multi-Border-Router Failover
Thread’s Mesh Link Establishment (MLE) protocol elects a leader on its own and spreads routing work across all border routers. When one border router fails, the network reconverges within seconds using the routers that survive. Silicon Labs benchmarks show Thread handles failover much faster than Zigbee coordinator recovery, since Thread leans on no single coordinator.
Commissioning Matter Devices onto Your Thread Network
With the Thread mesh running, you can start adding Matter-over-Thread devices. The steps shift a little based on whether you commission through Home Assistant, Apple Home, or Google Home.
Basic Commissioning
Every Matter device has a QR code or an 11-digit setup code printed on it or in the box. The commissioner scans this code, then sends Thread credentials and Matter fabric keys to the device. In Home Assistant, go to Settings > Devices & Services > Add Integration > Matter. Then scan the QR code with the Companion app’s camera, or type the code by hand.
Multi-Admin (Multi-Fabric) Setup
Multi-admin is the reason Matter is worth the migration hassle. After you commission a device in Home Assistant, open the device’s Matter settings and pick “Share device” to open a new commissioning window. Scan the code that appears with Apple Home or Google Home to add the device to a second ecosystem.
Matter 1.4 supports up to 5 fabrics per device at once. So one Thread light bulb can answer to Home Assistant, Apple Home, Google Home, Samsung SmartThings, and Amazon Alexa all at the same time. Each ecosystem gets its own secure fabric with its own encryption keys.
Thread Credential Sharing Across Ecosystems
If you run an Apple HomePod and a Google Nest border router, turn on “Share Thread network” in both ecosystems. They will then use the same Thread network. Devices commissioned from either ecosystem join one shared mesh rather than separate networks. This is Thread 1.4 credential sharing at work, and it ends the fragmentation problem that hurt early Thread setups.
Tested Matter-over-Thread Devices
More than 1,100 Matter-certified devices now exist. Here are some well-tested picks across categories:
| Category | Device | Notes |
|---|---|---|
| Smart Plug | Eve Energy | Thread-native, no bridge needed, acts as mesh router |
| Light Bulb | Nanoleaf Essentials A19 | Thread-native, acts as mesh router, local control |
| Contact Sensor | Eve Door & Window | Thread-native, battery-powered end device |
| Motion Sensor | Aqara Motion Sensor P2 | Matter-over-Thread native |
| Temperature Sensor | Eve Weather | Thread-native, outdoor rated |
| Smart Lock | Aqara U200 | Matter-over-Thread, auto-lock support |
| Light Strip | Nanoleaf Essentials Lightstrip | Thread-native, addressable zones |
Eve went all-in on Thread early, and its whole product line is Thread-native with no bridge needed. Nanoleaf’s Essentials line is also fully Thread-native. Aqara keeps growing its Matter-over-Thread lineup, though some older Aqara sensors still use Zigbee and need the Aqara M3 hub as a Matter bridge.
Troubleshooting Failed Commissioning
Most commissioning failures come down to network setup, not the device itself:
- The border router and the commissioner must be on the same VLAN/subnet, with mDNS traffic (port 5353 UDP) allowed between them. Many managed switches and enterprise access points block mDNS by default. This is the top cause of failed commissioning.
- Matter over Thread needs IPv6. Check that IPv6 is on at your router and that no firewall rules drop IPv6 traffic on the LAN.
- If you run border routers from many ecosystems on separate Thread networks, devices might join the wrong one. Thread 1.4 credential sharing helps, but you may still need to check that all border routers are on the same network.
- During the first commissioning, keep the device within a few meters of a border router. Once it joins the mesh, you can move it to its final spot.
What Happens When All Border Routers Go Down
If every border router in your Thread network loses power or connectivity, the Thread mesh itself stays alive between router-capable devices. Plugs and bulbs can still talk to each other over 802.15.4. But nothing can reach your IP network. No app control, no automations, nothing that leans on Home Assistant or a cloud link.
To recover, power on one border router at a time and wait 1-2 minutes between each. Thread’s MLE protocol will re-elect a leader and rebuild the routing tables. On large networks the full mesh may take up to an hour to settle. So avoid restarting things over and over during recovery, since that only drags it out.
This is why you want at least two border routers on separate power sources. Plug one into a UPS if you can. A second border router costs little next to the pain of a dead smart home during a power blip.
Running Thread and Zigbee on the Same 2.4 GHz Band
If you are migrating from Zigbee or running both protocols side by side, plan your channels with care. Both Thread and Zigbee use IEEE 802.15.4 at 2.4 GHz, so they share the same radio band. If both networks sit on the same or overlapping channels, they will interfere with each other.
The fix is channel separation. Reddit’s own protocol argument shows how many people end up running both stacks rather than picking one. Put your Zigbee network and Thread network on 802.15.4 channels that do not overlap. For example, if your Zigbee coordinator is on channel 15, put your Thread network on channel 25. The 802.15.4 band has 16 channels (11-26), so there is room for both protocols to share it cleanly.
Check your Zigbee coordinator’s current channel. In Home Assistant, go to Settings > Devices & Services > ZHA or Zigbee2MQTT and look at the network settings. Then pick a Thread channel at least 5 channels away. That gap is enough to avoid cross-protocol interference.