Home Assistant Dashboards: 6 Conditional Card Types and HACS Extensions

Yes, Home Assistant has a built-in conditional card that shows or hides any dashboard card based on real-time conditions - entity state, time of day, who is home, screen size, and more. Combined with template sensors and a few HACS custom cards, you can build dashboards where morning shows weather and coffee controls, evening shows media and lighting scenes, and an empty house shows security cameras and alarm controls. The cards appear and disappear without leaving blank gaps, and the whole thing runs through the standard Lovelace frontend with no custom code required.
This guide covers the native conditional card system (updated through Home Assistant 2026.4), time-based layouts, presence-aware dashboards, device-state triggers, and advanced techniques with HACS community cards.
The Conditional Card and Its Condition Types
The conditional card wraps any other Lovelace card and controls its visibility based on one or more conditions evaluated in real-time. When conditions are met, the wrapped card renders normally. When they are not met, the card disappears completely from the layout without leaving empty space behind.
Here is a basic example that shows a card only when a person is home:
type: conditional
conditions:
  - condition: state
    entity: person.john
    state: "home"
card:
  type: entities
  entities:
    - light.johns_desk_lamp
- switch.johns_monitorHome Assistant supports six condition types for conditional cards:
| Condition | What It Checks | Example Use Case |
|---|---|---|
state | Entity matches a specific state | Show card when person.jane is home |
numeric_state | Numeric value above/below threshold | Show AC controls when temperature > 25C |
screen | CSS media query on viewport | Show simplified card on mobile devices |
user | Currently logged-in HA user | Show admin controls only for your account |
time | Current time and day of week | Show work commute card on weekday mornings |
location | User’s current location/zone | Show controls for the zone you are in |
The state condition is the workhorse. It supports both state: for positive matching and state_not: for inverse matching. The numeric_state condition accepts above: and below: parameters, and you can use both together for range matching.
The screen condition uses standard CSS media queries. Setting media_query: "(max-width: 768px)" shows a card only on phones, while "(min-width: 1024px)" targets desktops and tablets. This is how you build responsive dashboards that look different on a wall-mounted tablet versus a phone.
The time condition accepts after, before, and weekdays parameters:
conditions:
  - condition: time
    after: "08:00"
    before: "17:00"
    weekdays:
      - mon
      - tue
      - wed
      - thu
      - fri
Valid weekday values are mon, tue, wed, thu, fri, sat, sun.
Combining Conditions with Logic Operators
Multiple conditions within a conditional card default to AND logic - all must be true for the card to show. But Home Assistant now supports explicit logical operators:
AND- all conditions must be met (this is the default behavior)OR- at least one condition must be metNOT- negates a condition
type: conditional
conditions:
  - condition: or
    conditions:
      - condition: state
        entity: person.john
        state: "home"
      - condition: state
        entity: person.jane
        state: "home"
card:
  type: markdown
  content: "Welcome home!"
This eliminates the old workaround of creating template sensor helpers just to get OR logic on the dashboard.
Visibility Tab vs. Conditional Card Wrapper
Since recent Home Assistant releases, you can also apply visibility conditions directly to most card types through their Visibility tab in the UI editor. Instead of wrapping a card in a conditional card, you edit the card itself, go to the Visibility tab, and add conditions there. The result is identical - the card shows or hides based on the conditions. The Visibility tab approach produces cleaner YAML and avoids the nesting that conditional card wrappers introduce. Note that while editing the dashboard, conditioned cards are always visible; exit edit mode to test.
Time-Based Dashboard Layouts
Different times of day call for different controls. A morning dashboard should surface weather, commute info, and coffee machine controls. An evening dashboard should prioritize media players and lighting scenes. You can build this with either the native time condition or a template sensor for more granular control.
Using the Native Time Condition
For simple time windows, the built-in time condition works well:
type: conditional
conditions:
  - condition: time
    after: "06:00"
    before: "10:00"
card:
  type: vertical-stack
  cards:
    - type: weather-forecast
      entity: weather.home
    - type: button
      entity: switch.coffee_machine
      name: "Start Coffee"
Using the Time of Day Integration
For named time periods that you can reference across multiple cards and automations, the Time of Day (tod)
integration is cleaner. Add this to your configuration.yaml:
binary_sensor:
  - platform: tod
    name: Morning
    after: "06:00"
    before: "10:00"
  - platform: tod
    name: Daytime
    after: "10:00"
    before: "17:00"
  - platform: tod
    name: Evening
    after: "17:00"
    before: "22:00"
  - platform: tod
    name: Night
    after: "22:00"
    before: "06:00"
Each tod sensor turns on during its defined window and off otherwise. Now your conditional cards reference these sensors:
type: conditional
conditions:
  - condition: state
    entity: binary_sensor.morning
    state: "on"
card:
  type: vertical-stack
  cards:
    - type: weather-forecast
      entity: weather.home
    - type: button
      entity: switch.coffee_machine
      name: "Start Coffee"
    - type: calendar
      entities:
        - calendar.personal
Template Sensor for Custom Time Periods
If you need a single sensor with named states rather than multiple binary sensors, create a template sensor:
template:
  - sensor:
      - name: "Time of Day"
        unique_id: sensor_time_of_day
        state: >
          {% set hour = now().hour %}
          {% if 6 <= hour < 10 %}morning
          {% elif 10 <= hour < 17 %}day
          {% elif 17 <= hour < 22 %}evening
          {% else %}night
          {% endif %}
Then build your cards around sensor.time_of_day:
- Morning (
sensor.time_of_day = morning): Weather forecast, commute time via Waze or Google Travel Time integration, coffee machine button, today’s calendar events - Day (
sensor.time_of_day = day): Solar panel output, security camera feeds, robot vacuum controls - Evening (
sensor.time_of_day = evening): Media player controls, lighting scene buttons (Movie, Dinner, Reading), thermostat with night setback preview, door lock status - Night (
sensor.time_of_day = night): Alarm panel arm button, all-lights-off confirmation, door/window status summary, minimalist clock with dark styling
The evening and night transitions pair well with adaptive lighting schedules — pairing a solar-elevation automation with the Adaptive Lighting HACS integration creates a light environment that reinforces the same time-of-day logic your dashboard already tracks.
Smooth Transitions with card-mod
Cards appear and disappear instantly by default. If that feels jarring, the card-mod custom component (available through HACS) lets you add CSS transitions:
card_mod:
  style: |
    ha-card {
      transition: opacity 0.3s ease-in-out;
    }
This softens the visual change when time-based cards swap in and out.
Presence-Aware Dashboards
Home Assistant tracks people through the companion app, router integrations, Bluetooth, and other methods . You can use person entities directly in conditional card conditions to build dashboards that change based on who is in the house.
Person-Specific Controls
Wrap each family member’s controls in a conditional card tied to their person entity:
type: conditional
conditions:
  - condition: state
    entity: person.jane
    state: "home"
card:
  type: vertical-stack
  title: "Jane's Controls"
  cards:
    - type: media-control
      entity: media_player.janes_speaker
    - type: light
      entity: light.janes_office
    - type: button
      entity: scene.janes_reading_mode
      name: "Reading Mode"
Jane’s music controls, office light, and personal scenes only appear when she is home. When she leaves, they vanish from the dashboard without anyone touching anything.
Guest Mode
Create an input_boolean.guest_mode toggle for when visitors come over. When enabled, show simplified cards with basic controls and hide complex automation settings:
type: conditional
conditions:
  - condition: state
    entity: input_boolean.guest_mode
    state: "on"
card:
  type: vertical-stack
  title: "Guest Controls"
  cards:
    - type: light
      entity: light.living_room
    - type: thermostat
      entity: climate.main
    - type: markdown
      content: "WiFi: GuestNetwork / Password: welcome2024"
Combine this with a state_not condition on your admin panels and security controls to hide them while guest mode is active.
Occupancy-Based Controls
Use a group entity containing all your person entities to distinguish between “someone home” and “nobody home”:
group:
  family:
    name: Family
    entities:
      - person.john
      - person.jane
      - person.kids
When group.family is home (at least one person present), show welcome scenes and comfort controls. When not_home (everyone away), show security cameras, alarm arming buttons, and energy-saving mode toggles.
Arriving-Home Cards
If you use the Home Assistant Companion app, you can detect when someone is approaching home and show pre-arrival cards. Create a proximity sensor or use zone-based automation to flip an input_boolean.arriving_home when someone enters a 1km radius around home. Show the garage door opener and alarm disarm button before they walk through the door.
Wall-Mounted Tablet Per-Room Controls
If you have tablets in different rooms, create a separate Home Assistant user account for each tablet. Then use the user condition to show only relevant controls:
type: conditional
conditions:
  - condition: user
    users:
      - abc123def456  # kitchen_tablet user ID
card:
  type: vertical-stack
  cards:
    - type: light
      entity: light.kitchen
    - type: entities
      entities:
        - timer.cooking
        - timer.oven
The kitchen tablet shows kitchen lights and cooking timers. The bedroom tablet shows bedroom scenes and an alarm clock. Same dashboard definition, different experience per device.
Device-State Conditional Cards
Some of the most practical conditional cards react to device states - they show controls when a device needs attention and stay hidden otherwise.
Laundry Done Notification
Create a template binary sensor that detects when the washing machine cycle finishes (power drops below 5W after being above 100W):
template:
  - binary_sensor:
      - name: "Washing Machine Done"
        unique_id: washing_machine_cycle_complete
        state: >
          {{ states('sensor.washing_machine_power') | float < 5
             and states('input_boolean.washer_was_running') == 'on' }}
        icon: mdi:washing-machine
Then show a notification card on the dashboard:
type: conditional
conditions:
  - condition: state
    entity: binary_sensor.washing_machine_done
    state: "on"
card:
  type: markdown
  content: "## Laundry is done! Time to switch it over."
Garage Door Open Alert
Show a prominent card with a close button when the garage has been left open:
type: conditional
conditions:
  - condition: state
    entity: cover.garage_door
    state: "open"
card:
  type: vertical-stack
  cards:
    - type: markdown
      content: "## Garage Door is OPEN"
    - type: button
      entity: cover.garage_door
      name: "Close Garage"
      icon: mdi:garage-alert
Add a history_stats sensor to show how long it has been open - useful for catching doors left open overnight.
Active Media Player
Instead of showing all your media players at once, show only the one that is currently playing:
type: conditional
conditions:
  - condition: state
    entity: media_player.living_room
    state: "playing"
card:
  type: media-control
  entity: media_player.living_room
Repeat this pattern for each media player. Only active players appear on the dashboard, cutting the clutter from idle Chromecasts and speakers.
Low Battery Alerts
Create a template sensor that counts devices with low battery:
template:
  - sensor:
      - name: "Low Battery Devices"
        unique_id: low_battery_count
        state: >
          {{ states.sensor
             | selectattr('attributes.device_class', 'eq', 'battery')
             | map(attribute='state')
             | map('int', default=100)
             | select('lt', 20)
             | list | count }}
Show a warning card only when the count is above zero:
type: conditional
conditions:
  - condition: numeric_state
    entity: sensor.low_battery_devices
    above: 0
card:
  type: markdown
  content: >
    ## Low Battery Warning
    {{ states.sensor
       | selectattr('attributes.device_class', 'eq', 'battery')
       | selectattr('state', 'lt', '20')
       | map(attribute='name')
       | list | join(', ') }}
Door Unlocked After Hours
Show a warning about unlocked doors only after 11 PM using compound conditions:
type: conditional
conditions:
  - condition: time
    after: "23:00"
  - condition: state
    entity: lock.front_door
    state: "unlocked"
card:
  type: markdown
  content: "## Front door is unlocked after 11 PM!"
Both conditions must be true (AND logic by default), so the card only appears when it is actually late and the door is actually unlocked.
Advanced Techniques with HACS Custom Cards
The built-in conditional card handles most use cases, but HACS community cards add capabilities that are hard to replicate with native tools alone.
auto-entities: Dynamic Entity Lists
The auto-entities card automatically populates a card with entities matching a filter. Instead of manually creating conditional cards for each device, auto-entities does it dynamically:
type: custom:auto-entities
card:
  type: entities
  title: "Lights Currently On"
filter:
  include:
    - domain: light
      state: "on"
  exclude:
    - entity_id: light.hallway_indicator
sort:
  method: name
This card automatically lists every light that is currently on, updates in real-time, and disappears when all lights are off (with show_empty: false). It works for any entity type - battery sensors below 25%, open doors, running automations.
state-switch: Conditional on Steroids
The state-switch card acts like a switch/case statement for dashboard cards. Instead of multiple conditional cards that each check one state, a single state-switch card displays different content based on an entity’s current state:
type: custom:state-switch
entity: sensor.time_of_day
states:
  morning:
    type: vertical-stack
    cards:
      - type: weather-forecast
        entity: weather.home
      - type: button
        entity: switch.coffee_machine
  evening:
    type: vertical-stack
    cards:
      - type: media-control
        entity: media_player.living_room
      - type: light
        entity: light.living_room
  night:
    type: markdown
    content: "Good night. All systems armed."
default:
  type: markdown
  content: "Welcome home."
One card, multiple views, clean YAML. It also supports user, deviceID, and mediaquery as entity types, plus transition animations like slide-left and flip.
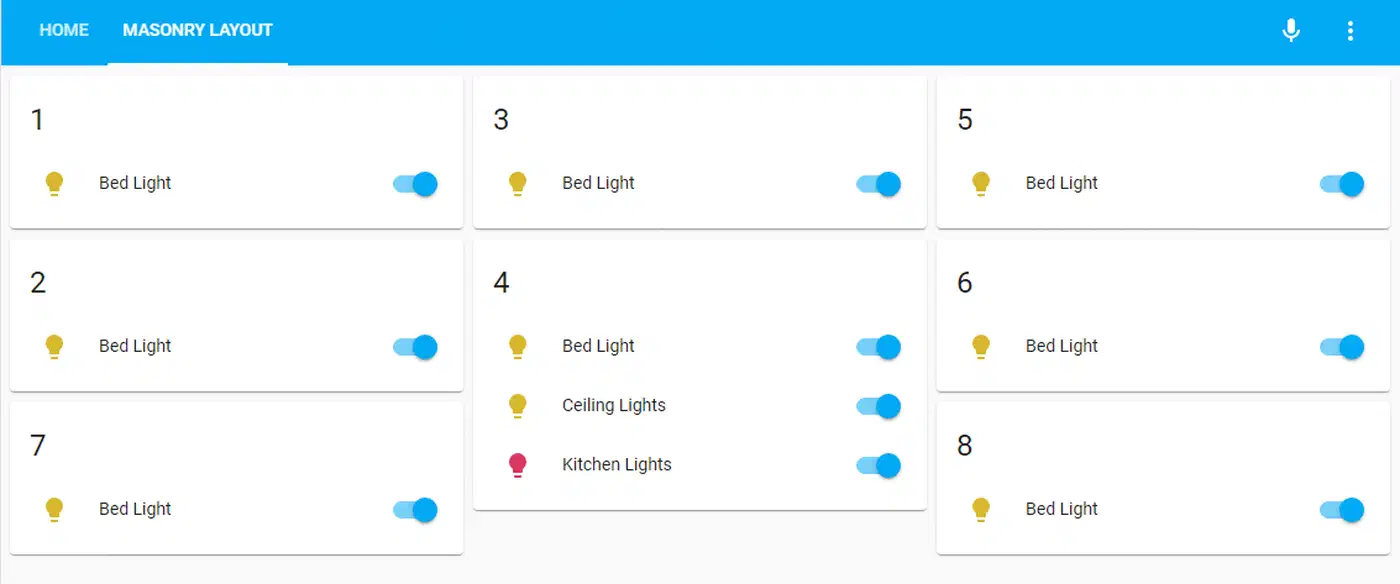
layout-card: Preventing Dashboard Gaps
When conditional cards appear and disappear, the default Lovelace layout can leave awkward gaps. The layout-card solves this by providing masonry, grid, horizontal, and vertical layout modes that reflow cards smoothly:
type: custom:layout-card
layout_type: masonry
cards:
  - type: conditional
    conditions:
      - condition: state
        entity: binary_sensor.morning
        state: "on"
    card:
      type: weather-forecast
      entity: weather.home
  - type: conditional
    conditions:
      - condition: state
        entity: cover.garage_door
        state: "open"
    card:
      type: button
      entity: cover.garage_door
The masonry layout automatically repositions remaining cards to fill empty space when a conditional card is hidden. For a broader look at building professional-looking Lovelace dashboards with CSS Grid and HACS cards, that guide covers room-based layouts in depth.
card-mod: Conditional Styling
card-mod lets you apply CSS styles to any card based on entity states. Instead of hiding a card entirely, you can change its appearance:
type: entities
entities:
  - entity: sensor.temperature
card_mod:
  style: |
    ha-card {
      {% if states('sensor.temperature') | float > 30 %}
        border: 2px solid red;
        background: rgba(255, 0, 0, 0.1);
      {% elif states('sensor.temperature') | float < 10 %}
        border: 2px solid blue;
        background: rgba(0, 0, 255, 0.1);
      {% endif %}
    }
This makes a temperature card glow red when it is hot and blue when it is cold - same card, different presentation based on state.
Performance Considerations
Each conditional card evaluates its conditions through the WebSocket connection in real-time. Dashboards with 50 or more conditional cards on a single view can cause visible lag, especially on low-powered wall tablets or Raspberry Pi setups. A few strategies help:
- Instead of five cards each checking
now().hour, create onesensor.time_of_daytemplate sensor and have all five cards reference it. This reduces the evaluation overhead from five Jinja2 template computations to one. - A single state-switch card replaces several conditional cards, reducing the number of WebSocket subscriptions.
- Complex Jinja2 in markdown cards or card-mod evaluates client-side. Move logic to backend template sensors whenever possible.
- If your dashboard has grown beyond 30-40 conditional cards, split it into tabbed views (Home, Security, Media, Climate) so each view only loads and evaluates its own subset. The same principle applies to your YAML — organizing configuration files into packages keeps template sensors, input helpers, and automations grouped by feature rather than scattered across one monolithic file.
Handling Unknown and Unavailable States
When sensors go offline or return unknown/unavailable, conditional cards stop matching. Your carefully designed dashboard might show nothing if a key sensor drops out. Build in fallbacks:
type: conditional
conditions:
  - condition: state
    entity: sensor.time_of_day
    state_not: "unavailable"
card:
  # your normal card here
Or use auto-entities with an exclude filter for unavailable entities. Design your dashboard assuming sensors will sometimes fail, and make sure the result is still usable rather than a blank screen.