Linux Hardening in 30 Minutes: Lynis Score 55 to 84

You can cut your Linux server’s attack surface down to a fraction of its default state in about 30 minutes. The recipe is not complicated: harden SSH by disabling password auth and switching to Ed25519 keys, set up nftables with a default-deny firewall policy, enable automatic security updates, configure auditd for kernel-level logging, and lock down user accounts with faillock and restrictive permissions. These five areas cover the vast majority of attack vectors against freshly provisioned servers. A typical Lynis security audit score jumps from around 55-62 on a stock install to 75-84 after applying these changes.
This checklist is organized so that each section takes 3-7 minutes. Work through it top to bottom on a fresh server and you will have a solid security baseline before your first application deployment.
SSH Hardening - Your First Line of Defense
SSH is the primary entry point for both administrators and attackers. A misconfigured SSH daemon is behind the majority of server compromises on the public internet, and default settings are far too permissive for production use. Every brute-force bot on the internet is already probing port 22 with common username/password combinations.
Switch to Ed25519 Keys
Generate a new key pair if you have not already:
ssh-keygen -t ed25519 -C "admin@yourserver"Ed25519 keys produce a 256-bit signature that provides 128 bits of security - equivalent to RSA-3072 but with faster generation and verification. There is no reason to use RSA for new deployments unless you need compatibility with very old clients (OpenSSH < 6.5, which was released in 2014).
Copy your public key to the server:
ssh-copy-id -i ~/.ssh/id_ed25519.pub user@serverLock Down sshd_config
Edit /etc/ssh/sshd_config and apply these settings:
PasswordAuthentication no
KbdInteractiveAuthentication no
PubkeyAuthentication yes
PermitRootLogin no
MaxAuthTries 3
LoginGraceTime 30
AllowUsers deploy admin
HostKeyAlgorithms ssh-ed25519-cert-v01@openssh.com,ssh-ed25519
KexAlgorithms curve25519-sha256,curve25519-sha256@libssh.org
Ciphers chacha20-poly1305@openssh.com,aes256-gcm@openssh.com,aes128-gcm@openssh.com
The critical settings here: PasswordAuthentication no eliminates brute-force password attacks entirely. PermitRootLogin no forces attackers to guess both a username and key. MaxAuthTries 3 and LoginGraceTime 30 limit the window for each connection attempt.
For the key exchange algorithms and ciphers, restricting to modern algorithms (Curve25519 and ChaCha20-Poly1305) removes the possibility of downgrade attacks against weaker legacy ciphers. Also consider removing small Diffie-Hellman moduli (those under 3072 bits) from /etc/ssh/moduli:
awk '$5 >= 3071' /etc/ssh/moduli > /etc/ssh/moduli.safe
mv /etc/ssh/moduli.safe /etc/ssh/moduli
Change the Default Port
Port 2222Changing the port is not a security measure in itself - any real attacker will scan all ports. But it reduces automated scanning noise by roughly 95%, which keeps your auth logs readable and cuts load from brute-force bots. Remember to update your firewall rules to match.
Optional: Add Two-Factor Authentication
For additional protection, install libpam-google-authenticator and configure TOTP as a second factor after key authentication:
# In sshd_config
AuthenticationMethods publickey,keyboard-interactive
This requires both a valid SSH key and a TOTP code for every login. It is worth the minor inconvenience on servers that face the public internet. For an even stronger approach, placing your server behind a WireGuard VPN means SSH is not exposed to the public internet at all.
After all changes, reload the daemon:
sudo systemctl reload sshdTest in a separate terminal before closing your current session.
Firewall Configuration with nftables
Every server connected to the internet needs a default-deny firewall. nftables
has fully replaced iptables in modern Linux kernels and is the default on Debian 13+, Fedora 41+, and most current distributions. The iptables command still exists on most systems but it is a compatibility shim that translates rules to nftables behind the scenes.
One major advantage of nftables over the old iptables approach: rule application is atomic. The system either applies your entire ruleset or rejects it completely on error. No more half-applied rulesets that lock you out mid-change.
Verify nftables Is Active
systemctl status nftables
nft list ruleset
A Complete Default-Deny Ruleset
Here is a production-ready /etc/nftables.conf that you can drop in and adapt:
#!/usr/sbin/nft -f

flush ruleset

table inet filter {
    chain input {
        type filter hook input priority 0; policy drop;

        # Accept established and related connections
        ct state established,related accept

        # Accept loopback
        iif lo accept

        # Accept ICMP and ICMPv6 (ping, path MTU discovery)
        ip protocol icmp accept
        ip6 nexthdr icmpv6 accept

        # SSH (rate-limited to 4 new connections per minute)
        tcp dport 2222 ct state new limit rate 4/minute accept

        # HTTP/HTTPS (uncomment if running a web server)
        # tcp dport { 80, 443 } accept

        # Log and drop everything else
        log prefix "[nftables drop] " drop
    }

    chain forward {
        type filter hook forward priority 0; policy drop;
    }

    chain output {
        type filter hook output priority 0; policy accept;
    }
}Key points about this ruleset:
| Rule | Purpose |
|---|---|
policy drop | Deny all inbound traffic by default |
ct state established,related accept | Allow return traffic for your outbound connections |
iif lo accept | Local processes can talk to each other |
limit rate 4/minute | SSH brute-force protection without needing fail2ban |
log prefix | See what gets dropped in your kernel log |
The SSH rate limit (4/minute) is aggressive enough to block automated attacks but generous enough that you will not lock yourself out during normal use. If you need fail2ban-level granularity, install it separately, but this rate limit handles the common case.
Apply and Persist
# Test the ruleset (catches syntax errors before applying)
nft -f /etc/nftables.conf

# Persist across reboots
systemctl enable nftables
Always test from a separate session before closing your current SSH connection. If you lock yourself out, console access (IPMI, KVM, cloud provider console) is your recovery path.
For paranoid setups, you can also set the output chain to policy drop and whitelist only what you need: DNS on port 53, HTTPS on port 443, NTP on port 123. This prevents a compromised process from phoning home to arbitrary destinations. If you want to extend these nftables rules into a full software router with traffic shaping, see our guide on building a Linux router with nftables
.
Automatic Security Updates
Unpatched software remains the top cause of server compromise. The median time from CVE publication to active exploitation is now measured in days, not weeks. Automatic security updates ensure critical patches are applied within hours of release, not whenever you remember to SSH in.
Debian/Ubuntu: unattended-upgrades
sudo apt install unattended-upgrades apt-listchanges
sudo dpkg-reconfigure -plow unattended-upgrades
Verify the configuration in /etc/apt/apt.conf.d/50unattended-upgrades. Make sure the security origin is uncommented:
Unattended-Upgrade::Allowed-Origins {
    "${distro_id}:${distro_codename}-security";
};
On Debian 13+ (Trixie), automatic upgrades are driven by systemd timers rather than cron. Enable them:
sudo systemctl enable --now apt-daily.timer
sudo systemctl enable --now apt-daily-upgrade.timer
For kernel updates that require a reboot, install needrestart and configure automatic reboots during a maintenance window:
Unattended-Upgrade::Automatic-Reboot "true";
Unattended-Upgrade::Automatic-Reboot-Time "04:00";
Fedora/RHEL: dnf-automatic
sudo dnf install dnf-automaticEdit /etc/dnf/automatic.conf:
[commands]
apply_updates = yes
upgrade_type = security

[emitters]
emit_via = email
Enable the timer:
sudo systemctl enable --now dnf-automatic-install.timerReduce the Installed Package Surface
Every installed package is a potential CVE. Audit what you have and remove what you do not need:
# Debian/Ubuntu
apt list --installed | wc -l
sudo apt purge telnet rsh-client xinetd cups

# Fedora/RHEL
rpm -qa | wc -l
sudo dnf remove telnet xinetd cups
For packages you manage manually (database servers pinned to specific versions, for instance), use apt-mark hold <package> or dnf versionlock add <package> to prevent automatic updates from breaking them.
Audit Logging and Intrusion Detection
Knowing what happened on your server after an incident is as important as preventing the incident. Application-level logging can be tampered with by an attacker who gains user-space access. auditd hooks into the Linux kernel and captures events before they can be intercepted or modified by user-space processes.
Install and Enable
# Debian/Ubuntu
sudo apt install auditd

# Fedora/RHEL
sudo dnf install audit

sudo systemctl enable --now auditd
Verify the daemon is running:
sudo auditctl -s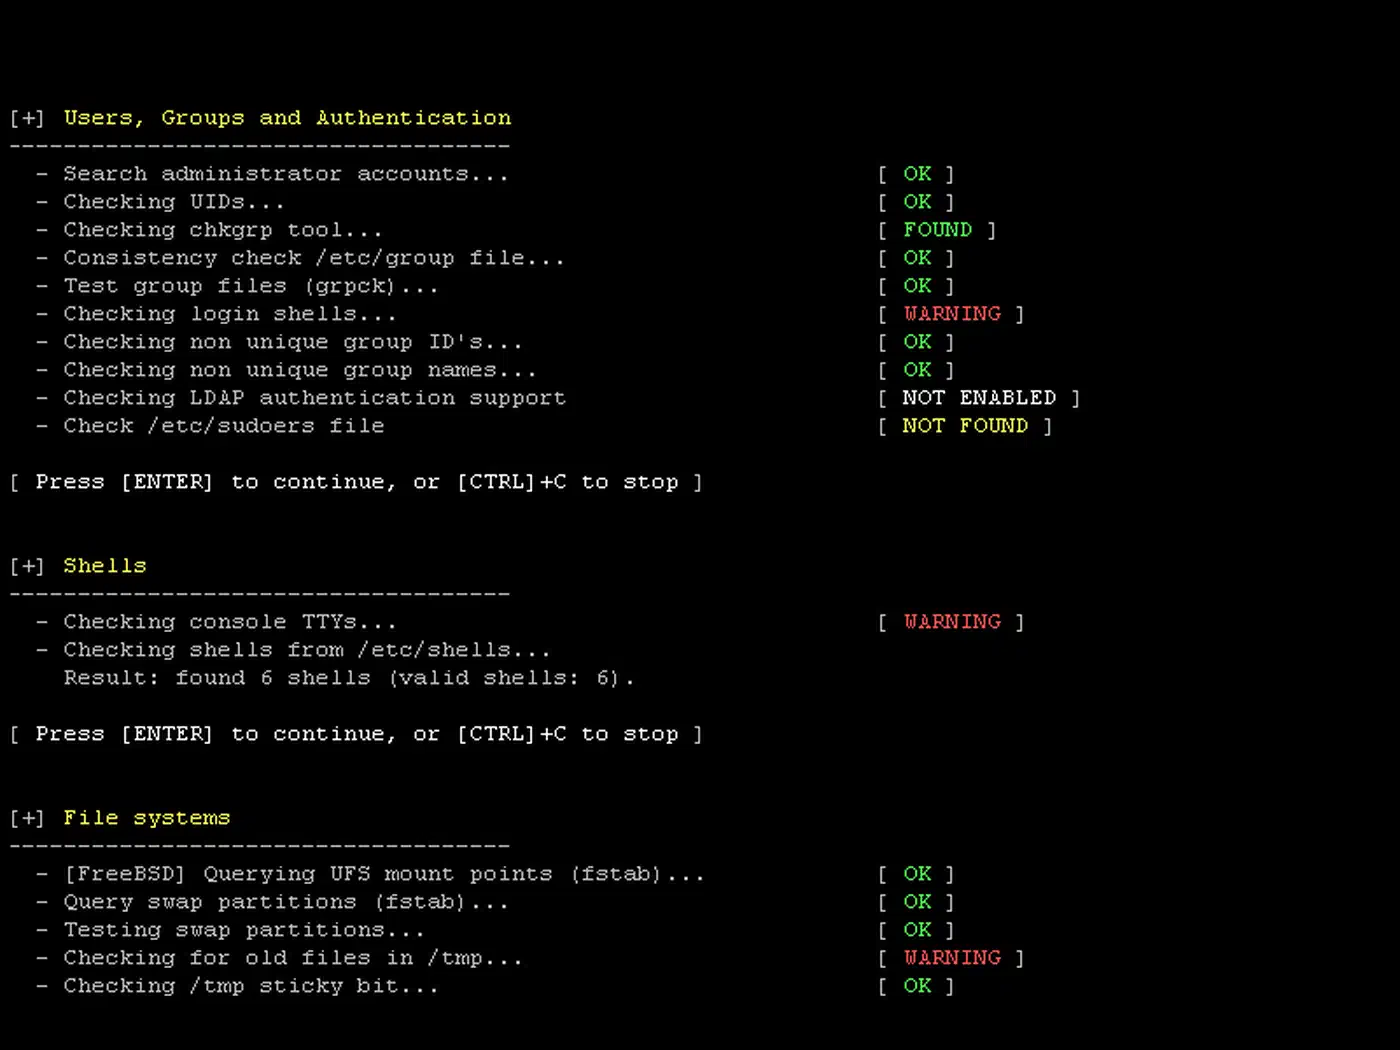
Essential Audit Rules
Create /etc/audit/rules.d/hardening.rules:
# Watch identity files for modifications
-w /etc/passwd -p wa -k identity
-w /etc/shadow -p wa -k identity
-w /etc/group -p wa -k identity
-w /etc/gshadow -p wa -k identity

# Monitor all commands run as root
-a always,exit -F arch=b64 -S execve -F euid=0 -k root_commands

# Track SSH key changes
-w /home -p wa -k ssh_keys

# Log authentication events
-w /var/log/auth.log -p wa -k auth_log

# Watch sudo configuration
-w /etc/sudoers -p wa -k sudo_config
-w /etc/sudoers.d -p wa -k sudo_config

# Monitor kernel module loading
-w /sbin/insmod -p x -k kernel_modules
-w /sbin/modprobe -p x -k kernel_modules
Load the rules:
sudo augenrules --loadSearching and Reporting
# Find identity file changes today
sudo ausearch -k identity --start today

# Authentication summary
sudo aureport --auth --summary

# All root commands in the last hour
sudo ausearch -k root_commands --start recent
Log Rotation
Configure /etc/audit/auditd.conf to prevent disk exhaustion:
max_log_file = 50
num_logs = 10
space_left_action = email
admin_space_left_action = halt
The space_left_action = email setting alerts you before audit logs fill the disk. The admin_space_left_action = halt setting stops the system rather than continuing to operate without audit logging - appropriate for compliance-sensitive environments.
Optional: File Integrity Monitoring with AIDE
For detecting unauthorized file modifications, install AIDE :
sudo apt install aide    # Debian/Ubuntu
sudo aide --init
sudo mv /var/lib/aide/aide.db.new /var/lib/aide/aide.db
Schedule regular integrity checks via a systemd timer or cron job:
sudo aide --checkAIDE compares the current state of the filesystem against a known-good baseline. Any unauthorized modification to system binaries, configuration files, or libraries will be flagged.
User Account Lockdown and Kernel Security
Default user account policies and kernel parameters leave gaps that targeted attacks exploit. Here is how to close them.
Account Lockout with faillock
Edit /etc/security/faillock.conf:
deny = 5
unlock_time = 600
fail_interval = 900
This locks an account for 10 minutes after 5 failed authentication attempts within a 15-minute window. Enough to stop brute-force attacks, short enough that legitimate users can recover without administrator intervention.
Restrictive Default Permissions
Change the default umask to 027 in both /etc/login.defs and /etc/profile:
UMASK 027With umask 027, new files are created with permissions 640 (owner read/write, group read, others nothing) and directories with 750. This prevents other users on the system from reading files they should not have access to.
Disable Unused System Accounts
sudo usermod -L -s /usr/sbin/nologin nobody
sudo usermod -L -s /usr/sbin/nologin games

# Find all human accounts (UID >= 1000)
awk -F: '($3 >= 1000) {print $1}' /etc/passwd
Kernel Hardening via sysctl
Create /etc/sysctl.d/99-hardening.conf:
# Hide kernel logs from non-root users
kernel.dmesg_restrict = 1

# Enable reverse path filtering (anti-spoofing)
net.ipv4.conf.all.rp_filter = 1
net.ipv4.conf.default.rp_filter = 1

# Reject ICMP redirects (prevent MITM attacks)
net.ipv4.conf.all.accept_redirects = 0
net.ipv4.conf.default.accept_redirects = 0
net.ipv6.conf.all.accept_redirects = 0
net.ipv6.conf.default.accept_redirects = 0

# Restrict ptrace to root only (prevent process inspection)
kernel.yama.ptrace_scope = 2

# Prevent core dumps from SUID binaries
fs.suid_dumpable = 0
Apply the settings:
sudo sysctl --systemDisable Core Dumps
Add to /etc/security/limits.conf:
* hard core 0Core dumps can contain sensitive data from memory - passwords, encryption keys, session tokens. Disabling them prevents credential leakage from crashed processes.
Secure Temporary Filesystems
Edit /etc/fstab to add restrictive mount options for temporary directories:
tmpfs /tmp tmpfs defaults,noexec,nosuid,nodev 0 0
tmpfs /dev/shm tmpfs defaults,noexec,nosuid,nodev 0 0
The noexec flag prevents execution of binaries dropped into /tmp or /dev/shm, which is a common technique in post-exploitation payloads. Remount immediately:
sudo mount -o remount /tmp
sudo mount -o remount /dev/shm
Mandatory Access Control: SELinux and AppArmor
Beyond the changes above, enabling a Mandatory Access Control (MAC) system adds a layer of policy-driven confinement to every process.
On RHEL, Fedora, and CentOS, SELinux
ships in enforcing mode by default. Verify with getenforce. If it returns Permissive or Disabled, set SELINUX=enforcing in /etc/selinux/config and reboot. SELinux labels every file and process, enforcing policies that prevent compromised services from accessing files outside their designated context - even if the service runs as root.
On Debian and Ubuntu, AppArmor
is the default MAC framework. Check status with sudo aa-status. Ensure profiles are loaded and enforced for services like sshd, nginx, and mysqld. To switch a profile from complain mode to enforce: sudo aa-enforce /etc/apparmor.d/usr.sbin.sshd.
Both approaches limit what a compromised process can do. For most administrators, the default policies cover the critical services and need little customization. For workloads that fall outside default profiles, tools like Firejail or Bubblewrap provide per-application sandboxing without writing custom SELinux or AppArmor policies.
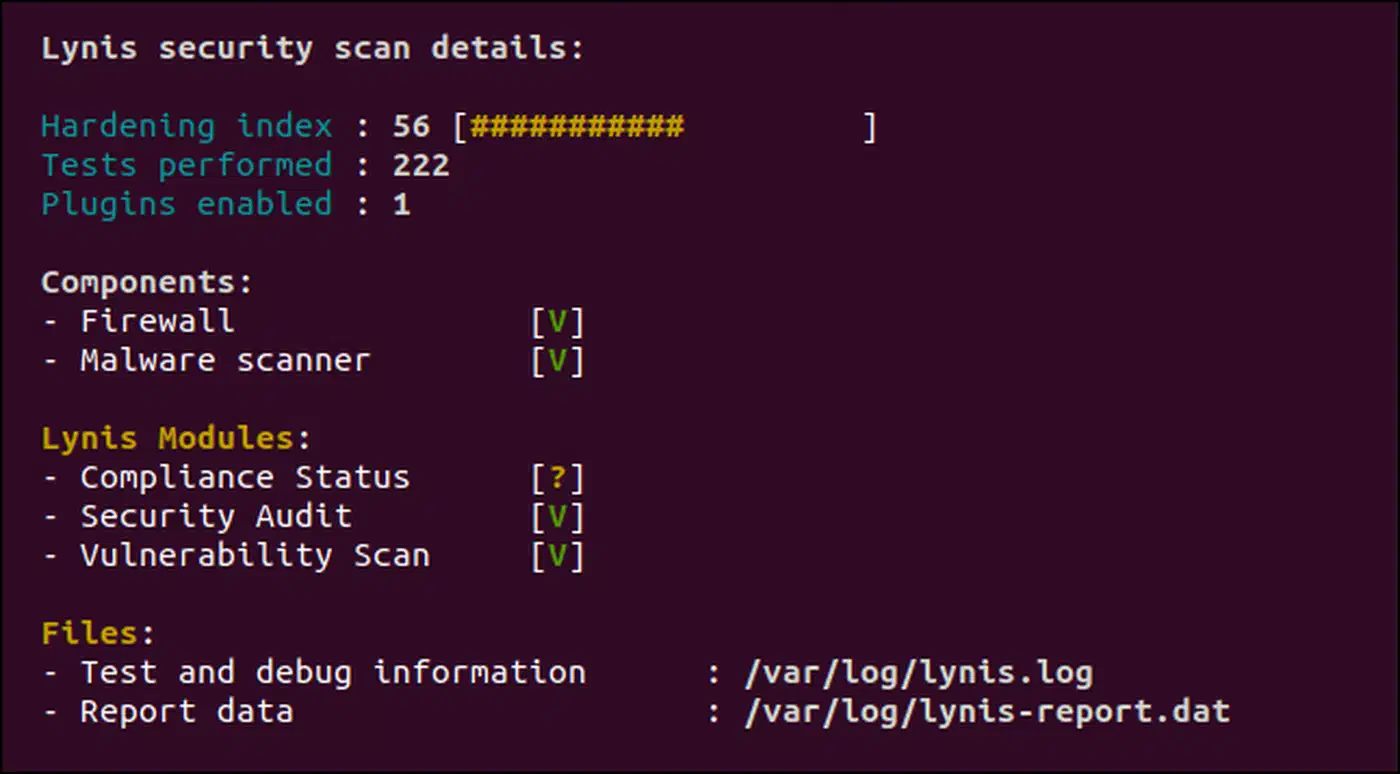
Verify Your Work with Lynis
After applying this checklist, run a Lynis audit to measure your hardening score:
sudo apt install lynis    # or: sudo dnf install lynis
sudo lynis audit system
A stock Debian or Ubuntu install typically scores between 55 and 62. After applying the changes in this checklist, expect a score in the 75-84 range.
The CIS Benchmarks provide over 200 individual controls per distribution for organizations that need formal compliance documentation. This checklist covers the highest-impact subset - the 20% of controls that address 80% of real-world attack surface. For full CIS Level 1 compliance, consider automated tooling like OpenSCAP or Ansible playbooks built against the CIS benchmark profiles. If your server runs Docker workloads, the same hardening mindset applies inside containers — see our Docker image security checklist for container-specific controls.
Quick Reference
| Step | Time | Key Config File |
|---|---|---|
| SSH hardening | 5-7 min | /etc/ssh/sshd_config |
| nftables firewall | 5-7 min | /etc/nftables.conf |
| Auto security updates | 3-5 min | /etc/apt/apt.conf.d/50unattended-upgrades |
| Audit logging | 5-7 min | /etc/audit/rules.d/hardening.rules |
| Account and kernel lockdown | 5-7 min | /etc/sysctl.d/99-hardening.conf |
| MAC enforcement | 2-3 min | SELinux: /etc/selinux/config, AppArmor: aa-status |
That is thirty minutes of work. Your server has gone from a default-configured target to something that deflects automated attacks and makes targeted ones substantially harder to pull off.