ZFS Snapshots Guide: Protect Your Data from Ransomware

Ransomware has shifted from a “big enterprise” worry to a routine risk for freelancers, homelab users, and small teams. In 2026, attacks are faster and quieter. They often start with plain credentials stolen from a browser, a password vault export, or an exposed SSH key. If you run Linux storage and your only safeguard is “we have backups somewhere,” your recovery window is too wide.
ZFS snapshots
give you a way to shrink that window. A snapshot is a read-only marker of a dataset at a fixed point in time. ZFS is copy-on-write (CoW). Snapshots are cheap to make, fast to list, and safe to recover from. You just need to set up retention and permissions with care. This guide covers the full plan: setup, install paths, locked-down snapshot controls, jobs with sanoid
and syncoid
, recovery steps during a live hit, performance cost, and compliance notes.
Why ZFS Fits the 2026 Ransomware Reality
The core reason ZFS works against ransomware is built into its design. On CoW filesystems, changed data lands in new blocks, and metadata pointers update as one atomic step. Old blocks stay intact until nothing points to them. A snapshot is just another durable set of pointers to past blocks. So a snapshot can hold the pre-attack state even if live files are encrypted minutes later.
Most modern ransomware now follows an “encrypt first, disrupt second” flow. Attackers stay quiet until encryption has spread across shares and endpoints. On ext4 with weak backup habits, both live data and backups can be encrypted in turn. On ZFS with frequent snapshots and tight delete rights, the attacker can encrypt the live dataset but cannot quietly rewrite past blocks.
This is where recovery point objective (RPO) gets concrete. Snapshot hourly, and your worst-case loss window is about one hour. Snapshot every 5 minutes on critical datasets, and the blast radius shrinks to match. Snapshot cadence is not a comfort setting. It is a business choice about how much data you can afford to lose.
Compared with Btrfs snapshots , ZFS adds two traits that count under attack pressure:
- End-to-end checksums for both data and metadata.
- Mature RAID-Z and self-healing behavior in degraded pools.
Btrfs has come a long way. Still, many ops teams prefer ZFS for safe recovery flows. The tools and the day-to-day patterns are mature, in NAS-like setups most of all.
Prerequisites and Installation Paths
Many guides assume you already have a healthy ZFS pool. For ransomware planning, that guess is risky. Start with baseline needs and an install path that fits your setup.
Baseline prerequisites
| Component | Recommended baseline (2026) | Notes |
|---|---|---|
| CPU | 64-bit with AES-NI support | Strongly helps encrypted datasets |
| RAM | 16 GB minimum, 1 GB per TB rule as planning heuristic | Not a hard rule, but still useful for design |
| ECC memory | Preferred for business/important data | Reduces silent memory corruption risk |
| OS kernel | Modern LTS kernel with OpenZFS support | Keep kernel and ZFS module compatibility aligned |
| Storage | Redundant vdev layout (mirror/RAID-Z) | Single disk pools remove self-healing benefits |
The “1 GB RAM per TB” rule is a planning hint, not a law. If your workloads are light and mostly sequential, you can run lower. If you dedupe hard or mix VM workloads, you may need more. With 64 GB DDR5 in a 2026 home NAS, you can run dense snapshot schedules and replication without strain.
Ubuntu and Debian quick setup
On current Ubuntu and Debian releases with OpenZFS packages, the fast path looks like this:
sudo apt update
sudo apt install -y zfsutils-linux sanoid
sudo modprobe zfs
sudo zpool create -o ashift=12 tank mirror /dev/sdb /dev/sdc
sudo zfs create tank/data
sudo zfs set compression=zstd tank/data
If you need encryption at rest from day one, create encrypted datasets up front:
sudo zfs create \
  -o encryption=aes-256-gcm \
  -o keyformat=passphrase \
  -o keylocation=prompt \
  tank/secure
This setting guards offline media and stolen drives. It does not replace snapshots. Ransomware tends to run after the dataset is unlocked on a live system.
TrueNAS SCALE path
If you prefer an appliance model, TrueNAS SCALE gives you a UI-driven path. You get pool setup, dataset rights, snapshot tasks, and replication. Choose SCALE when:
- You want safer defaults and guardrails for a small team.
- You do not want to track Linux package and module compatibility by hand.
- You need role-based admin with less shell exposure.
Choose native Linux OpenZFS when:
- You need fine-grained automation wired into existing scripts.
- You already run Linux services and infra-as-code.
- You want direct control over package versions and CLI flows.
What Changed in ZFS in 2026
The biggest change for ops teams is RAID-Z expansion in newer OpenZFS releases. In the past, many admins held off on ZFS. Scaling RAID-Z often meant pool redesign or a full move. Expansion support flattens that cliff.
In practical terms, you can add space to eligible RAID-Z vdevs and then rebalance over time. You no longer rebuild from scratch. Speed during expansion depends on the workload. Sequential work handles it well. Random-heavy work feels it more. Plan expansion windows and watch latency. The old “destroy and recreate” pain is no longer the default story.
Block cloning is another big win. When it is on and your stack supports it, duplicate file copies can share block pointers until they diverge. That cuts space waste in versioned flows and backup staging.
One more thing to clarify: managed platforms and upstream OpenZFS can expose features on their own timeline. Before you use new features in production, check three items:
- Pool feature flags on source and destination systems.
- Replication compatibility across versions.
- Rollback/upgrade plan if a feature must be disabled.
Designing Snapshot Immutability and Least Privilege
Snapshots only protect you if an attacker cannot just delete them. In many incidents, the destructive step lands after privilege escalation. If the hijacked account has full ZFS admin rights, snapshots turn into safety glass. You can punch right through them.
Use snapshot holds for critical restore points
zfs hold blocks deletion of specific snapshots until you release the matching hold:
sudo zfs snapshot tank/data@pre-change-2026-03-07
sudo zfs hold keep tank/data@pre-change-2026-03-07
# Attempted destroy now fails until hold release
For long-term checkpoints (quarter-end, audits, major migrations), holds are a direct and strong control.
Delegate only the permissions you need
Don’t run every job as root. Delegate narrow rights to a dedicated service account:
sudo useradd -r -s /usr/sbin/nologin zfs_admin_snapshot
sudo zfs allow zfs_admin_snapshot snapshot,mount,send,hold tank/data
This follows least privilege. Your scheduler can create, send, and hold snapshots without broad destroy rights across all datasets.
Keep an offsite copy outside local blast radius
Use zfs send | zfs receive to copy snapshots to a second host. Ideally that host sits in another site, or at least in another trust zone. A WireGuard site-to-site VPN
is a light, encrypted pipe for this channel:
sudo zfs snapshot -r tank/data@auto-$(date +%Y%m%d-%H%M)
sudo zfs send -Rw tank/data@auto-20260307-0100 | \
  ssh backup@offsite "sudo zfs receive -u backup/tank-data"
If ransomware lands on your primary host, local snapshots help. If it also gains destroy rights, offsite locked copies are your second line of defense.
Trigger protective snapshots on suspicious activity
zed
(ZFS Event Daemon) can run scripts on pool events. Pair it with file-activity signals from endpoint tools to fire emergency snapshots. A simple pattern is:
- Detect odd encryption-like file churn.
- Fire an immediate recursive snapshot on high-value datasets.
- Alert operators and lock down write paths for now.
Even if detection is noisy, an extra snapshot is cheap insurance.
Automating Snapshots and Replication with sanoid and syncoid
Manual snapshots are theater. Real defense means policy-driven creation, retention, and replication.
Example sanoid policy
A common setup is frequent short retention plus longer archive checkpoints. In /etc/sanoid/sanoid.conf:
[tank/data]
        use_template = production
        recursive = yes

[template_production]
        frequently = 0
        hourly = 48
        daily = 30
        monthly = 12
        autosnap = yes
        autoprune = yes
This keeps 48 hourly checkpoints, 30 daily, and 12 monthly. Tune the schedule per dataset value and churn rate.
Replicate with syncoid
syncoid wraps send and receive safely. It supports incremental runs, resume tokens, and handy flags:
syncoid \
  --compress=zstd-fast \
  --sshport=22 \
  --no-sync-snap \
  --source-bwlimit=80m \
  tank/data backup@offsite:backup/tank-data
Key points:
--no-sync-snapis useful when you run pull-based backups and want tighter control of snapshot names.- Bandwidth limits keep replication from soaking WAN links.
- Use SSH keys locked to replication commands and host allowlists.
Lightweight property-based option
If you need a minimal start, com.sun:auto-snapshot=true works with simpler snapshot tools in some setups. It is not as rich as sanoid retention templates. Still, it beats ad-hoc manual snapshots.
Test restores before an incident
A snapshot policy that has never been tested is a guess. Run recovery drills every quarter:
# Clone snapshot into isolated test dataset
sudo zfs clone tank/data@autosnap_2026-03-07_0100 tank/restore-test
# Validate application startup and file integrity from clone
Clones let you check recovery without touching production state.
Recovery Playbook After a Ransomware Event
When an incident starts, stress and speed cause mistakes. Use a repeatable sequence.
Step 1: Isolate, do not power off
Cut network access right away. Avoid an abrupt shutdown if you can. You want forensic traces and intact system state for timeline analysis.
Step 2: Identify safe snapshot boundary
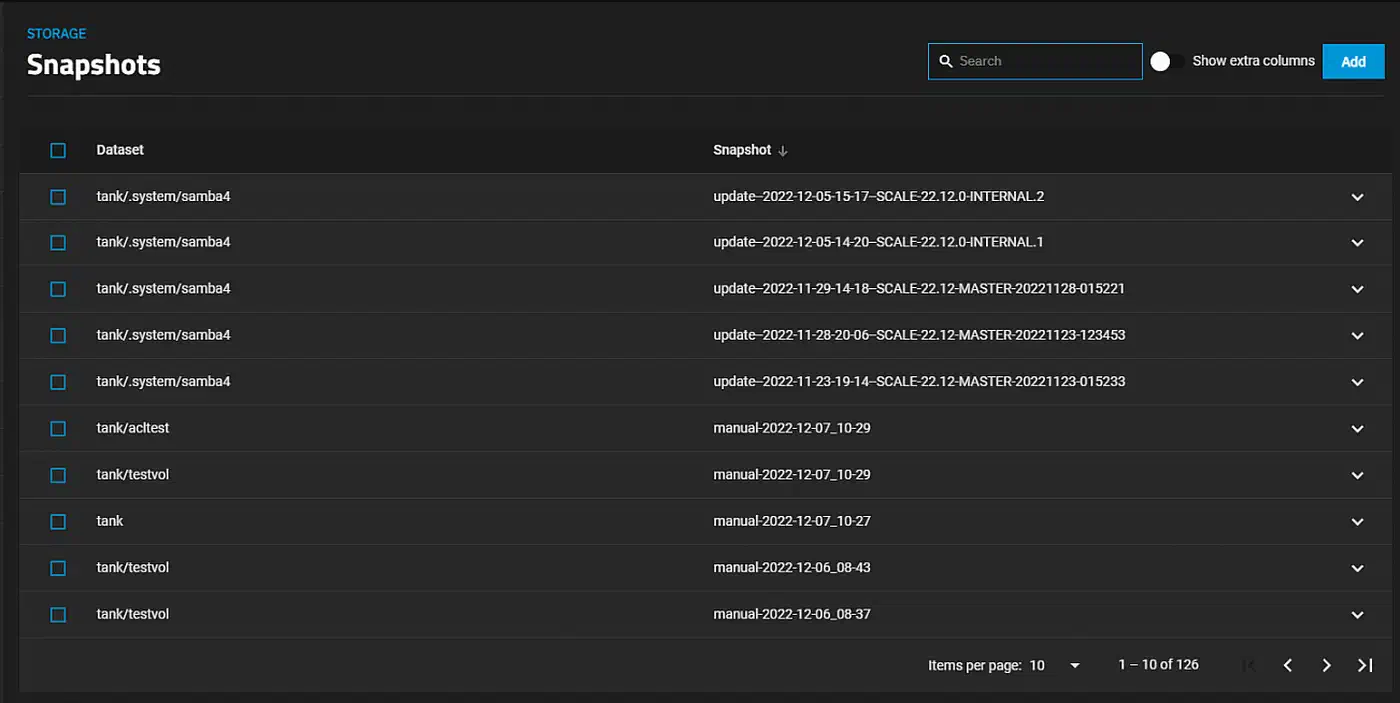
List snapshots and find the most recent pre-encryption checkpoint:
sudo zfs list -t snapshot -o name,creation -s creationIf you also replicated offsite, check the remote side for a matching clean snapshot.
Step 3: Perform selective recovery first
Before a full rollback, check .zfs/snapshot read-only paths to pull specific files back fast:
ls /tank/data/.zfs/snapshot/
cp /tank/data/.zfs/snapshot/autosnap_2026-03-07_0100/projects/app/config.yml ./
This is often enough for partial incidents where only some files got encrypted.
Step 4: Roll back only with clear blast-radius confirmation
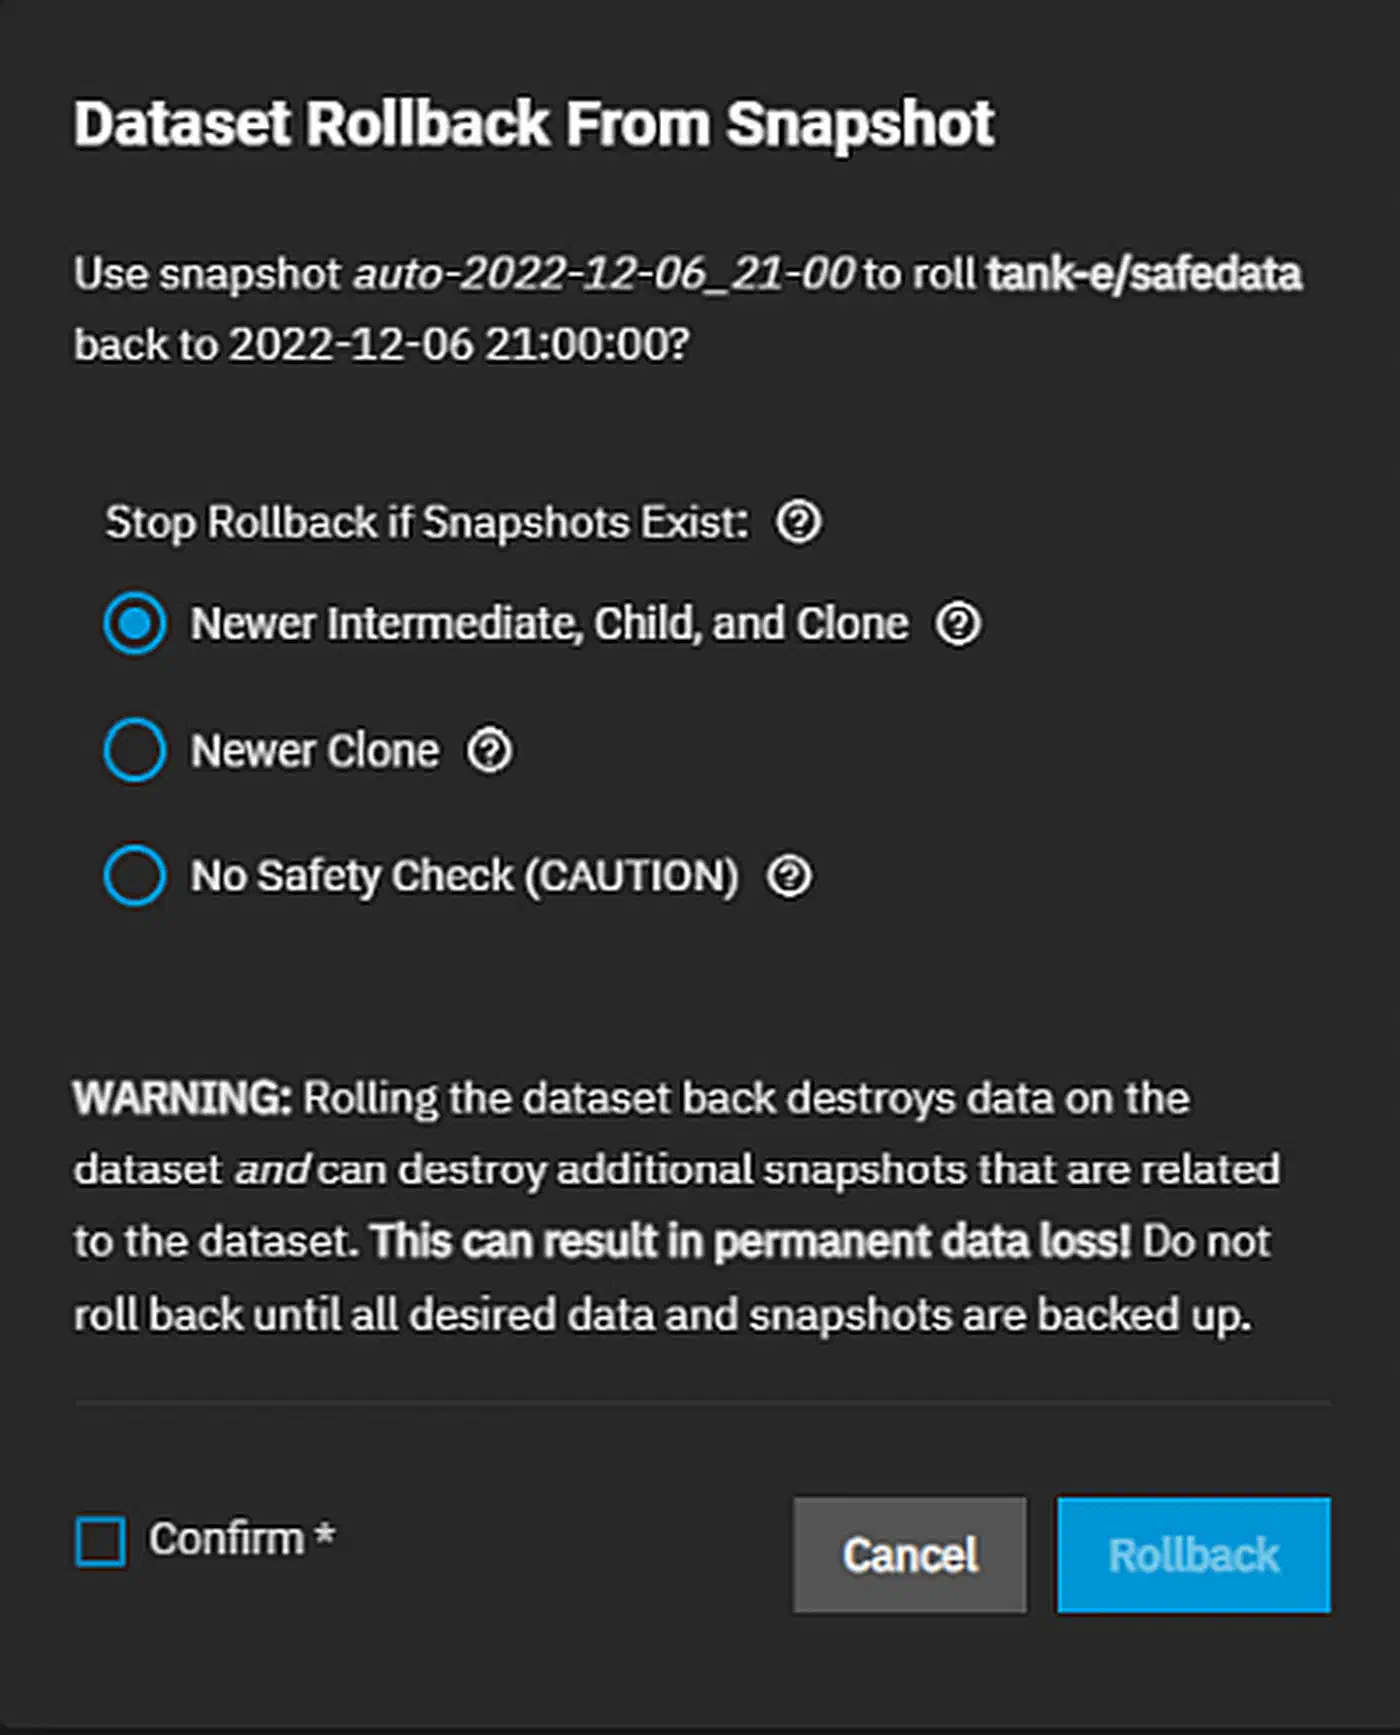
If wide encryption hit and the restore scope is clear:
sudo zfs rollback -r tank/data@autosnap_2026-03-07_0100Then rotate credentials, patch entry points, and re-enable writes in staged phases. Recovery without root-cause control invites reinfection.
Troubleshooting quick map
| Symptom | Likely cause | Immediate action |
|---|---|---|
| Snapshot missing expected files | Wrong dataset targeted | Check child datasets and recursive snapshot policy |
zfs rollback blocked | Newer snapshots/dependents exist | Use clone path or include -r after validation |
| Replication gap offsite | SSH/auth failure or pool feature mismatch | Validate transport keys and zpool get all feature flags |
| Snapshot deletion succeeded unexpectedly | No hold/delegation guardrail | Add holds and remove broad destroy permissions |
Snapshot Strategy Comparison
Snapshots are not the same across stacks. The right tool depends on data model, team maturity, and restore flow.
| Feature | ZFS snapshots | Btrfs snapshots | LVM snapshots | Restic (repo backup) |
|---|---|---|---|---|
| Snapshot speed | Instant metadata operation | Instant metadata operation | Fast but COW volume overhead | N/A (backup, not fs snapshot) |
| Integrity checksumming | End-to-end (data + metadata) | Yes, but operational variance by setup | No end-to-end fs checksumming | Repository-level content checks |
| Native send/receive replication | Mature and efficient | Available, less uniform ops patterns | Limited and tooling-dependent | Strong remote backup workflows |
| Ransomware recovery UX | Excellent with schedule + holds | Good with discipline | Usable but less ergonomic at scale | Excellent for offsite restore, slower full-system rollback |
| Typical use case | NAS, servers, high-value datasets | Desktop/server mixed workloads | Legacy enterprise stacks | Cross-platform backup archive |
A useful model for many teams is hybrid. Use ZFS snapshots for fast local rollback. Pair them with Restic object backup for cross-platform, long-term, and air-gapped storage.
Performance Impact of Dense Snapshot Schedules
The common fear is that frequent snapshots will crush I/O. In most real workloads, making a snapshot is cheap. The heavier load comes from dense retention, metadata churn, and prune windows.
What operators tend to see:
- Snapshot creation latency is near-instant.
- Read speed is usually fine on active datasets.
- Write-heavy workloads can see moderate overhead when many past block versions are kept.
- Destroying lots of old snapshots can spike I/O for a while.
A realistic range on modern SSD pools is low single-digit overhead for normal mixed workloads. It climbs under extreme small-file churn or aggressive prune windows. Measure on your hardware with your dataset shape. Don’t trust generic numbers.
Measure with a simple benchmark routine
- Capture baseline latency and throughput (
fio, app-level SLOs). - Enable the target snapshot schedule for at least one week.
- Compare daytime and prune-window I/O numbers.
- Tune retention and prune timing to dodge peak business hours.
If write amplification shows up, split high-churn data into its own datasets with shorter retention. Keep long retention for high-value, slow-changing datasets.
Encryption, Compliance, and Retention for Business Data
Ransomware defense is not only about technical recovery. For business data, legal duties shape what you keep, for how long, and where it is copied.
Encryption at rest and key handling
Encrypted datasets (aes-256-gcm) guard disks at rest and reduce the impact of device theft. For a compliance-friendly posture:
- Store keys apart from primary data where you can.
- Document your key rotation policy.
- Limit who can load and unload keys during maintenance.
Remember: once a dataset is unlocked and mounted, ransomware can still encrypt live files. Encryption at rest pairs with snapshots. It does not replace them.
GDPR and retention boundaries
For EU personal data, snapshots can clash with deletion duties if retention is open-ended. Build clear retention classes:
- Operational snapshots: short-term, high-frequency.
- Audit and legal snapshots: long-term with a written reason.
- Personal-data minimization: skip broad open-ended holds unless legally required.
Your incident policy should spell out how data subject requests play against locked backup windows. It should also state what legal basis covers short-term retention.
Policy checklist for regulated environments
| Control area | What to document |
|---|---|
| Retention policy | Snapshot frequency, duration, and deletion schedule by dataset |
| Access control | Who can create, hold, send, release, or destroy snapshots |
| Offsite replication | Region, provider, encryption state, recovery testing cadence |
| Incident response | Isolation steps, recovery authority, notification workflow |
| Audit evidence | Recovery drill logs, restore success proof, policy revisions |
If you run healthcare, finance, or contract enterprise workloads, review these controls with legal and compliance staff before you lock in retention jobs.
Final Implementation Blueprint
If you want a clear rollout path, use this sequence:
- Create or check pool and dataset layout.
- Enable compression and encrypted datasets for sensitive paths.
- Set snapshot frequency by RPO tier (5 min, hourly, daily).
- Apply least-privilege delegation and snapshot holds for critical checkpoints.
- Set up
sanoidretention templates. - Set up
syncoidreplication to an offsite target. - Test file-level recovery and full rollback in isolated drills.
- Record performance baselines and tune prune windows.
- Document compliance retention classes and access controls.
ZFS snapshots are not magic. They are one of the few controls that reliably shift incident outcomes from “total loss” to “fixable.” The difference is daily discipline: frequent snapshots, guarded delete paths, offsite copies, and tested restores.