Snapcast Multi-Room Audio System: 5 Rooms Under $300

Yes, you can build a multi-room audio system that rivals Sonos for under $300. It covers five rooms. Snapcast is an open-source audio player. It streams music to every room with sub-millisecond sync. Home Assistant adds per-room volume, source switching, and automation. Each room costs $30 to $50. Sync stays within 1ms, and humans can’t detect delays under 5ms. The whole system runs locally, with no cloud and no monthly fees.
How Snapcast Multi-Room Audio Works
Snapcast uses a simple server-client model. One central machine runs the server. It captures audio from a music player, Spotify Connect via librespot , an AirPlay receiver, or a line-in. It chunks that audio into timestamped packets. Then it sends them to all clients over TCP.
The sync method is what sets Snapcast apart. Each chunk carries a server timestamp. Clients use NTP to keep their clocks within 1ms of the server. From that, they compute the exact delay to match its playback time. The same audio plays in every room at once. You hear no echo as you walk between rooms.
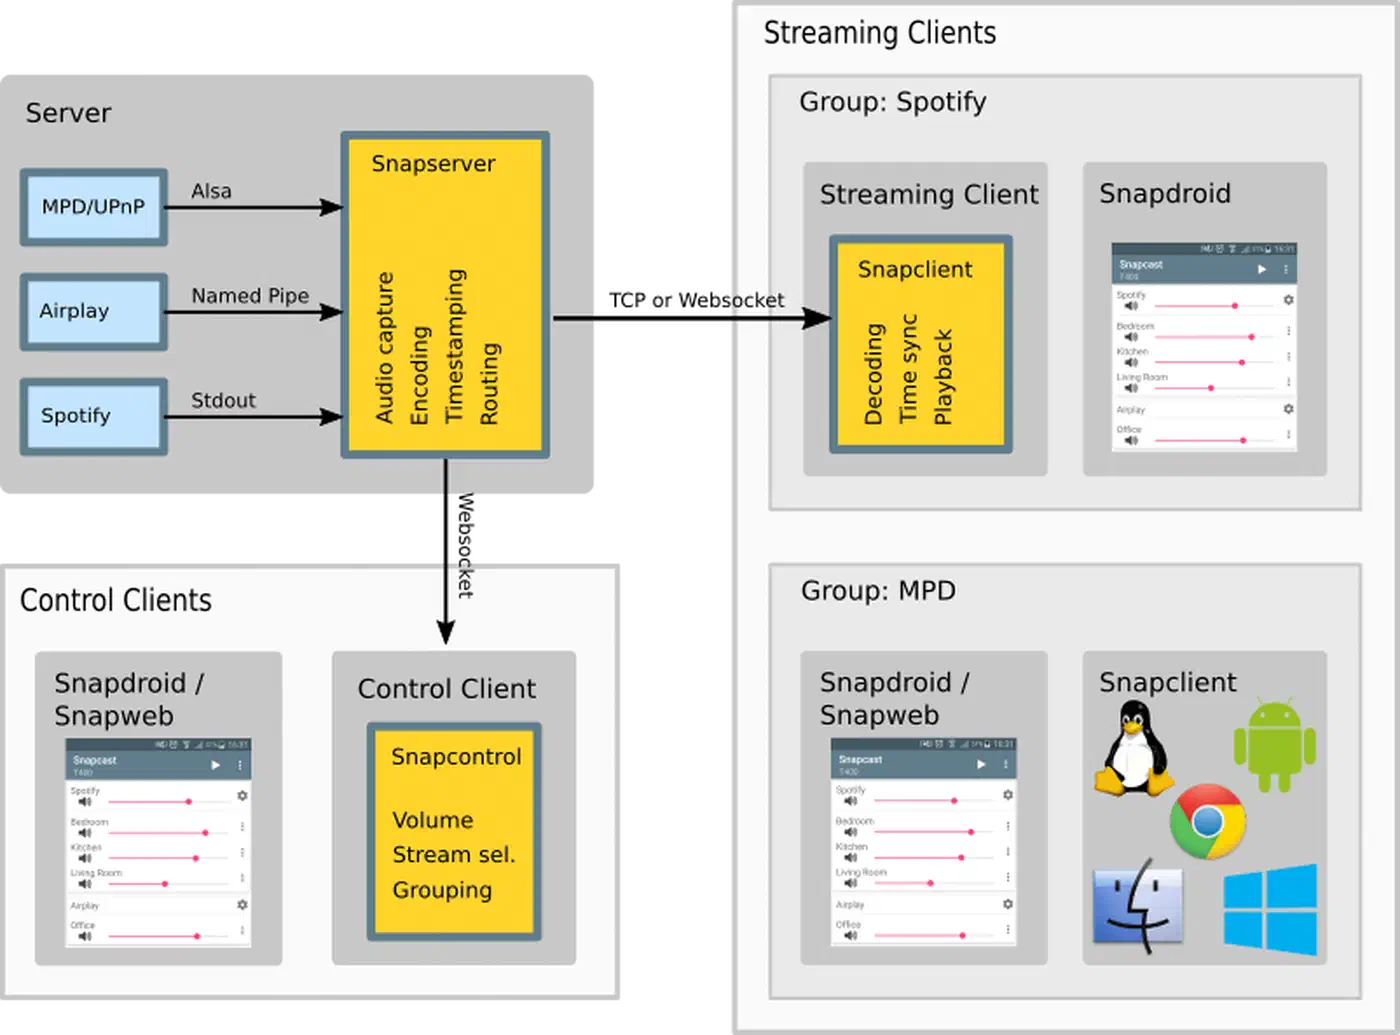
Snapcast supports many streams at once. Each client can play a different one. The kitchen can run Spotify while the office plays a podcast. It streams in four codecs:
| Codec | Type | Latency | Best For |
|---|---|---|---|
| FLAC | Lossless | ~26ms | Default, best quality-to-bandwidth ratio |
| PCM | Lossless, uncompressed | 0ms | Lowest latency, highest bandwidth |
| OGG | Lossy | Variable | Bandwidth-constrained networks |
| Opus | Lossy, low-latency | Low | Low-latency use cases (48kHz only) |
Network needs are modest. CD-quality audio uses about 200 kbps per client. A typical home network handles 50 rooms or more. Wi-Fi is fine for clients. Wire the server for steady lag.
How It Compares to Alternatives
Before you commit to a DIY build, see what Snapcast replaces:
| System | Cost Per Room | Sync Quality | Ecosystem | Cloud Required |
|---|---|---|---|---|
| Sonos | $200-600 | Good | Closed, proprietary | Yes (setup, updates) |
| Apple AirPlay 2 | $100-350 | Good | Apple-only | Partial |
| Chromecast Audio | Discontinued | Noticeable lag in groups | Yes | |
| PulseAudio/PipeWire network | $0 (software) | No sync, noticeable delays | Linux | No |
| Snapcast | $30-50 | Sub-millisecond | Open, any source | No |
Snapcast is the only open-source option with real time-synced playback. PulseAudio and PipeWire stream over the network too. But they weren’t built for sync, so room-to-room delays are easy to hear. Sonos syncs well. The catch is pricey hardware and a cloud-tied stack.
Hardware: What You Need
Server
A Raspberry Pi 4 (4GB, about $55) is the top pick. A Pi 5 is overkill for audio streaming. Any Linux box with a network port works too: an old laptop, a NAS, a mini PC, or a Docker container running on Proxmox . Wired Ethernet keeps lag steady, but it isn’t required.
Clients (One Per Room)
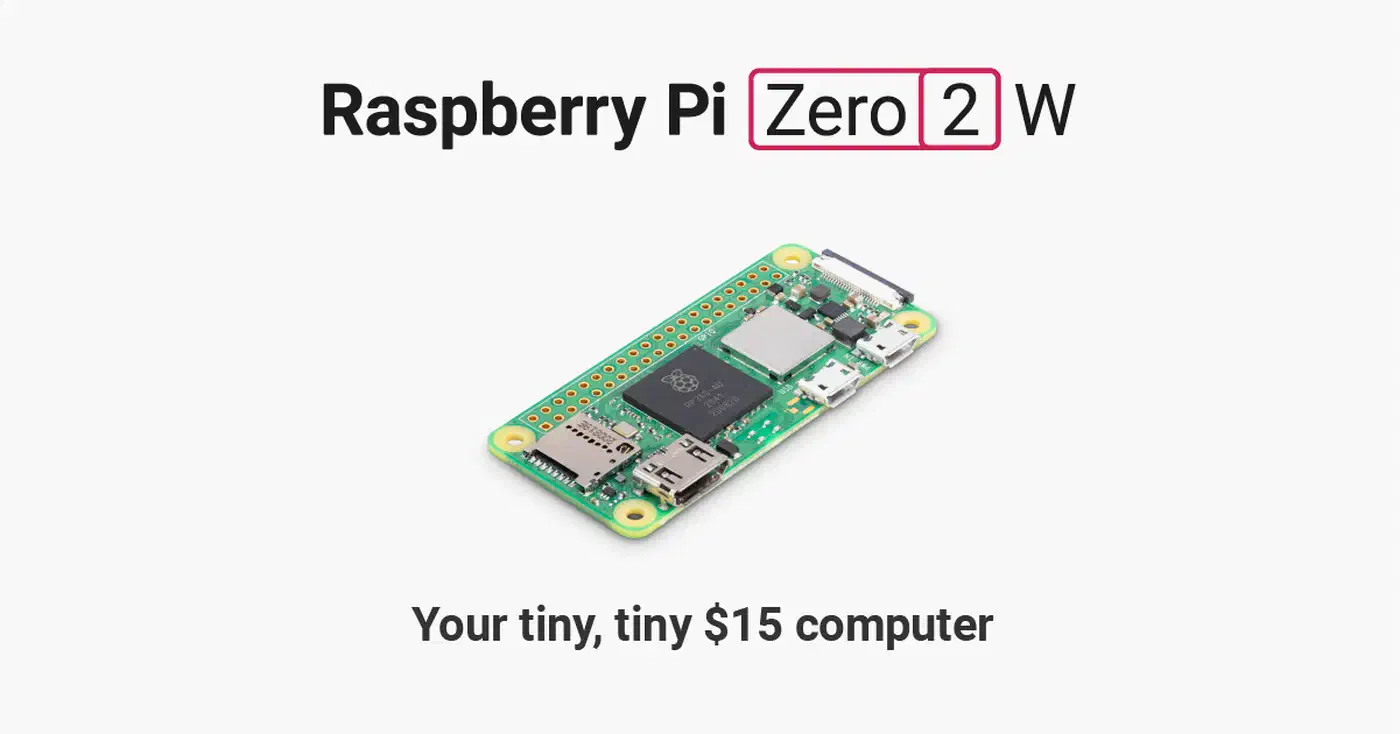
The Raspberry Pi Zero 2 W at $15 is the ideal client. It’s tiny and has built-in Wi-Fi. It draws about 1W at idle. It runs the Snapcast client headless.
For wired rooms, a Pi 3A+ ($25) works. A PoE HAT powers it over the Ethernet cable. Old Android phones also work as clients, through the Snapdroid app.
DACs
The Pi Zero’s built-in audio is too noisy to use. Add a DAC HAT for clean analog output:
| DAC | Price | Notes |
|---|---|---|
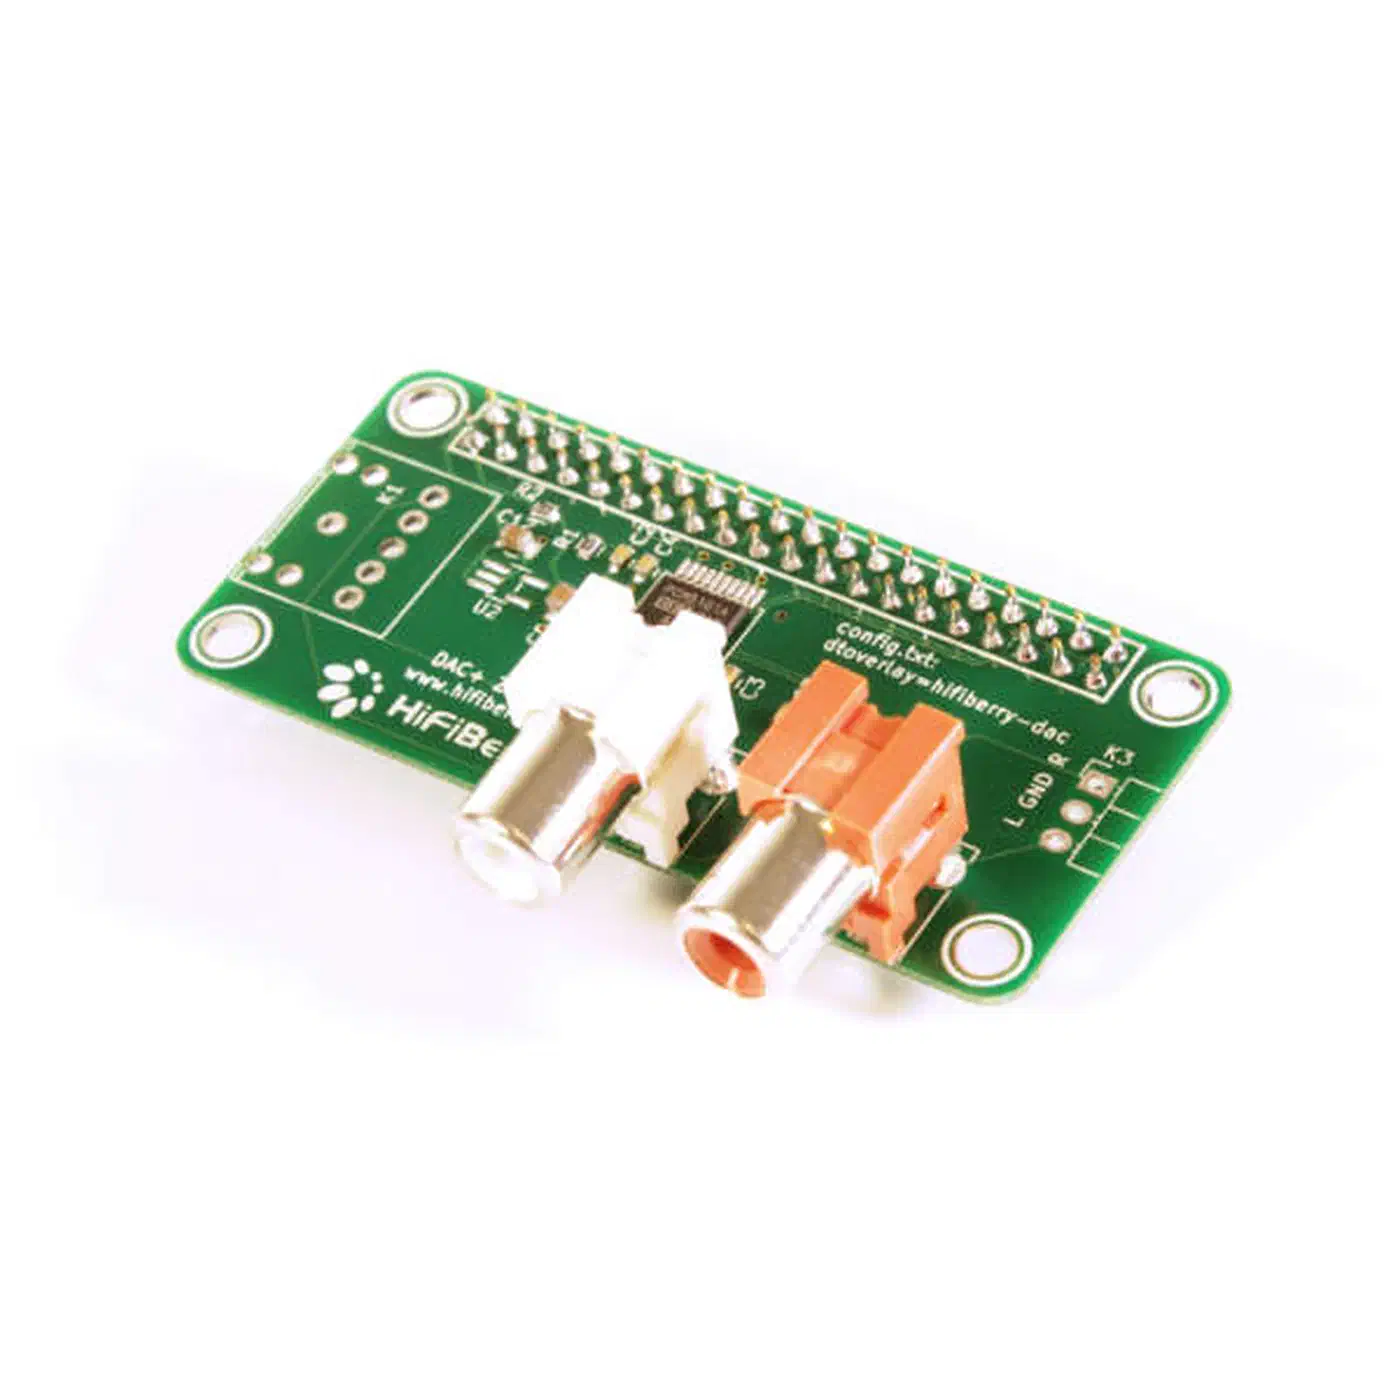
| HiFiBerry DAC+ Zero | ~$30 | Purpose-built for Pi Zero, 192kHz/24-bit, easy setup |
| Pimoroni pHAT DAC | ~$12 | Compact, decent quality |
| PCM5102A breakout board | ~$3 (AliExpress) | Cheapest option, requires soldering |
| HiFiBerry DAC2 HD | ~$60 | Audiophile-grade for Pi 4/5 clients in main listening rooms |
Speakers
Match speakers to each room’s purpose:
- Living room: Powered bookshelf speakers like the Edifier R1280T (~$80/pair) via 3.5mm from the DAC
- Kitchen or bathroom: A single powered speaker like the JBL Go
- Ceiling or distributed: Passive speakers driven by a mini amp like the Fosi Audio BT20A (~$65)
- Budget rooms: Any speaker plus a PAM8403 Class-D amp board ($2)
Cost Breakdown
A five-room system:
| Component | Cost |
|---|---|
| Server: Raspberry Pi 4 (4GB) | $55 |
| 5x Raspberry Pi Zero 2 W | $75 |
| 5x HiFiBerry DAC+ Zero | $150 |
| 5x Budget powered speakers | $100-200 |
| Power supplies, cables, SD cards | $50 |
| Total | $430-530 |
Five Sonos Era 100 speakers cost $1,250. That’s more than double a similar Snapcast build. Cheaper PCM5102A DACs and budget speakers bring the whole system under $300.
Installing and Configuring Snapcast
Server Setup
On a Debian-based system, grab the latest .deb from the Snapcast releases page
:
wget https://github.com/snapcast/snapcast/releases/download/v0.35.0/snapserver_0.35.0-1_armhf.deb
sudo dpkg -i snapserver_0.35.0-1_armhf.deb
sudo apt-get -f install  # resolve any dependencies
The server starts via systemd. Config lives in /etc/snapserver.conf. A multi-source example:
[http]
doc_root = /usr/share/snapserver/snapweb

[stream]
sampleformat = 48000:16:2
codec = flac
buffer = 1000
chunk_ms = 20

source = pipe:///tmp/snapfifo?name=MPD&sampleformat=48000:16:2
source = librespot:///librespot?name=Spotify&devicename=SnapHome&bitrate=320&volume=100
source = airplay:///shairport-sync?name=AirPlay&devicename=SnapHome&port=5000
source = alsa:///hw:1,0?name=Turntable&sampleformat=48000:16:2
After editing, restart with sudo systemctl restart snapserver. The web UI lives at http://<server-ip>:1780. There you can rename clients, group them, and switch sources.

Client Setup
On each room’s Pi, install the client package:
wget https://github.com/snapcast/snapcast/releases/download/v0.35.0/snapclient_0.35.0-1_armhf.deb
sudo dpkg -i snapclient_0.35.0-1_armhf.deb
sudo apt-get -f install
Set the server IP in /etc/default/snapclient:
SNAPCLIENT_OPTS="--host 192.168.1.100 --hostID kitchen"The --hostID gives the client a stable name across reboots. If you hear Wi-Fi dropouts, add --buffer 1500 to the same line.
DAC and Audio Setup
For HiFiBerry DAC HATs, add the device tree overlay to /boot/config.txt (dtoverlay=hifiberry-dac). Then set ALSA to use it as the default output in /etc/asound.conf:
pcm.!default {
    type hw
    card 0
}
ctl.!default {
    type hw
    card 0
}
Run aplay -l to confirm the DAC shows as card 0, and adjust the config if not.
The sample format is <samplerate>:<bitdepth>:<channels>. Use 48000:16:2 as a default. Pick 96000:24:2 for capable DACs. FLAC is the best codec. It’s lossless, uses about half the bandwidth of PCM, and adds only ~26ms of lag. Use PCM for a turntable when you need the lowest lag. If Wi-Fi drops audio, raise the buffer setting from 1000ms to 1500ms.
For five rooms or more, script the client install. A shell script or Ansible keeps every room the same.
Integrating Snapcast with Home Assistant
Home Assistant’s Snapcast integration shows every client and group as a media player entity. You get per-room volume, source picks, grouping, and automation.
Setting Up the Integration
Go to Settings > Devices & Services > Add Integration > Snapcast. Enter the server’s IP and port (1780). Home Assistant creates one entity per client, like media_player.snapcast_client_kitchen. It adds media_player.snapcast_group_0 for group control. Each one supports volume, mute, play/pause, and source pick.
Dashboard and Automations
For a clean dashboard, use the mini-media-player card from HACS. It gives compact per-room controls with volume sliders and source dropdowns. Group them in a grid:
type: grid
columns: 2
cards:
  - type: custom:mini-media-player
    entity: media_player.snapcast_client_kitchen
    name: Kitchen
    group: true
  - type: custom:mini-media-player
    entity: media_player.snapcast_group_0
    name: All Rooms
    group: true
Automations add useful patterns. This one drops volume after 10 PM:
automation:
  - alias: "Night volume reduction"
    trigger:
      platform: time
      at: "22:00:00"
    action:
      service: media_player.volume_set
      target:
        entity_id: media_player.snapcast_group_0
      data:
        volume_level: 0.3
A one-button script can switch the whole group between sources. It calls the media_player.select_source service.
TTS and Voice Control
You can route Home Assistant’s text-to-speech through your Snapcast speakers. Point the TTS platform at a dedicated pipe source. The integration’s snapshot and restore actions pause the music, play the message, then resume where it left off. To keep voice control local, pair Willow on an ESP32-S3 Box . Then “Play music in the kitchen” fires playback on the kitchen client. For a smarter setup, Home Assistant AI voice runs a local LLM as the conversation agent, and its spoken replies play through these same Snapcast speakers.
Audio Sources
Snapcast takes audio from almost anything. Each source shows up as a selectable stream that any room can switch to.
MPD for Local Music
MPD (Music Player Daemon)
is the most common pair for local music. Install it. Then point its output at a FIFO that Snapcast reads. In /etc/mpd.conf:
audio_output {
    type        "fifo"
    name        "snapcast"
    path        "/tmp/snapfifo"
    format      "48000:16:2"
    mixer_type  "software"
}
Control playback with mpc, the ncmpcpp
terminal UI, or a web app. MPD scans your library and supports FLAC, MP3, and OGG.
Spotify via Librespot
Snapcast has built-in librespot
support. Set the librespot source in snapserver.conf. Your server then appears as a Spotify Connect device. Pick it in the Spotify app, and audio routes to every room. You need Spotify Premium. Audio streams at 320kbps. go-librespot
is a second option, with better metadata and volume control.
AirPlay via Shairport-Sync
Install shairport-sync
and set it as a Snapcast source. Apple devices then see an AirPlay receiver. The airplay source type launches and manages it for you:
source = airplay:///shairport-sync?name=AirPlay&devicename=SnapHome&port=5000For AirPlay 2, set port=7000 instead.
Other Inputs
For guests, pair a phone over Bluetooth. Route that audio through bluealsa to a Snapcast FIFO. For a turntable or TV, connect it to a USB sound card. The alsa source type then captures the analog audio. For internet radio, point MPD at a stream URL.
Music Assistant: The Friendly Frontend
Music Assistant is a Home Assistant add-on. It gives you one music library across streaming services and local files. It supports Snapcast as a player provider. So you browse and queue in its polished UI, and Snapcast handles the synced playback underneath.
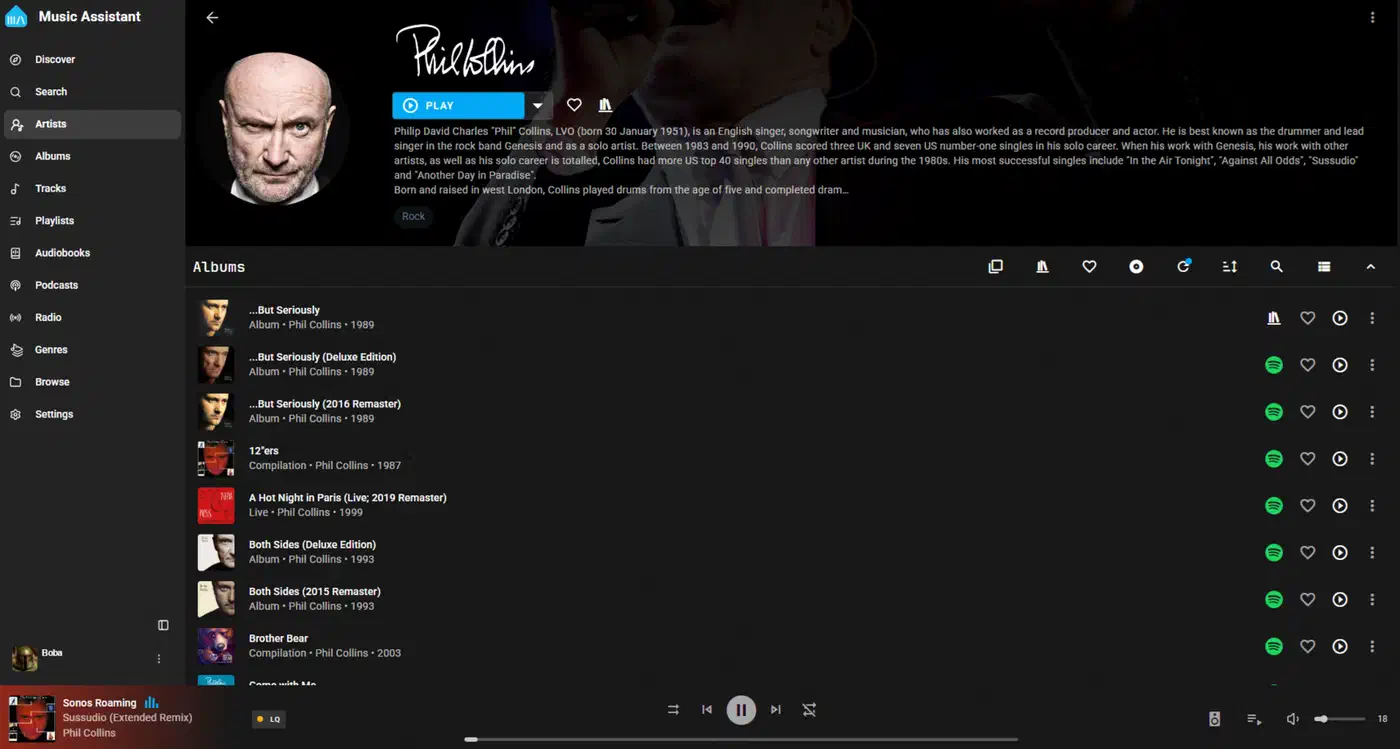
Music Assistant ships with a built-in Snapcast server. It can also point at an external one. It has its own multi-room protocol too, called Sendspin. The next section compares them. The two aren’t either-or. Music Assistant manages the library, and Snapcast handles the transport.
Snapcast vs Sendspin: Which Should You Use?
Sendspin comes up a lot when people research Snapcast. It is Music Assistant’s own playback and sync protocol. The Open Home Foundation builds it. Music Assistant’s founder, Marcel Veldt, started it for a reason. Snapcast “has so many downsides,” and its lone maintainer had gone quiet. That made Snapcast a poor base for streaming to ESP32-class devices and browsers.
| Snapcast | Sendspin | |
|---|---|---|
| Maturity | Stable, years in production | Technical preview, still changing |
| Transport | Raw TCP | WebSockets (crosses firewalls and reverse proxies) |
| Remote streaming | LAN-focused | WebSocket on the LAN, WebRTC for remote |
| Target clients | Linux, Raspberry Pi, Android | ESP32/ESPHome, browsers, HA Voice PE |
| Codecs | FLAC, PCM, OGG, Opus | FLAC on desktop, Opus on iOS and remote, switchable on the fly |
| Bit depth | Up to 24-bit | 16-bit only for now |
| Setup | Manual server and client config | mDNS auto-discovery, no manual setup |
| Best for | A reliable DIY multi-room build today | ESPHome smart speakers and browser playback |
As of early 2026, pick Snapcast for a system you want to depend on now. It’s proven, runs on $15 Raspberry Pi Zero clients, and handles 24-bit audio. Watch Sendspin if your speakers are ESP32-based ESPHome devices or the Home Assistant Voice Preview Edition. That’s where it’s the native path. The two aren’t mutually exclusive. Run Snapcast for Pi clients today, and add Sendspin for ESPHome devices later.
Is Snapcast or Sendspin better for multi-room audio?
For a build you want working reliably today, pick Snapcast. It’s mature. It runs on $15 Raspberry Pi Zero clients and handles 24-bit audio. Sendspin is newer and still in technical preview. It targets ESP32/ESPHome speakers and browsers, not Pi clients.
Is Music Assistant a replacement for Snapcast?
No. Music Assistant is a music library and playback frontend. Snapcast is the synced transport layer underneath it. Music Assistant browses and queues your music across streaming services and local files. Then it hands playback to Snapcast for sub-millisecond multi-room sync. They work together, not against each other.
Troubleshooting Common Issues
Audio dropouts on Wi-Fi: Raise the client buffer from 1000ms to 1500-2000ms. If dropouts persist, move the room to wired Ethernet.
FIFO pipe permission errors: Newer kernels lock down FIFO pipes in /tmp. Run sudo sysctl fs.protected_fifos=0. Add it to /etc/sysctl.conf so it sticks.
Client not in the web UI: Check the server IP in /etc/default/snapclient. Make sure ports 1704 and 1705 aren’t firewalled.
DAC not detected: Run aplay -l. If the DAC isn’t listed, check the overlay in /boot/config.txt and reboot. Some HATs need onboard audio off (dtparam=audio=off).
Lag between server and clients: Check NTP sync with timedatectl status. Snapcast needs accurate clocks, so install chrony if NTP isn’t running.
One room out of sync: In the web UI, tweak that client’s latency offset by hand. That covers DAC or amp processing quirks.