 Botmonster Tech
The ridiculously cheap 10GbE home network you can build for under $200


You can build a working 10-gigabit home network for around $200 by combining a budget 5-port 10GbE switch with Cat6a cabling and affordable PCIe NICs. The result saturates NVMe-backed NAS transfers at roughly 1,100 MB/s - about ten times faster than gigabit Ethernet - without enterprise-grade hardware or specialized wiring. Most of the savings come from buying NICs secondhand and sticking with unmanaged switches.
When Gigabit Becomes the Bottleneck
Gigabit Ethernet tops out at around 112 MB/s of real throughput. A basic NVMe SSD reads at 3,500 MB/s or more. That means your network is roughly 30 times slower than your storage - and for anyone running a NAS, this gap shows up fast.
Transferring a 1TB video editing project to your NAS takes about 2.5 hours over gigabit. Backing up a large photo library crawls. Proxmox live migrations between nodes stall while the network drains memory pages at 112 MB/s. Backup jobs that should finish in minutes stretch into hours.
Here is how the common speeds compare:
| Speed Tier | Practical Throughput | Time to Transfer 1 TB |
|---|---|---|
| 1 GbE | 112 MB/s | ~2.5 hours |
| 2.5 GbE | 280 MB/s | ~1 hour |
| 10 GbE | 1,180 MB/s | ~15 minutes |
You might wonder about 2.5GbE as a middle ground. It is cheaper, but it only delivers a 2.5x speed improvement. For NVMe-backed NAS setups, 2.5GbE still leaves most of your storage performance on the table. The price gap has also narrowed considerably: 10GbE switches that cost $500+ in 2023 now sell for $80-150 in 2026.
Choosing a 10GbE Switch
The switch is the most expensive single component and the one that determines how many devices you can connect at full speed. For most homelabs, an unmanaged switch with 5 ports is the right starting point.
Budget Unmanaged Switches
| Switch | Ports | Key Feature | Approx. Price |
|---|---|---|---|
| NICGIGA 6-port | 4x 10G + 2x 2.5G | Cheapest option | ~$80 |
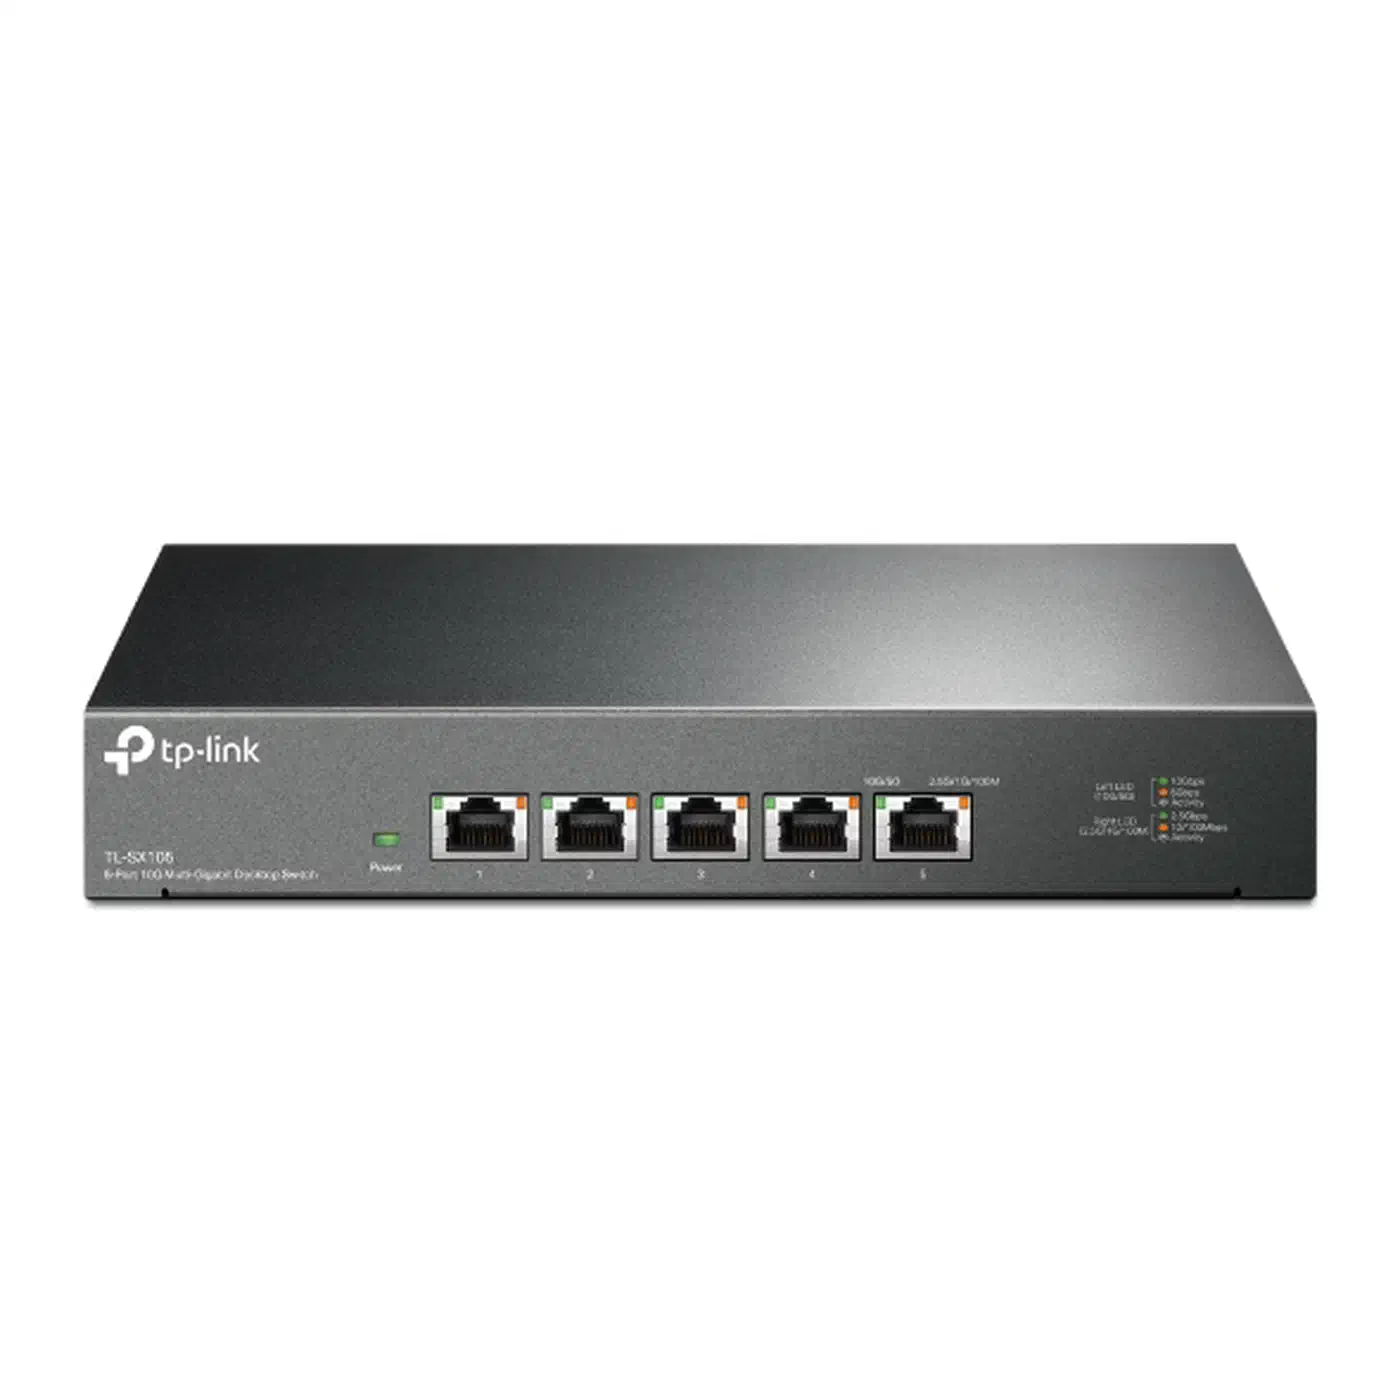
| TP-Link TL-SX105 | 5x 10G | Fanless, silent, 100 Gbps switching capacity | ~$90 |
| TRENDnet TEG-S750 | 5x 10G | Quiet, solid auto-negotiation | ~$100 |
| TP-Link TL-SX1008 | 8x 10G | Smart fan, best for larger setups | ~$150 |
The TP-Link TL-SX105 is a strong default pick. It is completely fanless, draws about 21W maximum, supports jumbo frames up to 10 KB, and auto-negotiates across five speeds (100 Mbps, 1G, 2.5G, 5G, 10G). Wall-mountable, metal casing, and dead silent in a living space.
For advanced users who need VLANs or traffic monitoring, the NETGEAR MS510TXM is an 8-port managed option at around $350.
What to Avoid
Stay away from switches that only offer SFP+ ports without RJ45. SFP+ requires transceivers (or DAC cables), which adds cost and complexity. For point-to-point links between a server and switch in the same rack, SFP+ with DAC cables is actually cheaper and lower power (about 0.7W per port versus 2-5W for 10GBASE-T), but for a general-purpose homelab switch you want RJ45 ports.
Port Count Planning
Count your high-speed devices: NAS + workstation + maybe one or two servers. That is 3-4 ports minimum. Buy a switch with at least one port of headroom for future additions. Five ports covers most homelabs; eight ports if you run multiple Proxmox nodes, a setup that pairs well with a cluster of low-power machines like these .
Cabling - Cat6a Is the Sweet Spot
Cabling is easy to overlook in a 10GbE upgrade. Wrong cables silently cause link negotiation failures or force the connection to downgrade to a slower speed.
Cat6a is the correct choice for 10GbE. It supports 10GBASE-T at the full 100-meter distance and was designed specifically for this purpose, with 500 MHz bandwidth providing plenty of headroom.
Cat6 technically supports 10G, but only up to 37-55 meters depending on crosstalk conditions. It works fine for short patch cables between nearby devices but is risky for in-wall runs.
Cat5e does not support 10GbE at any distance. This is a common misconception.
Solid vs. Stranded Core
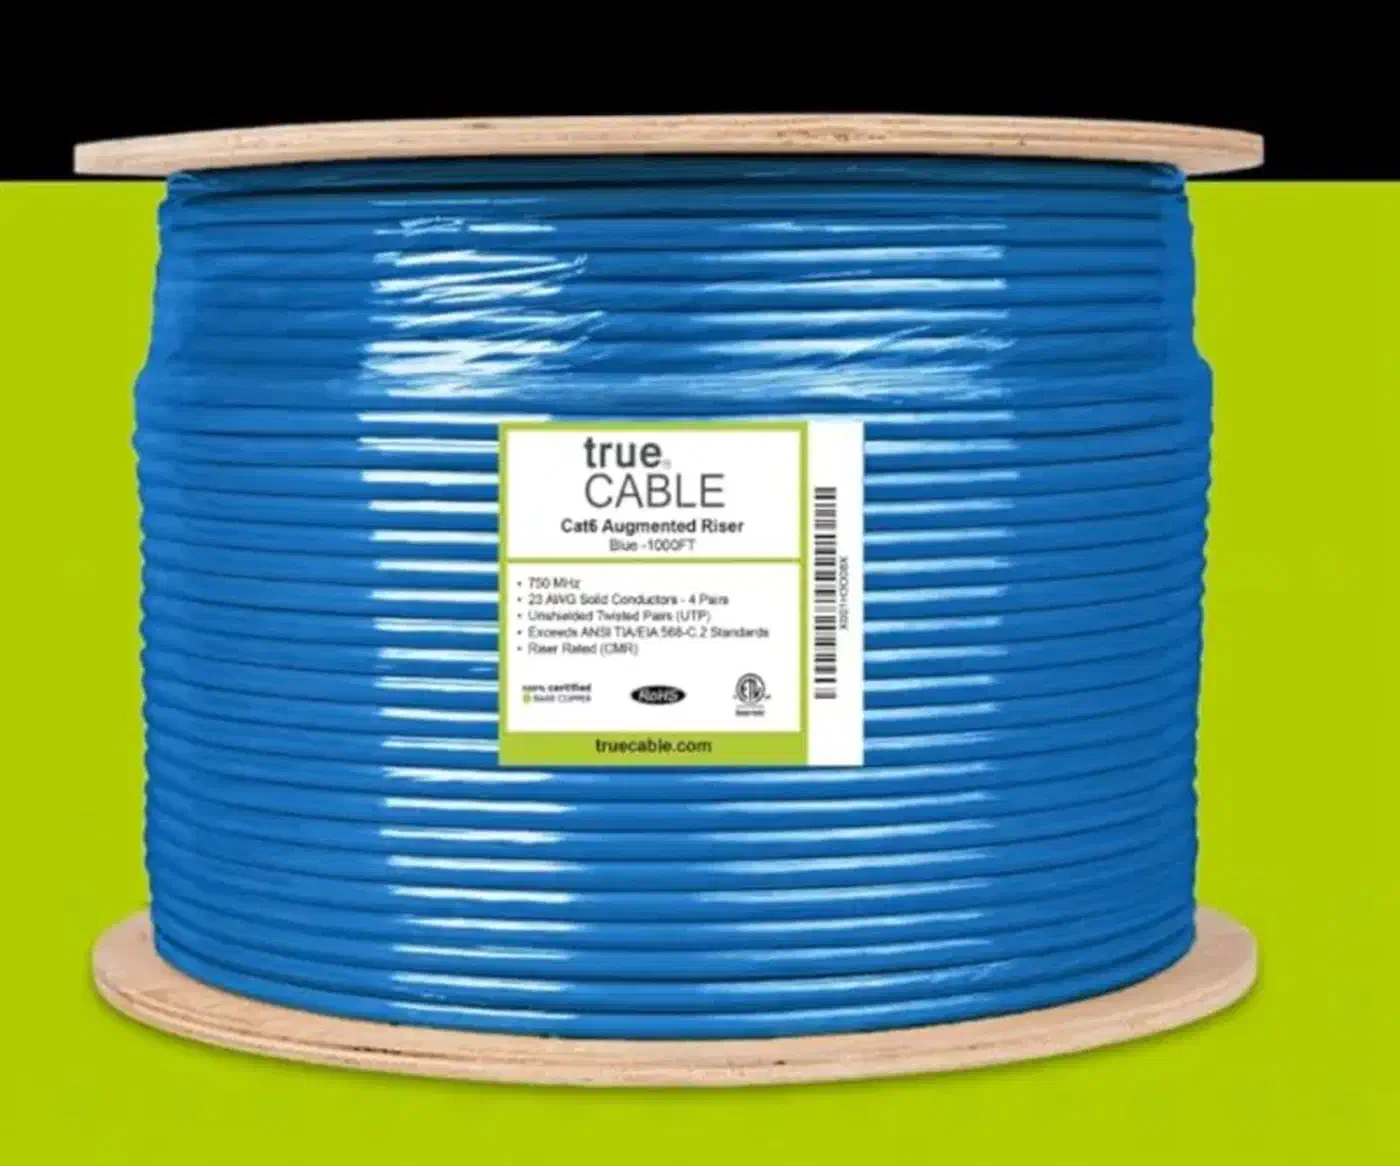
Use solid-core cable for permanent in-wall runs. It carries the signal better over distance but is stiffer and harder to route around tight corners. Use stranded cable for patch cables - it is flexible and easier to handle at short lengths.
Shielded vs. Unshielded
For home runs under 30 meters, unshielded (UTP) Cat6a works fine. Shielding (S/FTP) matters in electrically noisy environments - near fluorescent lighting banks, electric motors, or long parallel runs next to electrical conduit. If you do use shielded cable, both ends must be properly grounded or the shield becomes an antenna.
Cost and Testing
Cat6a bulk cable runs $0.28-0.50 per foot for CMR-rated solid copper. Pre-made patch cables cost $8-15 each. A basic cable tester ($30) verifies continuity and wiring order, which is sufficient for home use. Full cable certification requires a $2,000+ tool and is overkill outside of commercial installations.
Buy pre-terminated patch cables for connections between devices. Only crimp your own for in-wall runs where you need exact lengths. And always use pure copper - avoid copper-clad aluminum (CCA) cable, which has higher resistance and causes problems with PoE devices.
Adding 10GbE NICs to Your Devices
Most PCs and NAS units ship with 1GbE ports. Adding 10GbE requires either a PCIe card or a USB adapter.
PCIe 10GbE Cards
PCIe cards deliver the best performance and are surprisingly affordable on the secondhand market:
The Intel X550-T2 is the default recommendation for most builds. It has dual ports, excellent Linux driver support, and refurbished units sell for $50-70. If you want to spend even less, the Mellanox ConnectX-3 (MCX311A-XCAT) goes for around $23 on eBay with rock-solid Linux support via the mlx4 driver. The ConnectX-3 is SFP+ only, though, so you will need a DAC cable or transceiver to connect it to an RJ45 switch. For a new card with RJ45, the Aquantia AQC107 - sold as the ASUS XG-C100C
- runs about $80 and has good mainline Linux kernel support.
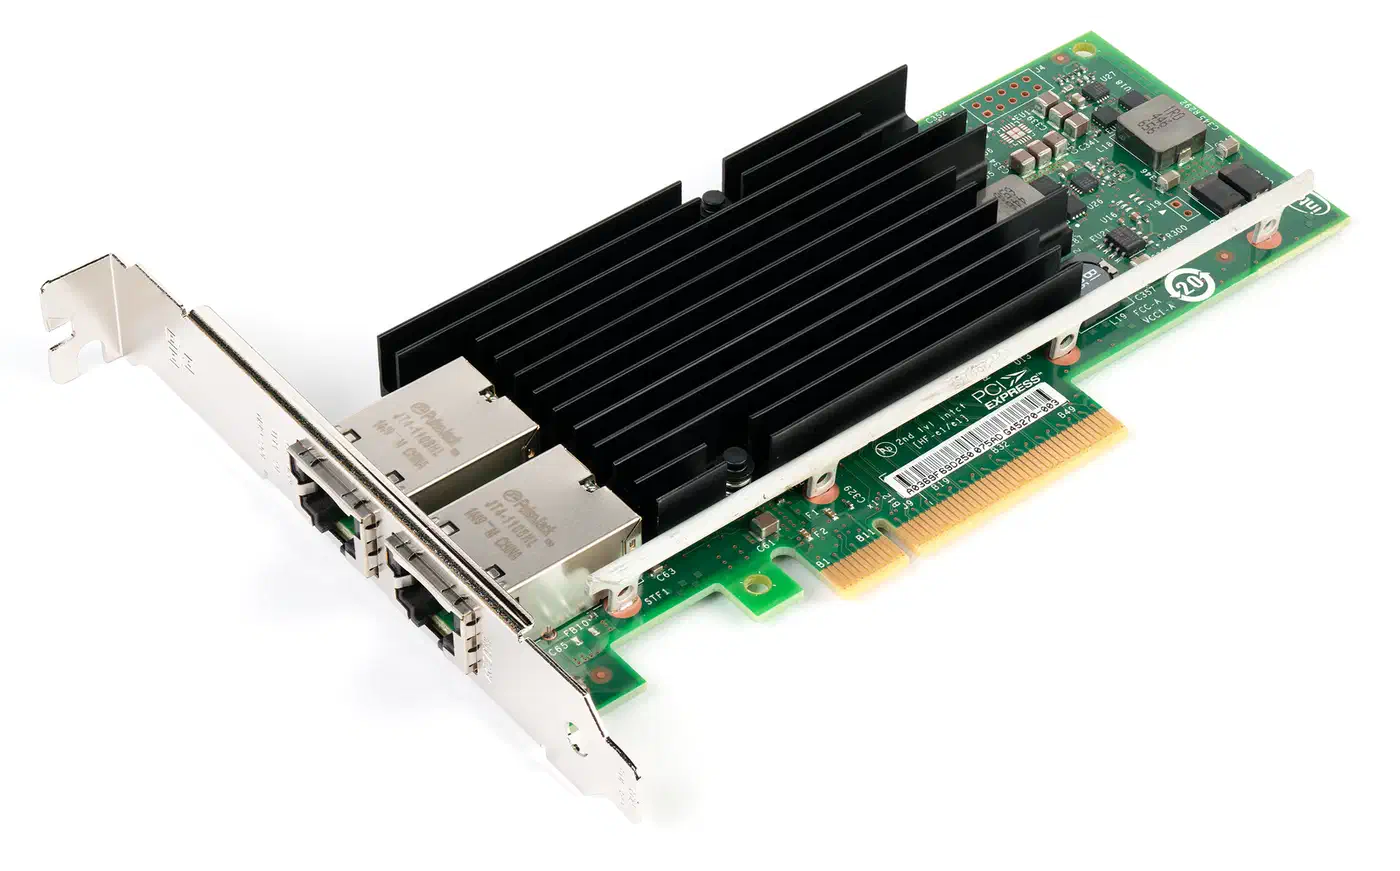
Before buying any NIC, verify the chipset has mainline Linux kernel driver support. Run lspci to identify the chipset and modinfo <driver_name> to confirm the module exists in your kernel. Power consumption for PCIe 10GbE cards ranges from 5-12W.
USB 10GbE Adapters
For laptops or devices without PCIe slots, options are limited. USB 3.2 Gen 2 maxes out at about 1 GB/s, which is slightly below 10GbE wire speed. The QNAP QNA-UC5G1T is a well-regarded USB-C to 5GbE adapter at around $90 - not true 10GbE, but a significant upgrade from gigabit for laptop users.
NAS Compatibility
Synology and QNAP both sell 10GbE add-in cards for their NAS units. TrueNAS runs on standard hardware and supports any Linux-compatible NIC, making it the most flexible option.
Thunderbolt as an Alternative
Mac users and anyone with Thunderbolt 3/4 ports have another option: Thunderbolt-to-10GbE adapters like the Sonnet Solo10G or CalDigit Connect 10G . These provide full 10GbE over Thunderbolt with no PCIe slot required. They show up automatically in macOS with no driver installation. Expect real-world speeds around 9.4-9.5 Gbps. The downside is cost: Thunderbolt 10GbE adapters typically run $150-200. Newer machines have more headroom to work with, since Thunderbolt 5 doubles the bandwidth available to that one port.
Configuring 10GbE on Linux
Once the hardware is connected, Linux needs minimal configuration. Most modern distributions recognize 10GbE NICs automatically.
Verify Link Speed
ethtool eth1 | grep SpeedThis should report 10000Mb/s. If it negotiates at 1G instead, check your cable quality, try a different switch port, and verify that both ends support 10G.
Enable Jumbo Frames
Jumbo frames (MTU 9000) reduce CPU overhead by sending fewer, larger packets. This must be enabled on the switch, the NIC, and the NAS - all three, or it will not work.
# Test temporarily
ip link set eth1 mtu 9000

# Verify path MTU (8972 = 9000 minus 28 bytes of header)
ping -M do -s 8972 <nas-ip>
To make the MTU change persistent, configure it in /etc/netplan/ (Ubuntu/Debian) or through NetworkManager.
Benchmark with iperf3
Run iperf3 on one end as a server and connect from the other:
# On the NAS or server
iperf3 -s

# On the workstation
iperf3 -c <server-ip>
You should see 9.3-9.5 Gbps. If throughput is significantly lower, check for MTU mismatches, firewall rules on the 10G interface, or PCIe lane bottlenecks (the NIC needs at least a x4 PCIe slot).
Performance Tuning
For maximum throughput, consider pinning NIC interrupts to specific CPU cores. The irqbalance service handles this automatically on most systems, but manual tuning via /proc/irq/*/smp_affinity can squeeze out the last few percent.
Keep firewall rules minimal on the 10G interface. nftables processing adds measurable overhead at these speeds. If the 10G link only connects trusted homelab devices, consider skipping the firewall on that interface entirely. For a complete ruleset that pairs packet filtering with traffic shaping, see how to turn a Linux box into a full software router
.
If auto-negotiation fails persistently, force the speed:
ethtool -s eth1 speed 10000 duplex full autoneg offNFS vs. SMB on 10GbE
The protocol you use for file sharing matters more at 10GbE speeds than it does at gigabit, because protocol overhead that was invisible at 112 MB/s becomes measurable at 1,100 MB/s.
NFS generally delivers higher throughput with lower CPU overhead for Linux-to-Linux transfers. In typical benchmarks, NFS achieves roughly 30% higher random read performance than SMB. For sequential large-file transfers (video editing, VM disk images), NFS saturates a 10GbE link with less effort.
SMB3 has improved considerably, though, and supports multichannel - using multiple NICs or connections simultaneously. For mixed environments with Windows, macOS, and Linux clients, SMB is the practical choice. SMB Direct (RDMA) can match or exceed NFS throughput for large sequential transfers if your hardware supports it.
For a Linux-only homelab, use NFS. For anything that touches Windows or macOS regularly, SMB3 is the safer default.
Mixing 10GbE and 1GbE Devices
A common concern: “Can I plug my 1GbE devices into a 10GbE switch?” Yes. Any 10GBASE-T switch with auto-negotiation handles this transparently. The 10GbE ports negotiate down to whatever speed the connected device supports - 1G, 2.5G, or 5G. Each port operates independently.
The only limitation is that a 1GbE device will still communicate at 1GbE speeds, even when talking to a 10GbE device on the same switch. The switch handles the speed translation internally. There is no performance penalty to the 10GbE devices.
This means you can upgrade incrementally. Start with your NAS and workstation on 10GbE, and leave everything else on gigabit. Add more 10GbE NICs as budget allows.
LACP Link Aggregation - When It Helps
LACP (Link Aggregation Control Protocol) bonds multiple Ethernet links into a single logical connection. Two bonded 10GbE links give you 20 Gbps aggregate bandwidth and redundancy if one link fails.
The catch: LACP does not speed up a single transfer between two devices. It distributes traffic across links based on source/destination pairs. This means LACP helps when multiple clients access the same NAS simultaneously - each client’s traffic can flow over a different physical link. For a single workstation transferring files to a NAS, a single 10GbE link is just as fast as a bonded pair.
LACP requires a managed switch and NICs that support bonding. For most homelabs with 2-3 clients, a single 10GbE link per device is sufficient. LACP makes more sense when you have 5+ clients hitting the same NAS and need aggregate throughput beyond 10 Gbps.
Real-World Cost and Performance
Here is what a budget build actually costs:
| Component | Model | Price |
|---|---|---|
| Switch | TP-Link TL-SX105 | $90 |
| NIC (workstation) | Intel X550-T2 (refurbished) | $55 |
| NIC (NAS) | Mellanox ConnectX-3 (eBay) | $25 |
| Cat6a cables (3x 5m) | Pre-terminated patch cables | $30 |
| Total | ~$200 |
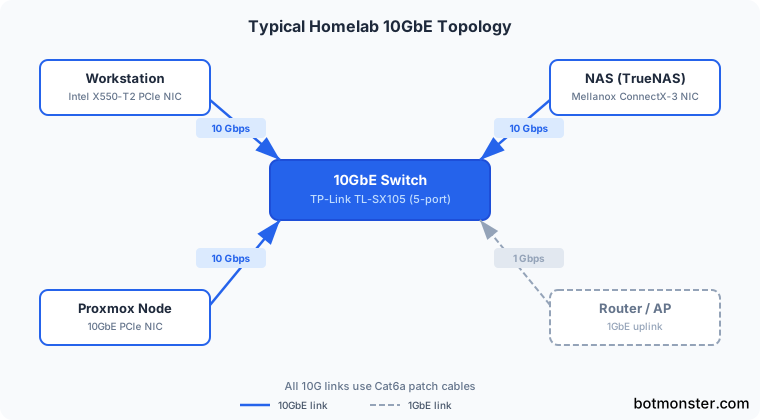
With this setup, transferring files from an NVMe-backed TrueNAS system (mirrored NVMe pool) to a workstation over NFS yields 1,050-1,100 MB/s sustained. That is a 9.4x improvement over the same setup on gigabit.
The fanless TP-Link switch adds about 8W to your homelab’s power draw. The NICs add 5-12W each. Total additional power consumption for the 10GbE upgrade is roughly 20-30W. To turn those watts into a yearly dollar figure, check your network gear’s energy cost in our calculator.
When to Spend More
If you need more than 5 ports, VLAN support, or aggregated 10G links, budget $300-500. The NETGEAR MS510TXM at $350 covers most of those needs. For even larger setups, used enterprise switches (like the MikroTik CRS309-1G-8S+IN with 8 SFP+ ports) appear on the secondhand market for $200-300 and support advanced routing features.
Getting Started
The upgrade path is short: buy a switch, add NICs to your two highest-bandwidth devices (typically NAS and workstation), connect them with Cat6a patch cables, and verify the link speed with ethtool. Enable jumbo frames if both ends support it, benchmark with iperf3, and you are done. The whole process takes about an hour of hands-on time, and the speed difference is immediately obvious the first time you drag a large file to your NAS. If you are still choosing hardware for the server end of that link, our guide to building a fanless home server under $300
covers the best silent, low-power platforms for NAS and general homelab workloads.