 Botmonster Tech
Custom Linux ISOs with Live Build or Cubic: scripted or GUI

You can build a personalized Linux live USB image with your own packages, desktop, config files, and branding. Two tools cover this. Debian’s live-build runs on the command line and builds repeatable ISOs from config files, so it fits CI pipelines well. Cubic, the Custom Ubuntu ISO Creator, does the reverse: a GUI that opens an existing ISO, drops you into a chroot, then rebuilds it. Both make bootable ISOs you can flash with Ventoy, dd, or Balena Etcher.
Why Build a Custom Linux ISO
Stock distribution ISOs are built for the widest audience, so they suit nobody in particular. Have you ever booted a live USB, then spent the first twenty minutes installing tools before you can work? A custom ISO cuts that wait.
The clearest use case is a rescue and repair USB. Pre-install testdisk, photorec, gparted, chntpw, btrfs-progs, zfsutils-linux, and mdadm next to your SSH keys. You then get a stick that boots on any machine, ready to recover partitions, reset Windows passwords, or rebuild a degraded RAID array with no internet connection.
Another common case is rapid deployment. Bake in your dotfiles, SSH authorized_keys, base packages (Neovim, tmux, htop, ripgrep, fzf), and a preseed config. New machines then come up identical in minutes, not hours.
Custom ISOs also work well for kiosks and appliances. Build a minimal image with one app: a browser kiosk, a signage display, or a POS terminal. It boots straight into the app with no desktop overhead. Pair this with the toram kernel parameter to run from RAM, then pull the USB after boot.
For training or workshops, hand a live USB to every participant. Each one carries the same dev tools, sample projects, and exercise files. Everyone gets an identical setup, no matter what laptop they brought.
Then there are air-gapped setups. The target systems cannot reach the internet, so you must bundle all the .deb packages and their dependencies onto the ISO itself. This comes up often in government, defense, and industrial control work.
The two main tools for Debian and Ubuntu-based custom ISOs differ in their approach:
| Feature | live-build | Cubic |
|---|---|---|
| Interface | CLI only | GUI with embedded terminal |
| Reproducibility | Fully scripted, Git-friendly | Manual, project-file based |
| Base distribution | Debian, Ubuntu | Ubuntu, Debian-based |
| Best for | Automated/CI builds, fleet deployment | One-off customizations, quick tweaks |
| Learning curve | Moderate (config file structure) | Low (visual wizard) |
| Installer support | Optional Debian Installer | Preserves source ISO installer |
For RPM-based distributions, livemedia-creator with Lorax handles Fedora, and Archiso covers Arch Linux. This post sticks to the Debian and Ubuntu toolchain, since it covers the widest range of use cases.
Building a Custom ISO with Debian Live Build
live-build is the official Debian project tool for making live system images. It runs entirely on the command line and gives repeatable results from config files. That makes it easy to version-control your ISO recipe and rebuild it in CI. Bake in an SSH config that scales and every machine from that image reaches your fleet on first boot.
Install and Initialize
On Debian 13 (Trixie) or Ubuntu 24.04+, install with:
sudo apt install live-buildVerify the installation:
lb --versionCreate and initialize a build directory:
mkdir ~/custom-iso && cd ~/custom-iso
lb config
This creates the auto/, config/, and local/ directories that live-build expects. Every change from here goes into the config/ tree.
Configure the Base System
Set the distribution, architecture, and image type:
lb config \
  --distribution trixie \
  --architectures amd64 \
  --binary-images iso-hybrid \
  --debian-installer none \
  --apt-indices false
The iso-hybrid option makes an ISO you can write straight to USB with dd. Setting --debian-installer none drops the graphical installer for a pure live system. Add it back if you want an installable image. The --apt-indices false flag removes the package index from the final image to save space.
Add Packages
Create a package list file:
mkdir -p config/package-lists
cat > config/package-lists/custom.list.chroot << 'EOF'
neovim
tmux
git
firefox-esr
gparted
build-essential
htop
ripgrep
fzf
curl
wget
openssh-server
EOF
One package name per line. live-build resolves dependencies for you, so you only list what you actually want.
Add Custom Files
Place files in config/includes.chroot/ mirroring the target filesystem root. For example:
config/includes.chroot/etc/skel/.bashrc: default shell config for new usersconfig/includes.chroot/usr/local/bin/my-tool: custom scripts (make sure they are executable)config/includes.chroot/etc/ssh/sshd_config.d/custom.conf: SSH server tweaksconfig/includes.chroot/root/.ssh/authorized_keys: your SSH public key for root access on boot
Any file placed here ends up at the same path in the live filesystem.
Build the ISO
sudo lb build 2>&1 | tee build.logThis takes 10 to 30 minutes, based on how many packages you picked and your mirror speed. The build directory grows to roughly 10-15 GB while it runs. The output is live-image-amd64.hybrid.iso in the build directory.
Before rebuilding with different settings, always clean first:
sudo lb cleanOr for a full reset including downloaded packages:
sudo lb clean --purgeMinimizing ISO Size
For a truly minimal image, start with a stripped-down base:
lb config --debootstrap-options "--variant=minbase"Remove unnecessary locales and documentation by creating config/includes.chroot/etc/dpkg/dpkg.cfg.d/excludes:
path-exclude=/usr/share/doc/*
path-exclude=/usr/share/man/*
path-exclude=/usr/share/locale/*
path-include=/usr/share/locale/en*
Add localepurge to your package list to strip unused locale data during the build. Together these steps can shrink a desktop ISO from 2+ GB to under 800 MB for a minimal system.
Customizing an Existing ISO with Cubic
Cubic, the Custom Ubuntu ISO Creator, takes an existing ISO and extracts its squashfs filesystem. You then modify it through a chroot, and Cubic rebuilds it. It is the fastest path when you want a stock Ubuntu or Debian ISO with a few changes, and you would rather skip a build system.
Install and Launch
Add the PPA and install on Ubuntu 22.04 or 24.04:
sudo apt-add-repository ppa:cubic-wizard/release
sudo apt update
sudo apt install cubic
Launch from the application menu or run cubic from the terminal.
Start a Project
Cubic walks you through a wizard:
- Select a working directory. Cubic stores extracted files here, so pick a spot with at least 15-20 GB of free space.
- Choose a source ISO, any Ubuntu or Debian-based
.isofile. Cubic extracts the squashfs filesystem and drops you into the chroot.
The Interactive Chroot
You land in a root shell inside the extracted filesystem. Anything you do here becomes part of the final ISO.
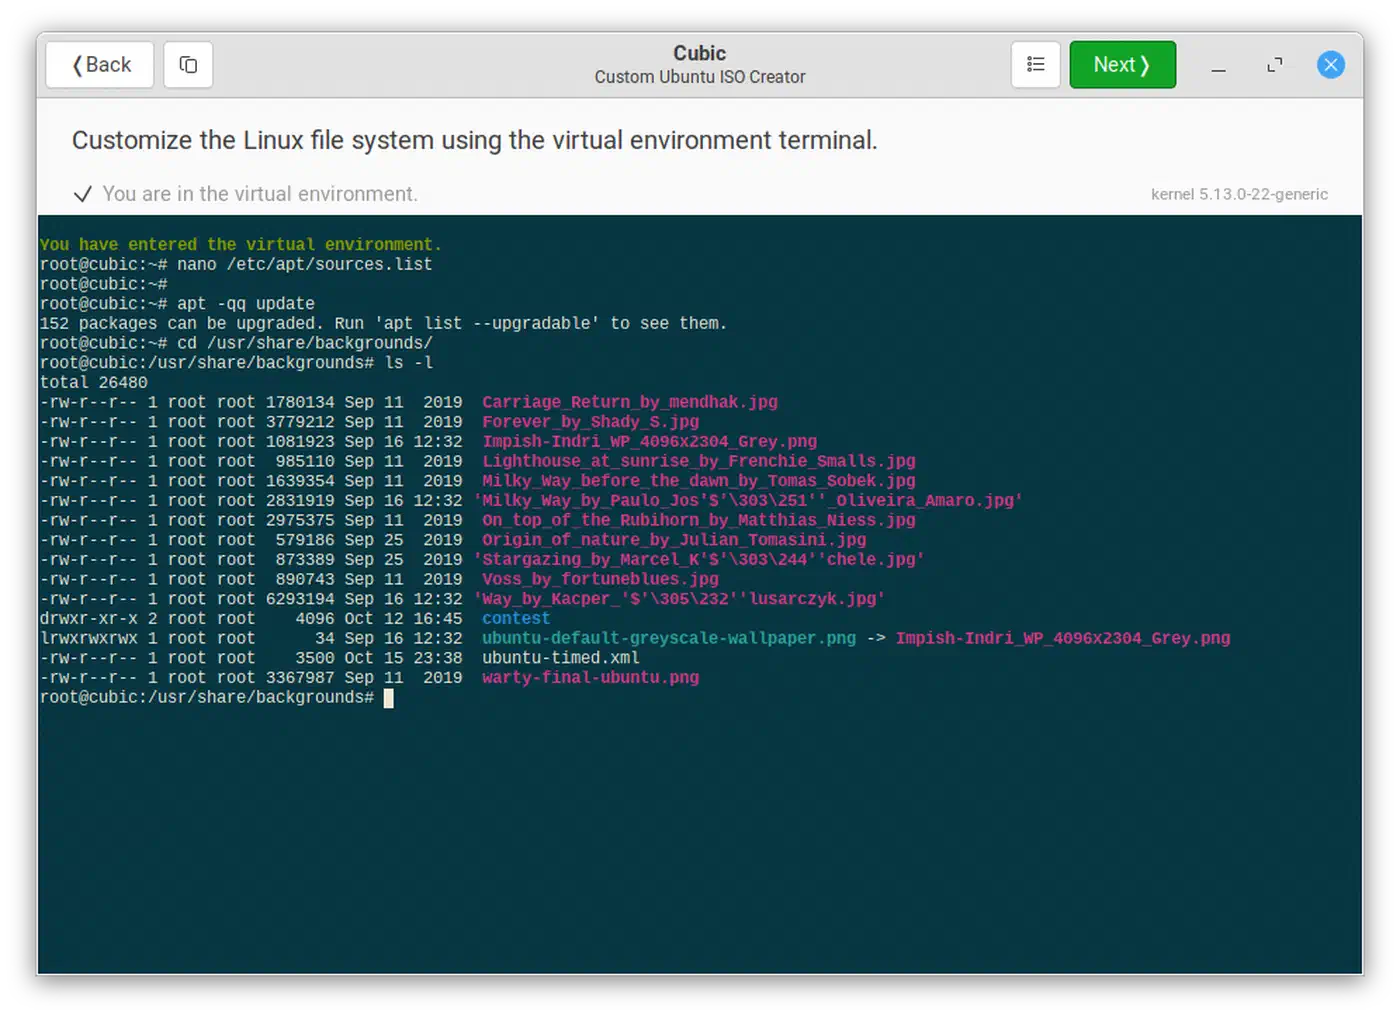
# Update package lists
apt update

# Install your tools
apt install neovim tmux git htop ripgrep fzf testdisk gparted

# Edit configuration files
nano /etc/skel/.bashrc

# Enable or disable services
systemctl enable ssh
systemctl disable cups

# Add your SSH key
mkdir -p /root/.ssh
echo "ssh-ed25519 AAAA..." > /root/.ssh/authorized_keys
chmod 700 /root/.ssh
chmod 600 /root/.ssh/authorized_keys
When you are done, click “Next” to proceed to the remaining tabs.
Kernel and Boot Options
The Kernel tab lets you pick which installed kernel the live system uses. Need specific hardware support? Install a different kernel in the chroot first, for example apt install linux-image-6.12-generic, and it shows up as an option here.
The Boot tab lets you customize GRUB entries and add kernel parameters. Useful additions:
toram: copies the whole filesystem to RAM on boot, so you can pull the USB drivequiet splash: standard silent boot with a splash screennomodeset: fallback for problem GPU drivers
You can also embed a preseed file here for automated installation, if you are building an installable ISO rather than a pure live system.
Generate the ISO
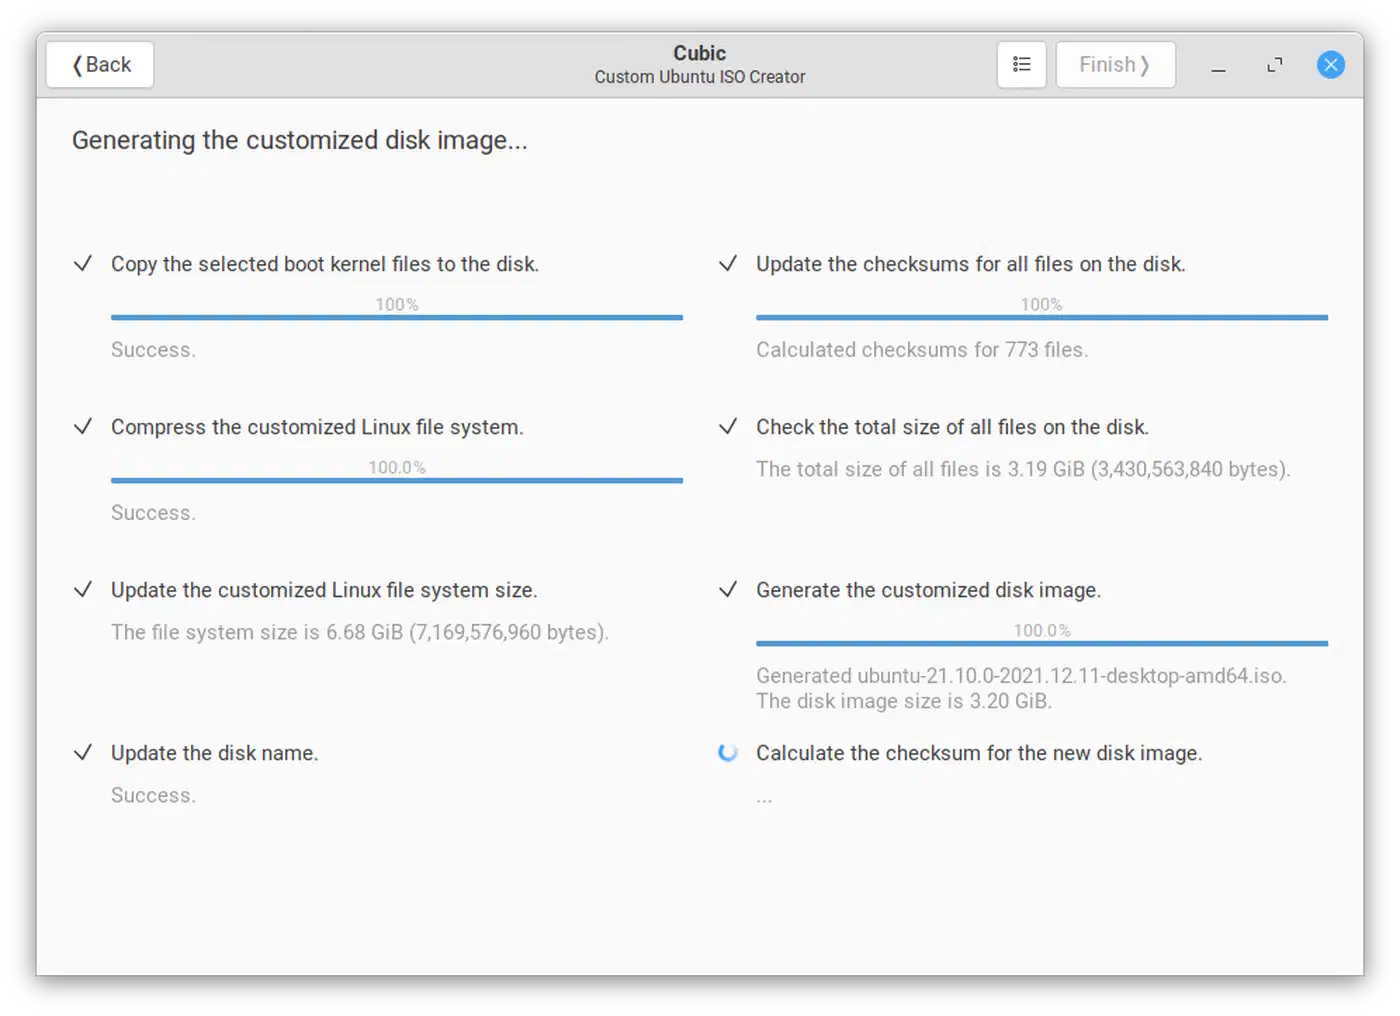
The final screen offers compression options for the squashfs filesystem:
| Algorithm | Compression Ratio | Compress Speed | Decompress Speed | Best For |
|---|---|---|---|---|
| gzip | ~2.9x | 15 MB/s | 128 MB/s | Broad compatibility |
| xz | ~3.4x | 5.5 MB/s | 35 MB/s | Smallest ISO size |
| zstd | ~3.1x | 50+ MB/s | 200+ MB/s | Best balance of size and speed |
| lz4 | ~2.1x | 94 MB/s | 218 MB/s | Fastest boot time |
For most use cases, zstd is the right choice. It makes files only slightly larger than xz, yet decompresses 5-8 times faster, which means shorter boot times. Use xz when you need the smallest ISO for slow connections. Use lz4 when boot speed is the only thing you care about.
Click through, and Cubic rebuilds the ISO into your project directory.
Advanced Customization: Persistence, Branding, and Automation
A custom ISO that resets to its original state on every boot suits kiosks and rescue work. Many use cases, though, need changes to survive reboots. There are also cosmetic and automation tweaks that turn a rough build into a polished one.
Persistent Storage with Ventoy
Ventoy lets you put many ISO files on one USB drive and boot any of them from a menu. It also supports persistence, which saves changes between sessions.
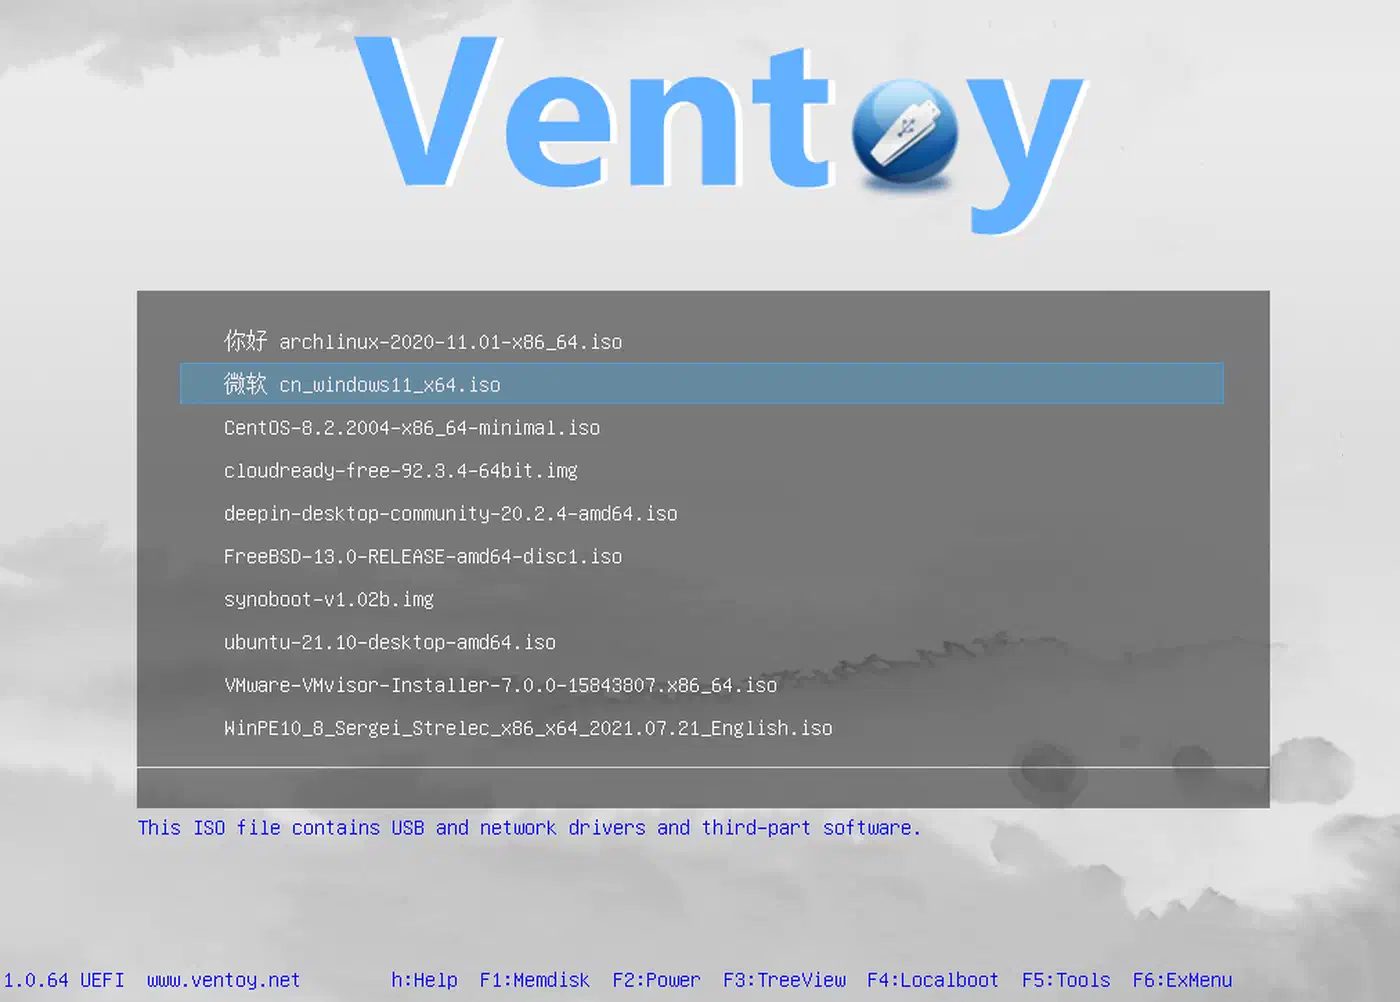
After flashing Ventoy to a USB drive, set up persistence:
Create a persistence data file (ext4 formatted, any size you need):
sudo dd if=/dev/zero of=persistence.dat bs=1M count=4096
sudo mkfs.ext4 -L persistence persistence.dat
Place the file on the Ventoy partition and create
/ventoy/ventoy.json:{ "persistence": [ { "image": "/my-custom-live.iso", "backend": "/persistence.dat" } ] }
Every change you make during the live session persists across reboots: installed packages, saved files, modified configs. You can define separate persistence files for different ISOs on the same drive.
Native Persistence with live-build
If you are not using Ventoy, live-build supports persistence natively. Configure it during the build:
lb config \
  --binary-filesystem fat32 \
  --bootappend-live "boot=live persistence"
After flashing the ISO, create a separate partition on the USB drive labeled persistence and add a persistence.conf file containing:
/ unionThis tells the live system to overlay all changes onto the persistence partition.
Custom Boot Branding
Replace the default GRUB splash screen by placing a splash.png (1920x1080 for modern displays, or 640x480 for legacy compatibility) in config/includes.binary/boot/grub/.
For the boot animation, install plymouth-themes in your package list and create a custom Plymouth theme:
# In the chroot or config/includes.chroot/
mkdir -p /usr/share/plymouth/themes/my-theme/
# Add your theme files (script, images, etc.)
plymouth-set-default-theme my-theme
CI/CD Automation with live-build
The real power of live-build over Cubic is automation. Check the auto/config, auto/build, and auto/clean scripts into Git. A basic auto/config script:
#!/bin/sh
set -e

lb config noauto \
  --distribution trixie \
  --architectures amd64 \
  --binary-images iso-hybrid \
  --debian-installer none \
  --apt-indices false \
  --cache true \
  "${@}"
Run sudo lb build in a GitHub Actions workflow or GitLab CI job using a Debian container image. Publish the resulting ISO as a release artifact. Every commit to your config repo then produces a fresh, repeatable ISO with no manual work.
Adding a Graphical Installer with Calamares
To turn a live ISO into an installable distribution, add Calamares, a framework for building distribution installers. Install calamares in your package list, set up its modules (partitioning, locale, user creation), and add a desktop shortcut to launch it from the live session. The Calamares wiki has a deployer’s guide that covers module config and branding.
Testing, Flashing, and Distributing Your Custom ISO
Building the ISO is half the work. You still need to check that it boots, flash it to physical media, and maybe hand it to others.
Test with QEMU
Before wasting time on physical USB drives, test in a virtual machine:
# Basic test (BIOS boot)
qemu-system-x86_64 -m 4G -cdrom live-image-amd64.hybrid.iso -boot d -enable-kvm

# UEFI test
qemu-system-x86_64 -m 4G -cdrom live-image-amd64.hybrid.iso \
  -boot d -enable-kvm -bios /usr/share/ovmf/OVMF.fd
Test both BIOS and UEFI boot modes. Check that networking works, your packages are present, custom configs apply, and services start as expected.
Flash to USB
The classic approach:
# ALWAYS verify the target device first
lsblk

# Write the ISO
sudo dd if=live-image-amd64.hybrid.iso of=/dev/sdX bs=4M status=progress conv=fsync
Replace /dev/sdX with your actual USB device. Double-check with lsblk first, since writing to the wrong device destroys data. For multi-ISO USB drives, use Ventoy instead of dd.
Verify and Distribute
Generate checksums and optionally sign them for distribution:
sha256sum live-image-amd64.hybrid.iso > SHA256SUMS
gpg --detach-sign SHA256SUMS
Host the ISO on a Gitea or Forgejo release page, a Nextcloud share, or S3-compatible storage. Ship the ISO file, SHA256SUMS, and SHA256SUMS.sig so recipients can verify integrity.
Common Boot Failures
When your custom ISO refuses to boot on real hardware, these are the usual suspects:
- Secure Boot rejection means the live kernel is not signed with a trusted key. Sign it with your own Machine Owner Key (MOK), or turn off Secure Boot in the BIOS.
- A black screen after the bootloader usually means you need
nomodesetin the kernel parameters. This is common with NVIDIA GPUs. - No network after boot points to missing firmware. Include
firmware-linux-nonfree(Debian) or the matchinglinux-firmwarepackage in your build. - Slow boot on USB 2.0 ports gets worse with xz compression, since slow decompression piles onto slow USB transfer speeds. Switch to zstd or lz4 for USB builds.
- If the ISO is over 4 GB and you write it to a FAT32 USB drive, the write may fail. Use Ventoy, which handles large ISOs, or use
dd, which writes the raw image and skips the filesystem size limit.
Which Tool Should You Pick
Start with Cubic if you want to modify an existing ISO in an afternoon, without reading docs on config file layouts. Move to live-build when you need repeatable, version-controlled builds that run unattended in CI. The two tools cover different parts of the workflow. Nothing stops you from prototyping in Cubic, then porting what you learned into a live-build config for the long haul. Either way, the end result is a bootable ISO built for your exact needs: a rescue toolkit that fits on a 1 GB stick, or a full dev environment ready to roll out across a lab of workstations.