Automated AES-256 Backups: 500GB in 5 min for $3 a month

Pair Restic with Rclone and you get client-side AES-256 encryption, smart deduplication, and a backend that talks to 70 plus cloud providers. A systemd timer and a short wrapper script handle the schedule. The result runs unattended, prunes old snapshots on its own, and lets you swap clouds by editing one config line. A tuned setup backs up 500 GB in under five minutes and costs as little as $3 a month on Backblaze B2.
Why Restic + Rclone Is the Modern Linux Backup Stack
Traditional backup tools leave gaps. rsync has no encryption and no dedup. tar archives are bulky and slow to update. Proprietary cloud clients lock you into one vendor. The Restic and Rclone pairing closes those gaps, and it has become the de facto Linux backup stack. It is also the right safety net for the Git repos and build artifacts a Gitea Actions setup leaves behind
, all of which live on hardware you own. The same goes for the ClickHouse and Postgres volumes a Plausible deployment depends on
: restic is the recommended way to ship those offsite.
The two tools split the work cleanly. Restic owns the data. It sets up the repo, applies AES-256-CTR encryption with a Poly1305 MAC, runs content-defined chunking (CDC) for dedup, takes incremental snapshots with metadata, and manages their life with forget and prune. Every blob is encrypted before it leaves your machine. On later runs, only the changed blocks go up.
Rclone owns the transport. It handles auth and file transfer to 70 plus backends like S3, Backblaze B2, Google Drive, SFTP, SMB, WebDAV, and the local filesystem. It also takes care of bandwidth limits, retries, chunked uploads, and server-side copies when the backend allows them.
Restic’s rclone backend spawns rclone serve restic as a child process. The two speak Restic’s REST protocol over stdin and stdout. No network port opens, and no separate daemon runs. From Restic’s view, Rclone is just a local backend that happens to reach anywhere.

How This Compares to Alternatives
| Tool | Encryption | Cloud-native | Deduplication | Speed |
|---|---|---|---|---|
| Restic + Rclone | AES-256-CTR, built-in | 70+ backends via Rclone | CDC chunking | 120-160 MB/s local |
| Borg | AES-256, built-in | No (requires FUSE mount hacks) | CDC chunking | 180-220 MB/s local |
| Duplicity | GPG-based | Limited (S3, Swift) | Full-chain based | Slow on large repos |
| Kopia | AES-256-GCM, built-in | Native S3, B2, GCS, Azure | Content-defined | Comparable to Restic |
Borg is faster in raw throughput, but it lacks native cloud support. To back up to a remote S3 bucket with Borg, you have to mount the bucket as a FUSE filesystem or run a Borg server on the remote end. Both add fragility. Duplicity leans on full-chain backups, so it gets slower as the repo grows. Kopia is a strong contender with a similar design, but the community and docs are smaller, so you’ll find fewer tutorials and fixes.
On a typical dev workstation with 200 GB of data, dedup saves 60 to 70 percent of storage after the first month of daily snapshots. The CDC algorithm splits files into chunks at content boundaries, so renaming a file or adding bytes at the start does not invalidate the whole file’s worth of chunks.
Installing and Initializing Your Encrypted Backup Repository
Installing both tools and creating your first encrypted repo takes about ten minutes.
Install Restic
The current stable version is 0.18.1.
# Debian/Ubuntu 24.04+
sudo apt install restic

# Fedora 41+
sudo dnf install restic

# Or download the static binary directly
curl -LO https://github.com/restic/restic/releases/download/v0.18.1/restic_0.18.1_linux_amd64.bz2
bunzip2 restic_0.18.1_linux_amd64.bz2
chmod +x restic_0.18.1_linux_amd64
sudo mv restic_0.18.1_linux_amd64 /usr/local/bin/restic

restic version
Install Rclone
The current stable version is v1.73.3.
# Debian/Ubuntu
sudo apt install rclone

# Or install the latest directly
curl https://rclone.org/install.sh | sudo bash

rclone version
Configure an Rclone Remote
Run rclone config to launch the interactive wizard. A Backblaze B2 configuration session looks like this:
$ rclone config
n) New remote
name> b2-backup
Storage> b2
account> YOUR_APPLICATION_KEY_ID
key> YOUR_APPLICATION_KEY
For SFTP, pick sftp as the storage type. Then give the host, the username, and the SSH key
path. The config is saved to ~/.config/rclone/rclone.conf.
Initialize the Repository
restic -r rclone:b2-backup:my-restic-repo initYou’ll be prompted for a repo password. That password encrypts the master key, which in turn encrypts every blob. Lose it and your data is gone. There is no recovery path.
Secure Password Management
Typing the password by hand defeats the point of automation. Store it safely with one of these options:
# Option 1: Password file (simplest)
echo 'your-strong-password' > ~/.config/restic/password
chmod 600 ~/.config/restic/password
export RESTIC_PASSWORD_FILE=~/.config/restic/password

# Option 2: GPG-encrypted password
echo 'your-strong-password' | gpg --encrypt --recipient you@email.com > ~/.config/restic/password.gpg
export RESTIC_PASSWORD_COMMAND="gpg --quiet --decrypt ~/.config/restic/password.gpg"

# Option 3: GNOME keyring via secret-tool
secret-tool store --label='restic' service restic type password
export RESTIC_PASSWORD_COMMAND="secret-tool lookup service restic type password"
Check that the repo works:
restic -r rclone:b2-backup:my-restic-repo cat configThis should print the repo config JSON with no errors.
Running Backups, Excluding Paths, and Managing Snapshots
The Basic Backup Command
restic -r rclone:b2-backup:my-restic-repo backup \
  ~/Documents ~/Projects ~/dotfiles \
  --tag daily
Tags are optional, but they help when you filter snapshots later. You can tag by purpose, such as daily or pre-upgrade, or by content type.
Setting Up Exclusions
Create an exclusion file at ~/.config/restic/excludes:
# Build artifacts and caches
node_modules/
__pycache__/
target/
.venv/
.cache/
.local/share/Trash/

# Large files you don't need backed up
*.iso
*.vmdk
*.qcow2

# IDE and editor caches
.idea/
.vscode/
*.swp
Then reference it in your backup command:
restic backup ~/Documents ~/Projects \
  --exclude-file ~/.config/restic/excludes \
  --exclude-caches
The --exclude-caches flag skips any folder that holds a CACHEDIR.TAG file. Many build tools, like Cargo, Gradle, and ccache, drop one in on their own.
Browsing and Restoring Snapshots
# List all snapshots
restic snapshots

# Filter by tag or host
restic snapshots --tag daily --host myworkstation

# List files in the latest snapshot
restic ls latest

# List a specific path in a specific snapshot
restic ls abc123 /home/user/Projects/

# Full restore
restic restore latest --target /tmp/restore/

# Partial restore - just one directory
restic restore latest \
  --include "/home/user/Documents/taxes/" \
  --target /tmp/restore/

# FUSE mount for interactive browsing
mkdir -p /mnt/restic
restic mount /mnt/restic
# Now browse /mnt/restic/snapshots/ with any file manager
The FUSE mount shines when you want a specific file version but can’t recall which snapshot holds it. Mount the repo, walk the snapshot dirs, and copy out what you need.
Automating with Systemd Timers and Retention Policies
No one remembers to run manual backups for long. A daily timer-driven job
, paired with Restic’s forget and prune commands, runs the whole flow on its own and keeps its own storage in check over time.
The Wrapper Script
Create /usr/local/bin/restic-backup.sh:
#!/usr/bin/env bash
set -euo pipefail

# Prevent concurrent runs
LOCK_FILE="/var/run/restic-backup.lock"
exec 200>"$LOCK_FILE"
flock -n 200 || { echo "Backup already running"; exit 1; }

# Configuration
export RESTIC_REPOSITORY="rclone:b2-backup:my-restic-repo"
export RESTIC_PASSWORD_FILE="/etc/restic/password"
export RCLONE_CONFIG="/etc/restic/rclone.conf"

# Paths to back up
BACKUP_PATHS=(
  /home/user/Documents
  /home/user/Projects
  /home/user/dotfiles
)

EXCLUDE_FILE="/etc/restic/excludes"

echo "Starting backup at $(date)"

# Run the backup
restic backup "${BACKUP_PATHS[@]}" \
  --exclude-file "$EXCLUDE_FILE" \
  --exclude-caches \
  --tag daily \
  --verbose

# Apply retention policy and prune
restic forget \
  --keep-daily 7 \
  --keep-weekly 4 \
  --keep-monthly 12 \
  --keep-yearly 2 \
  --prune

echo "Backup finished at $(date)"

# Ping healthcheck on success (optional)
# curl -fsS -m 10 --retry 5 https://hc-ping.com/YOUR-UUID-HERE
Make it executable:
sudo chmod +x /usr/local/bin/restic-backup.shThe flock call at the top stops overlapping runs. If a prior backup is still going when the timer fires again, the new run exits cleanly instead of breaking the repo.
The Systemd Service Unit
Create /etc/systemd/system/restic-backup.service:
[Unit]
Description=Restic encrypted backup
After=network-online.target
Wants=network-online.target

[Service]
Type=oneshot
ExecStart=/usr/local/bin/restic-backup.sh
Nice=19
IOSchedulingClass=idle
StandardOutput=journal
StandardError=journal
Nice=19 and IOSchedulingClass=idle keep the backup from slowing your normal work. The process uses whatever CPU and disk time is left over after higher-priority tasks.
The Systemd Timer
Create /etc/systemd/system/restic-backup.timer:
[Unit]
Description=Daily Restic backup

[Timer]
OnCalendar=daily
RandomizedDelaySec=1h
Persistent=true

[Install]
WantedBy=timers.targetOnCalendar=dailyfires once per day at midnight, and you can dial it to any schedule.RandomizedDelaySec=1hshifts the start by up to one hour, which avoids a thundering herd on shared storage.Persistent=truecatches up on missed runs, so if your laptop slept through midnight, the backup runs when it wakes.
Enable and start:
sudo systemctl daemon-reload
sudo systemctl enable --now restic-backup.timer
systemctl list-timers --all | grep restic
Understanding the Retention Policy
The forget command with retention flags marks snapshots for removal:
| Flag | Keeps | Example |
|---|---|---|
--keep-daily 7 | One snapshot per day, last 7 days | Mon through Sun |
--keep-weekly 4 | One per week, last 4 weeks | One from each of the last 4 weeks |
--keep-monthly 12 | One per month, last 12 months | Jan through Dec |
--keep-yearly 2 | One per year, last 2 years | 2025 and 2026 |
The --prune flag then reclaims disk space. It drops data blobs that no remaining snapshot points to. Without --prune, the snapshots are forgotten but the data stays on disk. For filesystem-level snapshot rules with the same flavor, see the guide on ZFS snapshot policies
.
Monitoring and Notifications
For simple checks, the systemd journal captures all output:
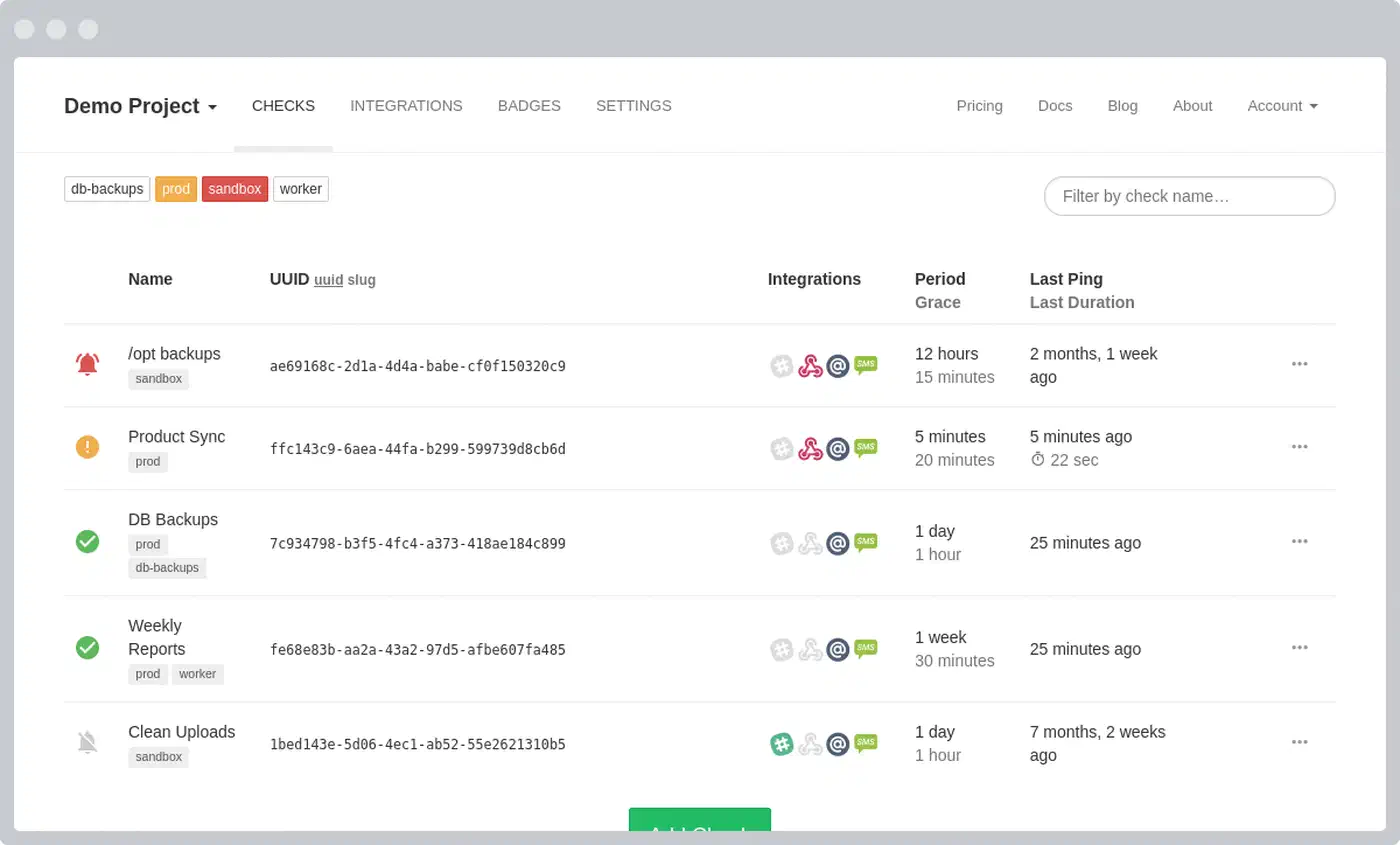
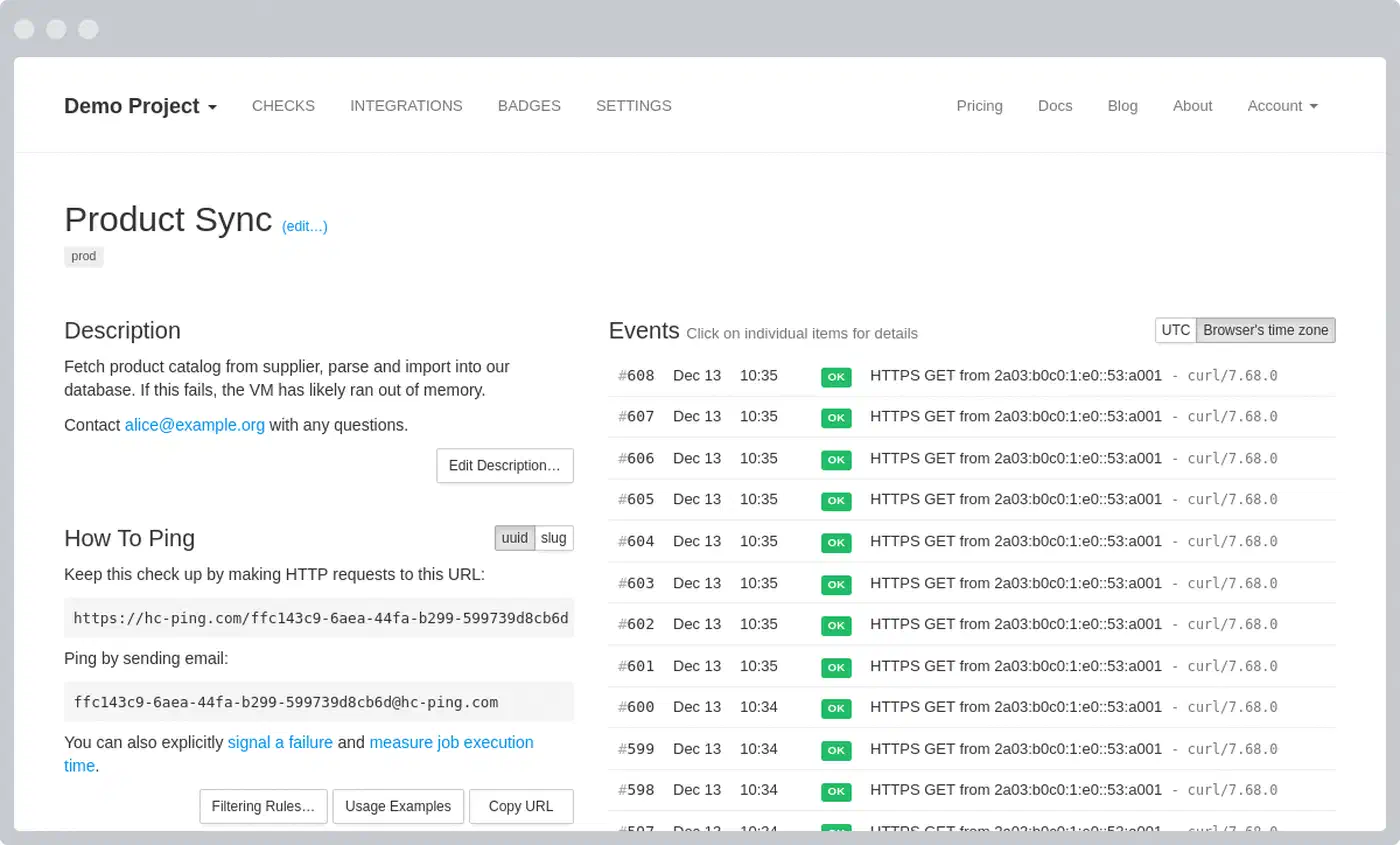
journalctl -u restic-backup.service --since todayFor active alerts, add a healthcheck ping at the end of your wrapper script. Healthchecks.io (the free tier covers up to 20 checks) will ping you if the call does not arrive on time.
Add this to the end of your wrapper script:
# At the end of restic-backup.sh
curl -fsS -m 10 --retry 5 "https://hc-ping.com/YOUR-UUID-HERE"
You can also use self-hosted picks like Ntfy or Gotify for push alerts on backup success or failure.
To get email alerts from systemd itself, add OnFailure=notify-email@%n.service to the [Unit] block of the service file. You’ll need a working mail relay or an msmtp setup.
Verifying Backups and Handling Multi-Backend Strategies
A backup you have never restored from is a backup you hope works. Check it on a regular cycle.
Integrity Verification
# Quick check: validates repository structure and metadata
restic check

# Full check: reads and verifies every data blob against its SHA-256 hash
restic check --read-data
The full check reads the entire repo. On a 500 GB repo over a slow link, it can take hours. A better plan is to check a random subset on a steady cadence:
# Verify 5% of blobs each week - full coverage in ~20 weeks
restic check --read-data-subset=5%
Create a separate restic-check.timer that runs this weekly, apart from your backup timer.
Cloud Storage Cost Comparison
For 500 GB of backup data (stored size is often lower after dedup), here’s what you’d pay each month:
| Provider | Storage Cost | Egress Cost | Monthly Total (500 GB stored, 50 GB egress) |
|---|---|---|---|
| Backblaze B2 | $0.006/GB ($3.00) | Free up to 3x storage | $3.00 |
| Wasabi | $0.007/GB ($3.50) | Free | $3.50 (1 TB minimum = $6.99) |
| AWS S3 Standard | $0.023/GB ($11.50) | $0.09/GB ($4.50) | $16.00 |
| Google Cloud Standard | $0.023/GB ($11.50) | $0.12/GB ($6.00) | $17.50 |
| AWS S3 Glacier | $0.004/GB ($2.00) | $0.09/GB + retrieval fees | $2.00+ (slow retrieval) |
Backblaze B2 is the top pick for Restic users thanks to its low per-GB cost and a free egress allowance of 3x your stored amount. Wasabi’s flat price with no egress fees looks great, but the 1 TB minimum means you pay $6.99 a month even if you only store 100 GB. AWS S3 and Google Cloud cost a lot more for pure backup use, but they make sense if you already run other gear on those clouds.
3-2-1 Backup Strategy
The 3-2-1 rule calls for 3 copies of your data, on 2 media types, with 1 copy offsite. Restic makes that easy:
# Cloud backup (offsite copy)
export RESTIC_REPOSITORY="rclone:b2-backup:my-restic-repo"
restic backup ~/Documents ~/Projects

# Local USB drive (second media type)
export RESTIC_REPOSITORY="/mnt/usb-backup/restic-repo"
restic backup ~/Documents ~/Projects
Init each repo on its own with the same or a different password, and run both from one wrapper script. You now have two independent, encrypted copies on different media.
Performance Tuning
A few knobs that move the needle:
# Speed up file scanning on SSDs (default is 2)
restic backup --read-concurrency 4

# Limit CPU usage (useful on a laptop running on battery)
GOMAXPROCS=2 restic backup ~/Documents

# Reduce the number of small pack files on cloud storage
restic backup --pack-size 32

# Limit Rclone's bandwidth usage
export RCLONE_BWLIMIT="10M"

# Time-based bandwidth limiting
export RCLONE_BWLIMIT="08:00,5M 23:00,off"
The --pack-size 32 flag bumps the pack size to 32 MB, up from the default 4 MB. On cloud backends each stored object has fixed overhead, so fewer and larger files mean fewer API calls and lower fees on providers that bill per request.
Disaster Recovery Drill
Once a quarter, test the full restore chain:
- Spin up a fresh VM or container
- Install Restic and Rclone
- Configure Rclone to reach your cloud backend
- Restore the latest snapshot to a temporary directory
- Verify that critical files are intact and readable
This takes 30 minutes. It is the only way to prove that your password, cloud keys, and backup data all line up end to end. The worst time to find a broken backup is when you need it.
Encrypting the Rclone Config for Extra Protection
By default, rclone.conf stores your cloud keys in plain text. If someone gets on your machine, they can read those keys. Rclone has built-in config encryption:
rclone config encryptionThis prompts for a password and re-encrypts the full config file. From then on, every rclone command asks for the config password, or reads it from RCLONE_CONFIG_PASS. For unattended backups, set this in an env file that only root can read:
echo 'RCLONE_CONFIG_PASS=your-config-password' > /etc/restic/rclone-env
chmod 600 /etc/restic/rclone-env
Then source it in your wrapper script, or add EnvironmentFile=/etc/restic/rclone-env to the systemd service unit.
Quick Reference
| Task | Command |
|---|---|
| Initialize repo | restic -r rclone:remote:bucket init |
| Run a backup | restic backup ~/path --exclude-caches |
| List snapshots | restic snapshots --tag daily |
| Restore latest | restic restore latest --target /tmp/restore/ |
| Mount for browsing | restic mount /mnt/restic |
| Apply retention + prune | restic forget --keep-daily 7 --keep-weekly 4 --keep-monthly 12 --prune |
| Verify integrity | restic check --read-data-subset=5% |
| Check timer status | systemctl list-timers | grep restic |
| View backup logs | journalctl -u restic-backup.service --since today |
The full setup, from installing both tools to your first unattended backup, takes about 20 minutes. After that, backups run quietly in the background, old snapshots get pruned on schedule, and your data stays encrypted in transit and at rest. The hardest part is picking a strong repo password and writing it down somewhere safe.