 Botmonster Tech
SSH config: Ed25519 keys, FIDO2, domain separation


Every SSH connection needs the right host, port, user, and sometimes a specific key, and there is no good place to write all that down outside of ~/.ssh/config. That file stays the most underused tool in any developer’s home directory. Without it you retype ssh deploy@10.0.4.17 -p 2222 -J bastion.example.com every session, forget which IP belongs to which server two weeks later, and end up with a shell history full of nearly identical commands.
Set up per-host blocks with their own keys, users, ports, and proxy jumps, and you scale from 5 servers to 50 without juggling key filenames. Instead of ssh -i ~/.ssh/id_ed25519_work -p 2222 deploy@192.168.1.50, you type ssh prod-web-01 and SSH handles the rest. Pair this with the SSH agent for passphrase caching, Match rules for patterns, and one key per security domain. Your SSH workflow gets fast, tidy, and far less error-prone, and it feels even snappier from a low-latency terminal emulator
built for minimal input lag.
Why You Need Separate SSH Keys
Using one SSH key for everything is like using one password for every account. When that key gets stolen from a dev laptop or leaks from a backup, every server, your GitHub account, and your homelab go down together.
With one key per domain, a leak only hits the servers that trusted that key. Your prod boxes stay safe even if your personal key escapes. Audits get easier too. Each key serves a known domain (work, personal, client-A, CI/CD), so you can read authorized_keys on a server and tell at a glance which key belongs there.
Rotation scales better as well. Swapping one universal key means touching every server you’ve ever logged into. Per-domain keys let you update one subset at a time: your five prod servers, or your three client boxes, but not both at once.
Without a config file, things get worse. SSH tries every key in ~/.ssh/ in order via the agent. That triggers “too many authentication failures” on servers with MaxAuthTries set to 3-5. You hold the right key, but SSH offered five wrong ones first and the server hung up.
Pick filenames that say what they do: id_ed25519_github, id_ed25519_work_prod, id_ed25519_homelab. The name itself records the key’s purpose. Six months later when you clean up, you’ll still know what each one was for.
Generating and Organizing Your SSH Keys
Ed25519 is the current standard for SSH keys. It makes smaller keys, signs faster, and has a cleaner crypto design than RSA. Make a new key like this:
ssh-keygen -t ed25519 -f ~/.ssh/id_ed25519_github -C "github-personal-2026"The -C comment goes into the public key and helps you spot it later when you read authorized_keys on a server or run ssh-add -l.
When should you use RSA instead? Only for old systems that don’t speak Ed25519: some old RHEL 7 boxes, certain embedded devices, or aging network gear. In those cases, use 4096 bits at minimum:
ssh-keygen -t rsa -b 4096 -f ~/.ssh/id_rsa_legacy -C "legacy-device-2026"Always set a passphrase when ssh-keygen asks for one. A passphrase encrypts the private key at rest, so a stolen key file alone is useless. The SSH agent (covered below) caches the decrypted key in memory, so you’re not retyping the passphrase every few minutes.
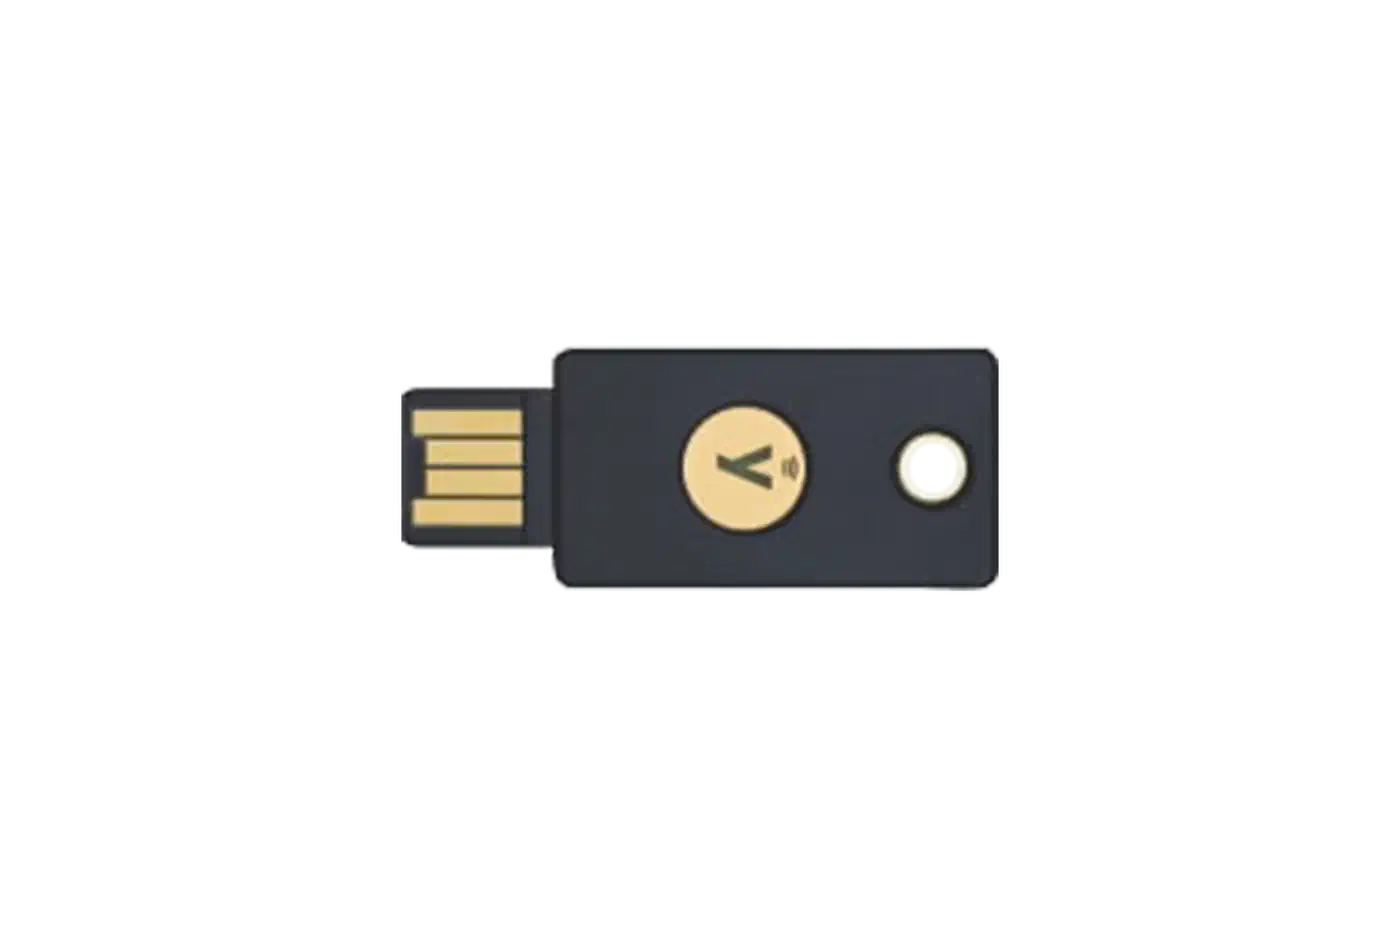
For top-tier key safety, reach for FIDO2 hardware keys. With a YubiKey (firmware 5.2.3+) or other FIDO2 device and OpenSSH 8.2 or newer:
ssh-keygen -t ed25519-sk -O resident -O verify-required -f ~/.ssh/id_ed25519_sk_yubikeyThis makes a key tied to your hardware. The private key never leaves the token, so it can’t be copied or stolen by software. You’ll be prompted for your FIDO2 PIN and a physical touch each time the key is used. The -O resident flag stores the key handle on the device itself. You can then use it from any machine by running ssh-keygen -K to download the key refs.
For directory organization, keep all keys in ~/.ssh/ and enforce correct permissions:
chmod 700 ~/.ssh
chmod 600 ~/.ssh/id_*
chmod 644 ~/.ssh/*.pub
chmod 600 ~/.ssh/config
SSH is strict about file permissions. It refuses to use keys or config files that are too open. If you ever get odd auth failures, check perms first. ssh -vvv will say “bad permissions” right in the output when that’s the cause.
Audit your key list now and then with ls -la ~/.ssh/id_* and cross-check it against your config. Delete keys that no server still trusts.
Mastering ~/.ssh/config
The SSH config file lives at ~/.ssh/config. It uses block syntax. Each Host entry sets options for one or more hosts. The format is simple, but it can do a lot.
Basic Host Blocks
A typical entry looks like this:
Host prod-web-01
    HostName 192.168.1.50
    User deploy
    Port 2222
    IdentityFile ~/.ssh/id_ed25519_work_prod
    IdentitiesOnly yes
Now ssh prod-web-01 connects to 192.168.1.50 on port 2222 as user deploy with the named key. The IdentitiesOnly yes line is key. It tells SSH to use only that one key, not every key in the agent. Skip it and you’re back to “too many authentication failures.”
Wildcard Patterns
For groups of related hosts, wildcards save repetition:
Host prod-*
    User deploy
    IdentityFile ~/.ssh/id_ed25519_work_prod
    IdentitiesOnly yes
    ServerAliveInterval 60

Host prod-web-01
    HostName 192.168.1.50
    Port 2222

Host prod-web-02
    HostName 192.168.1.51
    Port 2222

Host prod-db-01
    HostName 192.168.1.60
The Host prod-* block sets shared options for every host that matches that pattern. The single-host blocks below it add or change specific settings. SSH walks matching blocks top to bottom and uses the first value it finds for each option. So put your most specific blocks first and wildcards later. Or flip it: put wildcards first as defaults, then let single blocks override them.

Proxy Jump for Bastion Hosts
If you access internal servers through a jump host, ProxyJump handles the tunneling:
Host bastion
    HostName bastion.example.com
    User admin
    IdentityFile ~/.ssh/id_ed25519_work_bastion
    IdentitiesOnly yes

Host internal-db
    HostName 10.0.1.20
    User dbadmin
    ProxyJump bastion
    IdentityFile ~/.ssh/id_ed25519_work_internal
    IdentitiesOnly yes
Running ssh internal-db automatically tunnels through the bastion. For deeply nested networks, chain multiple jumps: ProxyJump bastion1,bastion2.
Note: OpenSSH 10.3 (released April 2, 2026) patched a shell injection flaw in the -J (ProxyJump) option where user and host names were not properly checked. Make sure your OpenSSH build is current.
The Include Directive
As your config grows, split it into separate files:
# ~/.ssh/config
Include ~/.ssh/config.d/*

Host *
    AddKeysToAgent yes
    ServerAliveInterval 60
    ServerAliveCountMax 3
    HashKnownHosts yes
Then organize by context:
~/.ssh/config.d/work
~/.ssh/config.d/homelab
~/.ssh/config.d/clients
Each file holds only the hosts for that one domain. So you can share your homelab config with a friend or shelf old client configs when a project ends.
Match Directives for Conditional Config
The Match directive applies settings only when specific conditions are met:
Match host *.internal exec "nmcli -t -f NAME c show --active | grep -q corporate-vpn"
    ProxyJump office-gateway
This applies proxy settings only when you’re on the corporate VPN. The exec keyword runs a command and uses the block only when it returns success (exit code 0). Handy for laptops that hop between home, office, and coffee shop Wi-Fi.
Global Defaults
Put sensible defaults in a Host * block at the end of your config:
Host *
    AddKeysToAgent yes
    ServerAliveInterval 60
    ServerAliveCountMax 3
    Compression yes
    HashKnownHosts yes
StrictHostKeyChecking accept-new| Option | What It Does |
|---|---|
AddKeysToAgent yes | Automatically adds keys to the agent on first use |
ServerAliveInterval 60 | Sends keepalive every 60s to prevent idle disconnects |
ServerAliveCountMax 3 | Drops connection after 3 missed keepalives |
Compression yes | Compresses traffic - useful for slow links |
HashKnownHosts yes | Hashes hostnames in known_hosts for privacy |
StrictHostKeyChecking accept-new | Auto-accepts new hosts, rejects changed keys |
A Complete Example Config
Putting it all together, a realistic config covering personal, work, bastion, and homelab domains:
# ~/.ssh/config

Include ~/.ssh/config.d/*

# --- Personal GitHub ---
Host github.com
    HostName github.com
    User git
    IdentityFile ~/.ssh/id_ed25519_github
    IdentitiesOnly yes

# --- Work Production ---
Host prod-*
    User deploy
    IdentityFile ~/.ssh/id_ed25519_work_prod
    IdentitiesOnly yes
    ServerAliveInterval 60

Host prod-web-01
    HostName 192.168.1.50
    Port 2222

Host prod-web-02
    HostName 192.168.1.51
    Port 2222

# --- Work via Bastion ---
Host work-bastion
    HostName bastion.company.com
    User admin
    IdentityFile ~/.ssh/id_ed25519_work_bastion
    IdentitiesOnly yes

Host work-internal-*
    ProxyJump work-bastion
    User engineer
    IdentityFile ~/.ssh/id_ed25519_work_internal
    IdentitiesOnly yes

Host work-internal-db
    HostName 10.0.1.20

Host work-internal-app
    HostName 10.0.1.30

# --- Homelab ---
Host lab-*
    User pi
    IdentityFile ~/.ssh/id_ed25519_homelab
    IdentitiesOnly yes

Host lab-nas
    HostName 192.168.50.10

Host lab-pve
    HostName 192.168.50.2

# --- Defaults ---
Host *
    AddKeysToAgent yes
    ServerAliveInterval 60
    ServerAliveCountMax 3
    HashKnownHosts yes
The same one-key-per-domain rule fits whether you push to GitHub or run your own self-hosted Git server. One key per host keeps the blast radius small.
SSH Agent Management and Passphrase Caching
The SSH agent is a daemon that holds decrypted private keys in memory. You type your passphrase once per session. The agent then handles auth for later connections without asking again. SSH clients reach the agent through the SSH_AUTH_SOCK Unix socket.
Whether the agent auto-starts depends on your setup. Most desktops (GNOME, KDE, sway) start one at login. For headless servers, tmux sessions, or minimal setups, add this to ~/.bash_profile:
eval $(ssh-agent -s)Or set up a systemd user service for ssh-agent that starts with your session and stays up across terminal restarts.
With AddKeysToAgent yes in your config (recommended), keys load into the agent on first use. No manual ssh-add needed. For extra safety, use AddKeysToAgent confirm to get a prompt before each use of a key from the agent.
You can also limit how long a key stays in the agent. Load it with a timeout:
ssh-add -t 3600 ~/.ssh/id_ed25519_work_prodThis keeps the key in the agent for one hour, then drops it. Handy for prod keys where you want to balance ease of use against the risk of an agent that runs all day with powerful keys loaded.
Agent Forwarding vs. ProxyJump
Agent forwarding (ForwardAgent yes) lets a remote server use your local agent for further SSH connections. For example, you might run git pull on a server using your local GitHub key. It sounds handy, but it carries a real risk. A hacked server with agent forwarding on can use your keys for anything, against any host, for as long as you’re logged in.
Use ProxyJump over agent forwarding whenever you can. ProxyJump keeps the TCP connection on your local machine and tunnels through the bastion without exposing your agent socket on the remote host. If you do need agent forwarding, turn it on per host, never globally, and never through hosts you don’t trust.
| Method | Keys Exposed on Remote? | Use When |
|---|---|---|
ProxyJump | No | Accessing internal hosts through a bastion |
ForwardAgent yes | Yes (to that host) | Running git/ssh commands on a trusted remote host |
ForwardAgent no (default) | No | Default - keep it this way unless needed |
For always-on remote access without running a bastion, a self-hosted WireGuard VPN can replace jump hosts and keep your SSH keys on your machine.
Password Manager SSH Agent Integration
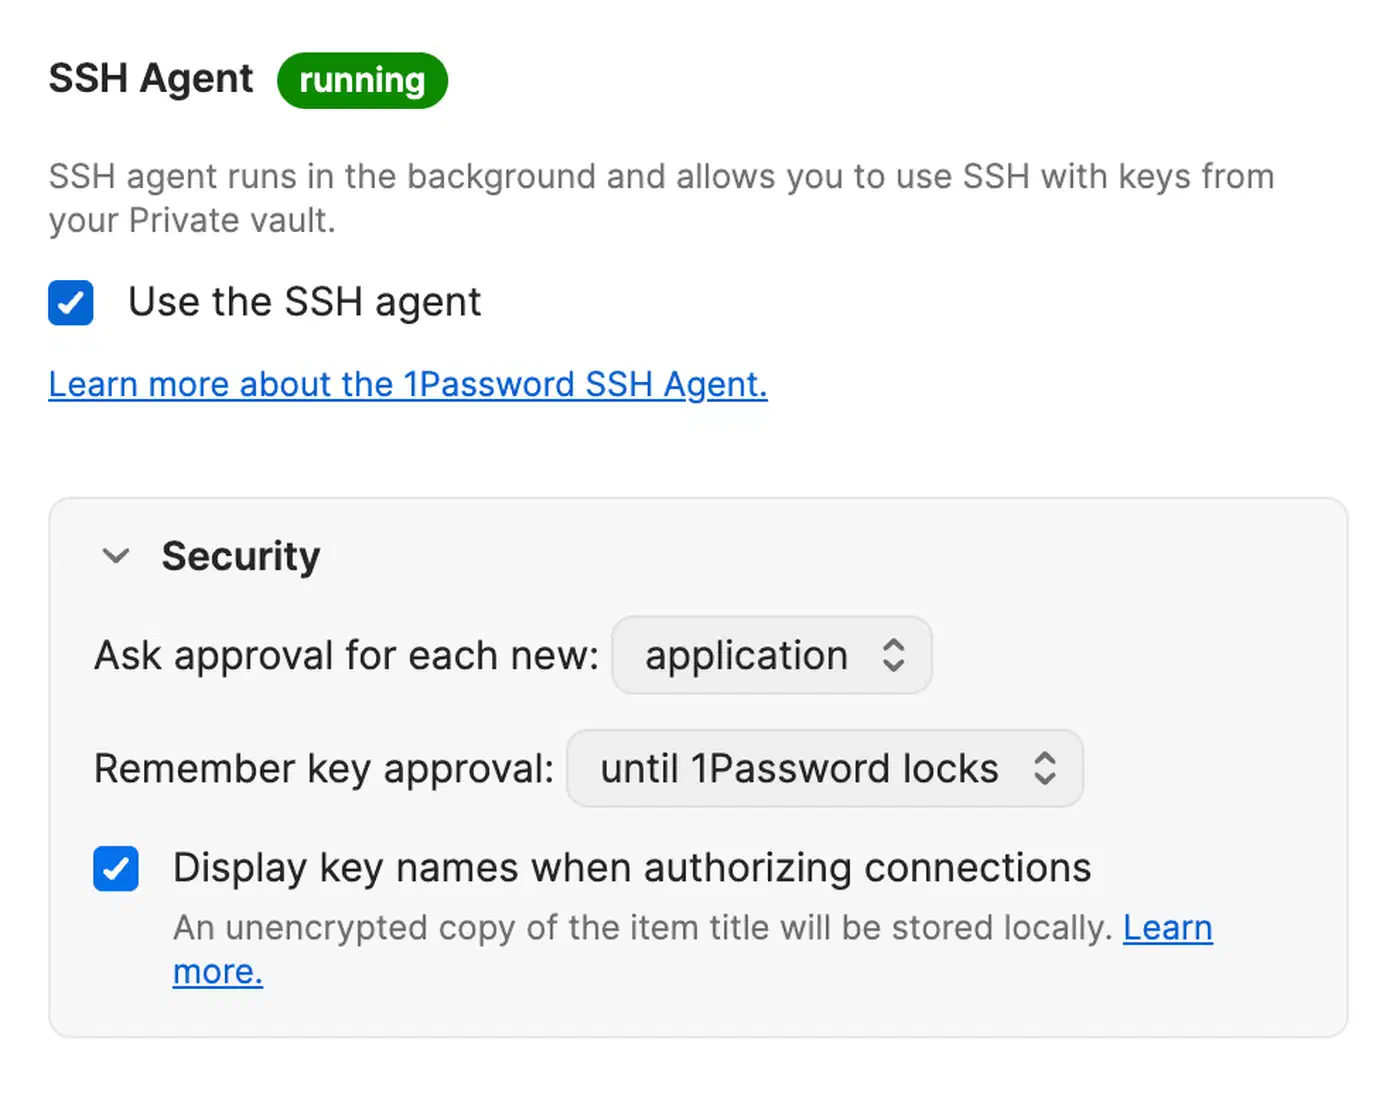
If you use a password manager, it might replace the system SSH agent. 1Password
has a built-in SSH agent that stores keys in your vault. Private keys never touch the filesystem. Turn it on in 1Password Settings > Developer > Set Up SSH Agent, then point SSH_AUTH_SOCK at the 1Password agent socket.
KeePassXC takes a different tack. It hooks into the system SSH agent. When the database is unlocked, it adds your keys. When it locks, it pulls them out. Turn it on under Tools > Settings > SSH Agent. You attach your private key file to a KeePassXC entry. The passphrase stored there decrypts and loads the key.
Both options cut the number of raw private keys sitting on disk. That’s a real safety gain.
Troubleshooting, Security Auditing, and Maintenance
SSH key management breaks in predictable ways. Here are the most common issues and how to fix them.
Debugging Connections
When something isn’t working, verbose output tells you exactly what’s happening:
ssh -vvv prod-web-01Look for these lines in the output:
Offering public keyshows which keys SSH is trying, and in what orderServer accepts keyshows which key actually workedToo many authentication failuresmeans the agent gave too many wrong keys before the right onebad permissionsmeans perms on keys or config are too open
Common Fixes
If you see “too many authentication failures,” add IdentitiesOnly yes to that host’s block. SSH then offers only the key named by IdentityFile instead of every key in the agent.
For permission errors, SSH refuses to use keys with open file modes. Fix them with:
chmod 700 ~/.ssh
chmod 600 ~/.ssh/id_*
chmod 644 ~/.ssh/*.pub
chmod 600 ~/.ssh/config
Stale host keys are another common snag. When a server is rebuilt, its host key changes. SSH then warns you about a possible man-in-the-middle attack. If you know the change is fine:
ssh-keygen -R hostnameUsing StrictHostKeyChecking accept-new in your config auto-accepts host keys for new servers, but still rejects changed keys for known hosts. A good middle ground between safety and ease of use.
Security Auditing
Periodically check what’s loaded and what’s on disk:
# List all keys currently in the agent
ssh-add -l

# List fingerprints of all local keys
for f in ~/.ssh/id_*; do ssh-keygen -lf "$f"; done
Cross-check these fingerprints against authorized_keys on your servers. Any key that doesn’t fit a current use case should come off both the server and your local box. SSH key hygiene is one item in a wider routine to lock down an internet-facing host
worth running on any box that faces the public network.
Key Rotation Workflow
When it’s time to rotate a key:
- Make a new key with
ssh-keygen - Push the public key to each server via
ssh-copy-idor a config tool like Ansible , Puppet, or Chef. Automating with Ansible and dotfiles makes this step repeatable across machines - Test access with the new key
- Remove the old key from
authorized_keyson each server - Delete the old private key on your local box
For large fleets with dozens or hundreds of servers, look at SSH certificates instead of raw public keys. SSH certificates use a central Certificate Authority that signs short-lived keys. That cuts the need to ship public keys to every server. Meta, Uber, and Google all use SSH certs at scale. Tools like Smallstep and Infisical make this work for smaller teams too.
Quick Reference
| Task | Command |
|---|---|
| Generate Ed25519 key | ssh-keygen -t ed25519 -f ~/.ssh/id_ed25519_name -C "comment" |
| Generate FIDO2 key | ssh-keygen -t ed25519-sk -O resident -O verify-required -f ~/.ssh/id_ed25519_sk |
| List agent keys | ssh-add -l |
| Add key with timeout | ssh-add -t 3600 ~/.ssh/id_ed25519_name |
| Remove stale host key | ssh-keygen -R hostname |
| Debug connection | ssh -vvv hostname |
| Fix permissions | chmod 700 ~/.ssh && chmod 600 ~/.ssh/id_* && chmod 600 ~/.ssh/config |
| Copy key to server | ssh-copy-id -i ~/.ssh/id_ed25519_name.pub user@host |
Setting all this up takes maybe 30 minutes. After that, you ssh alias-name to any host, the right key gets used every time, and you stop locking yourself out. The safety side is just as real. When you don’t share one key across every box you own, a stolen laptop doesn’t mean changing passwords on 40 servers at 2am.