Shelly Relay Garage Automation: $20 Install, Zero Warranty Risk

Wire a Shelly 1 relay in parallel with your existing garage door opener’s wall button, attach a reed switch for open/closed state detection, and integrate both with Home Assistant . That is the whole project. You get remote control, auto-close timers, arrival-based opening, and departure-based closing for under $20 in hardware, without replacing your existing opener or voiding any warranties.
This approach works because nearly every residential garage door opener - Chamberlain, LiftMaster, Genie, Craftsman - uses the same basic control mechanism. The wall button shorts two low-voltage wires together, and the motor responds. The Shelly relay replicates that button press electronically. Your physical wall button keeps working; the relay just adds a second way to trigger the same circuit.
How Garage Door Openers Work and Where the Relay Fits
A residential garage door opener has two separate electrical systems. The motor circuit runs on 120V or 240V AC and handles the heavy lifting. The control circuit is low-voltage, typically 12-24V DC, and connects to the wall button through two wires running from the motor unit down the wall. When you press the button, it momentarily shorts those two wires together. The opener responds by cycling through its states: open, stop, close.
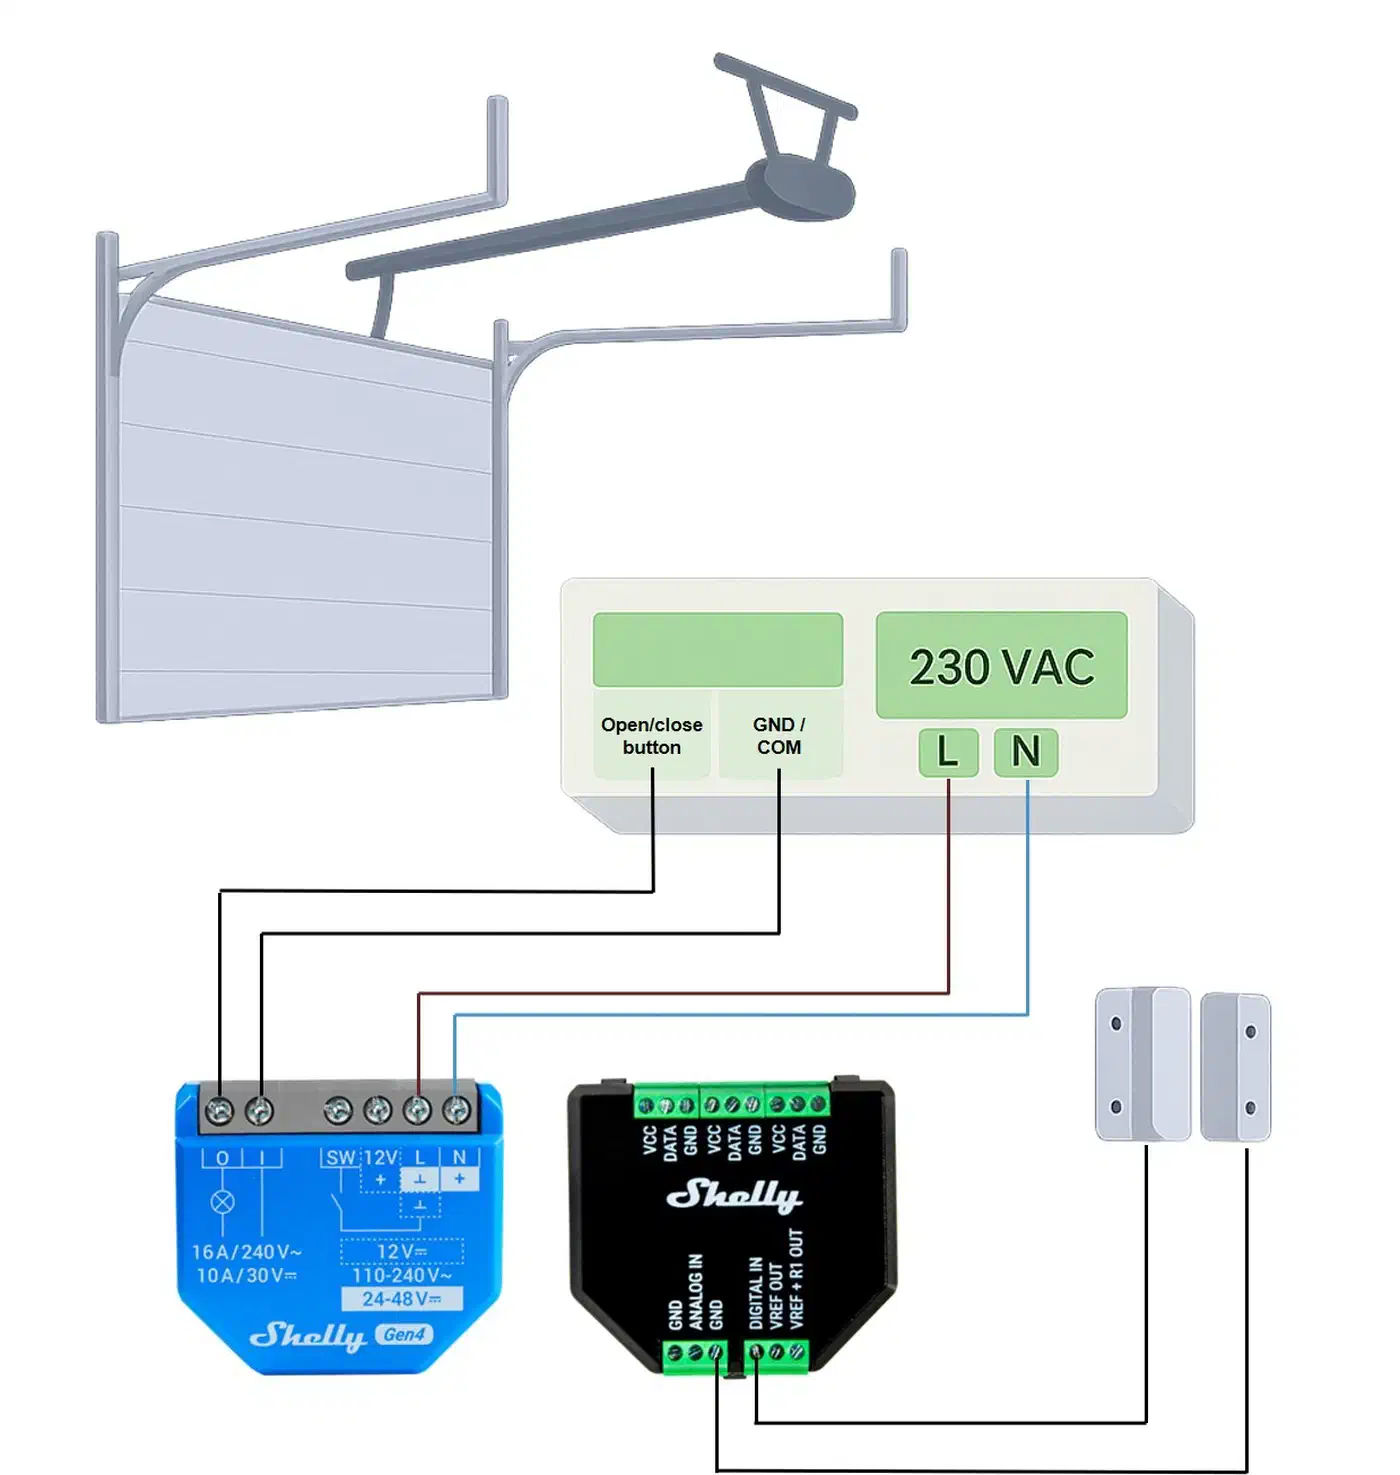
The Shelly relay’s dry-contact output does the same thing. You wire its relay terminals (labeled O and I on Shelly models) to the same two terminals on the opener where the wall button connects. When Home Assistant tells the Shelly to fire, its relay closes for half a second, the opener sees it as a button press, and the door moves. The wall button remains wired in parallel and works independently.
There is one exception to this straightforward wiring. LiftMaster and Chamberlain openers manufactured since roughly 2022 with Security+ 2.0 technology use encrypted digital signaling instead of simple contact closure. The wall button communicates over a data bus rather than a plain short circuit. For these models, you need a LiftMaster 883LMW dry contact adapter (around $30). This adapter plugs into the opener’s data bus and provides a pair of dry-contact terminals that the Shelly can trigger. Identify your opener type by checking the color of the “Learn” button on the motor unit: yellow means Security+ 2.0, which needs the adapter. Purple, red, orange, or green buttons use simple contact closure and work directly with the Shelly.
Safety note: The Shelly connects only to the low-voltage control wires, never to the motor’s 120V power. Before touching any wires, unplug the opener from the ceiling outlet. Even though you are working with the control circuit, the motor housing contains line voltage.
Picking the Right Shelly Relay
Shelly has produced several generations of their single-channel relay. The product line has evolved quickly, and the right choice in 2026 depends on your budget and connectivity requirements.
| Model | Processor | Relay Rating | Protocols | Power Input | Approx. Price |
|---|---|---|---|---|---|
| Shelly 1 Mini Gen3 | ESP-Shelly-C38F | 8A | WiFi, Bluetooth, Matter | 100-240V AC | ~$12 |
| Shelly 1 Gen3 | ESP-Shelly-C38F | 16A | WiFi, Bluetooth, Matter | 12V DC / 24-240V AC | ~$15 |
| Shelly 1 Mini Gen4 | - | 8A | WiFi, Bluetooth, Matter, Zigbee | 100-240V AC | ~$17 |
| Shelly Plus 1 (discontinued) | ESP32 | 16A | WiFi, Bluetooth | 12V DC / 110-240V AC | ~$14 (clearance) |
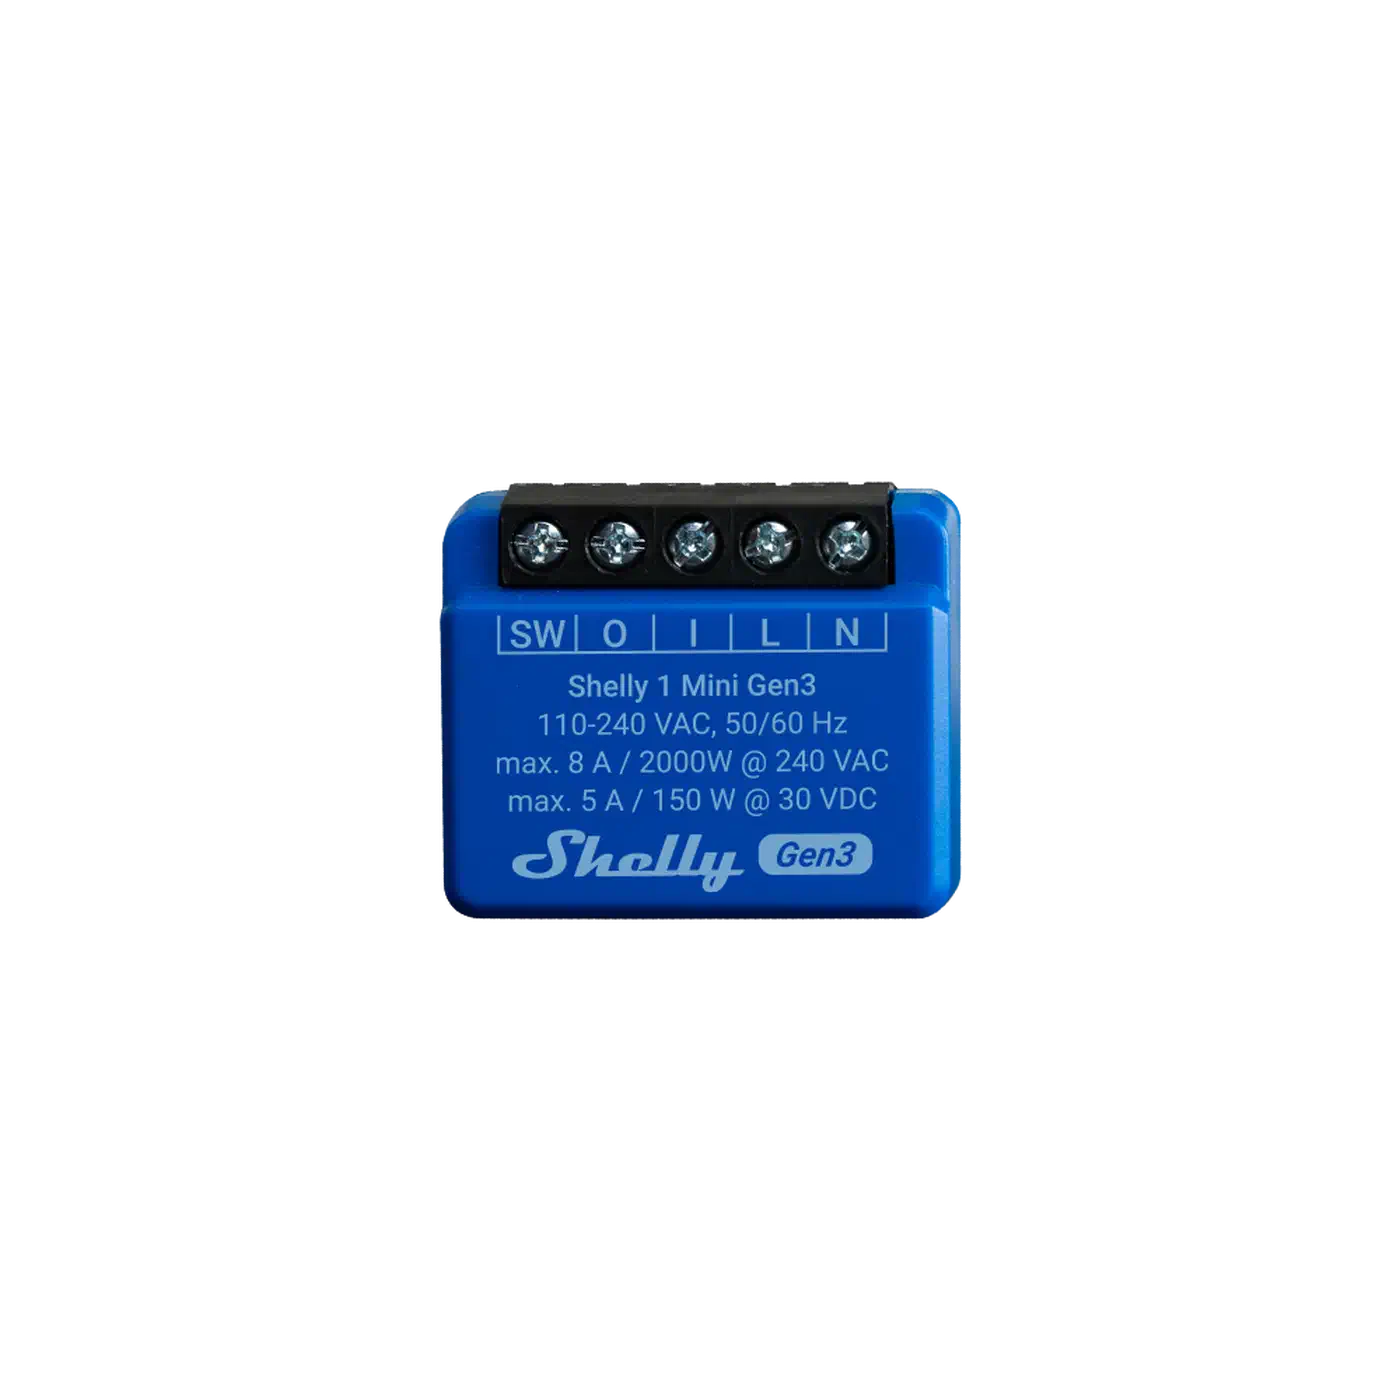
For a garage door project, the Shelly 1 Mini Gen3 is the best value pick. Its 8A relay rating is far more than the milliamps flowing through a garage door control circuit, and the compact form factor fits neatly inside a small junction box mounted near the opener. If you want Matter support for future-proofing across multiple smart home ecosystems, both the Gen3 and Gen4 lines support it.
The Shelly 1 Gen3 (full-size) is worth considering if your opener provides 12V or 24V DC accessory power terminals, since it can accept DC input directly. The Mini models require 100-240V AC for their power supply, so you will either need a small AC adapter plugged into the ceiling outlet near the opener or a DIN-rail transformer if you have one nearby.
All of these models support the native Shelly integration for Home Assistant , auto-discovered via mDNS on your local network. No cloud account is required - everything runs locally. They also support MQTT if you prefer that integration path.
The key configuration for garage door use: set the relay to momentary/pulse mode in the Shelly web UI. This makes the relay close for a configured duration (0.5 seconds is typical) and then automatically open again, mimicking a button press rather than leaving the circuit latched.
Wiring the Shelly Relay and Reed Switch
Start by unplugging the garage door opener from the ceiling outlet. While the control circuit is low voltage, the motor housing contains 120V AC and you do not want to be reaching around inside it with the power connected.
Relay Wiring
Locate the terminal block on your garage door opener’s motor unit. You will see the two wires from your wall button connected to it, typically a red wire and a white wire. These are the control circuit terminals.
Connect the Shelly’s relay output terminals (O and I) to these same two terminals on the opener. Run two short lengths of 18-22 AWG wire from the Shelly to the opener’s terminal block. Polarity does not matter for dry-contact connections - you are just creating a path that the relay can short together.
Power Supply
The Shelly needs its own power. Your options depend on the model:
- Shelly 1 Gen3 (full size): Accepts 12V DC directly. If your opener has dedicated 12V or 24V accessory terminals, tap into those. Otherwise, a small 12V wall wart plugged into the same ceiling outlet as the opener works well.
- Shelly 1 Mini Gen3 or Gen4: Requires 100-240V AC. The simplest approach is a short pigtail from the same outlet powering the opener. Alternatively, use an extension cord or a dual-outlet adapter at the ceiling.
Mount the Shelly in a small junction box or use adhesive-backed Velcro to attach it to the opener’s housing. Keep the wiring tidy - this is going to be a permanent installation.
Reed Switch for State Detection
A relay can open and close the door, but Home Assistant also needs to know the door’s current state. Without a sensor, the system has no idea whether a “toggle” command will open or close the door.
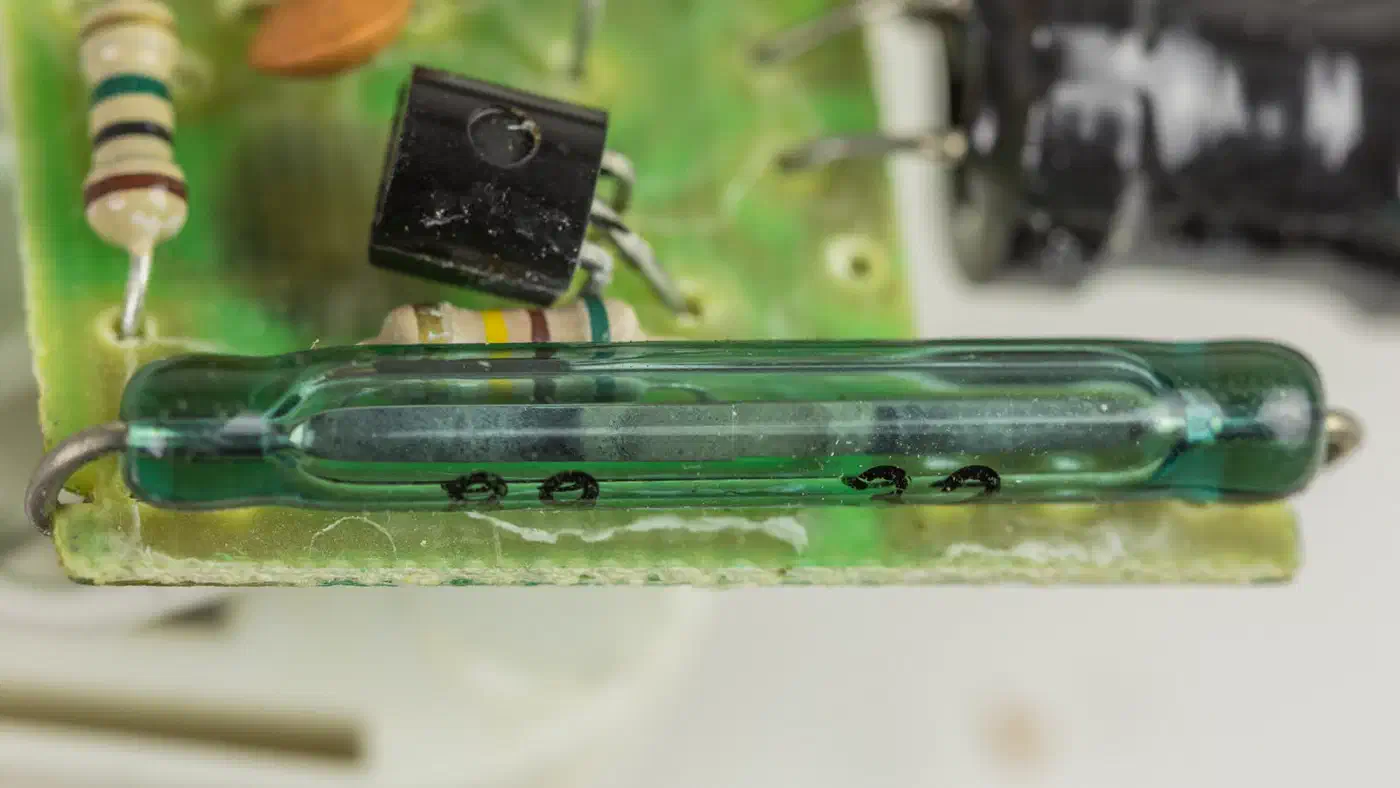
Mount a magnetic reed switch (normally-open type, around $3) on the door frame at the fully-closed position. Attach the corresponding magnet to the door itself, aligned so the reed switch closes its circuit when the door is fully closed. When the door opens, the magnet moves away, the reed switch opens, and the Shelly’s input detects the state change.
Wire the reed switch to the Shelly’s SW (switch) input and GND terminals. In the Shelly web UI, configure the SW input as a detached sensor so it reports state to Home Assistant without triggering the relay . This is important - you do not want the door moving every time the reed switch changes state.
Alternative: Tilt Sensor
For doors where mounting a reed switch at the frame is awkward, a tilt sensor like the SW-520D (about $1) offers a different approach. Mount it on a door panel, and it detects whether the panel is vertical (closed) or tilted (open). Tilt sensors work better than reed switches on some sectional doors where the bottom rail does not travel consistently close to the frame.
Configuring Home Assistant Integration and the Cover Entity
Once the Shelly is powered and connected to your WiFi, Home Assistant’s Shelly integration
discovers it automatically via mDNS. Navigate to Settings > Devices & Services > Shelly to configure it. You will see two entities: a switch for the relay (switch.shelly_1_mini_gen3_relay) and a binary sensor for the reed switch input (binary_sensor.shelly_1_mini_gen3_input).
The switch entity works for basic on/off, but a garage door should be a proper cover entity in Home Assistant. Covers have open/close/stop semantics, display correct icons, and integrate properly with voice assistants and alarm panels.
Template Cover Configuration
Since Home Assistant deprecated legacy template covers in version 2025.12, you need the current trigger-based syntax. Add this to your configuration.yaml or a package file:
template:
  - cover:
      - name: "Garage Door"
        device_class: garage
        state: >
          {% if is_state('binary_sensor.shelly_1_mini_gen3_input', 'on') %}
            closed
          {% else %}
            open
          {% endif %}
        open_cover:
          - action: switch.turn_on
            target:
              entity_id: switch.shelly_1_mini_gen3_relay
        close_cover:
          - action: switch.turn_on
            target:
              entity_id: switch.shelly_1_mini_gen3_relay
        stop_cover:
          - action: switch.turn_on
            target:
              entity_id: switch.shelly_1_mini_gen3_relay
A few things to note about this configuration. Both open_cover and close_cover call the same action because garage door openers use a single toggle command for open and close. The stop_cover action also uses the same command, since pressing the button mid-travel stops the door. The state template maps the binary sensor: when the reed switch is closed (magnet nearby, door down), the sensor reports on, and we map that to closed. When the door is up, the magnet moves away, the sensor reports off, and we map that to open.
After adding the template, restart Home Assistant or reload templates. You should now see cover.garage_door with proper garage door controls.
Dashboard and Voice Integration
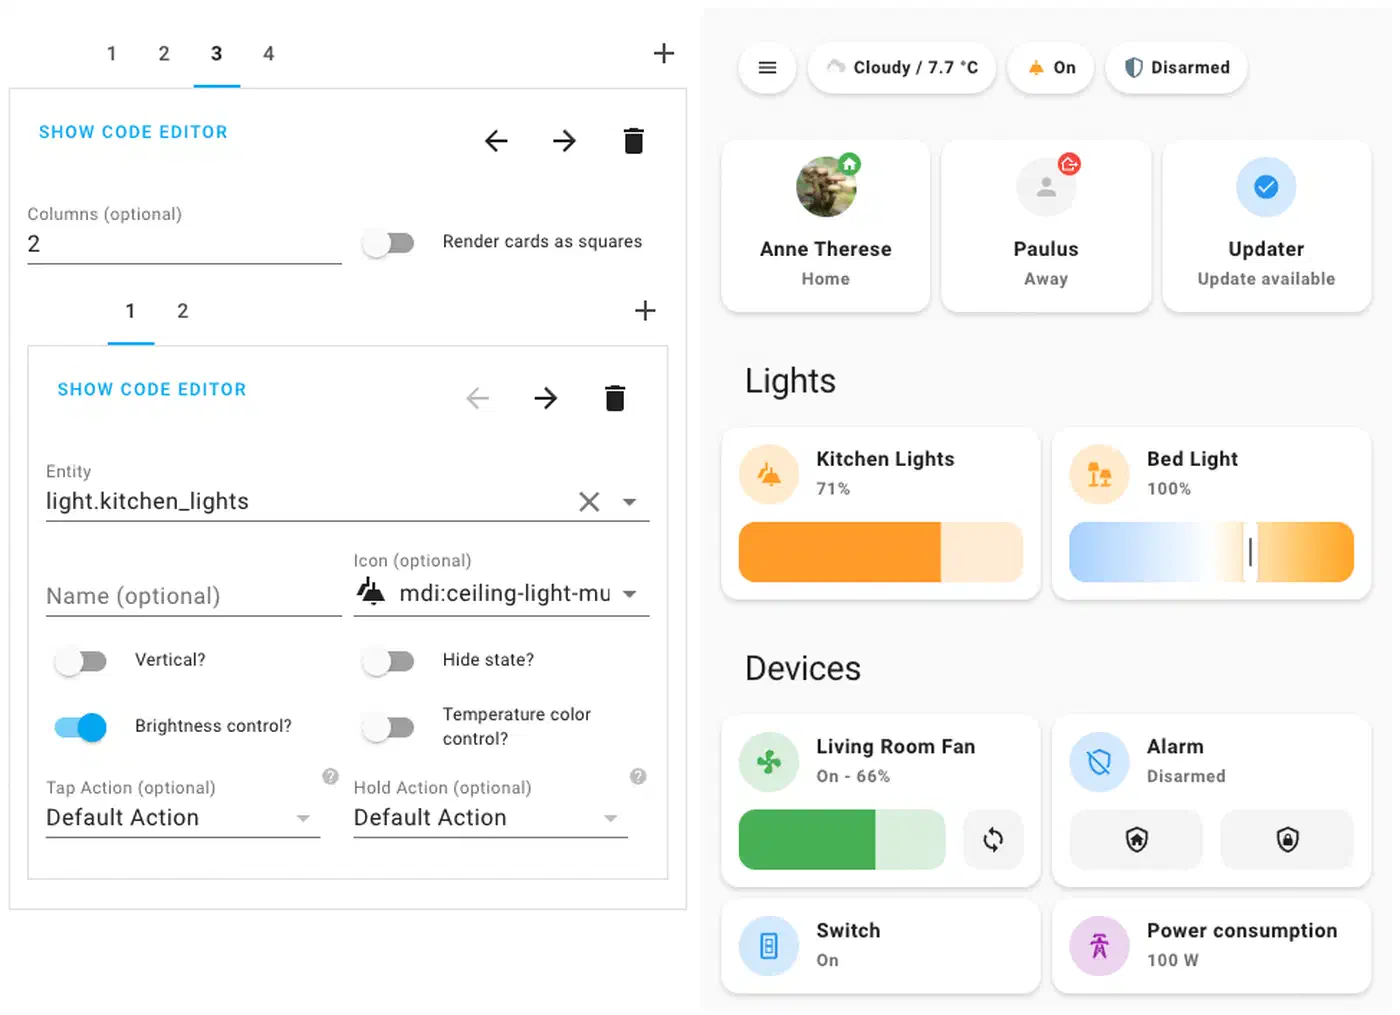
Add a cover card to your Lovelace dashboard showing the door state with open/close/stop buttons. The mushroom-cover-card from HACS provides a cleaner visual with color indicators - green for closed, red for open.
Setting device_class: garage means the cover entity automatically appears in Google Home and Apple Home through their respective Home Assistant integrations. Voice commands like “Hey Google, is the garage door open?” and “Hey Google, close the garage” work without additional configuration.
Automations That Make It Worth the Effort
Remote control is convenient, but automations are where this setup starts paying for itself. A few YAML blocks and you stop thinking about the garage door entirely. Once you have these working, Home Assistant Blueprints let you turn them into reusable templates you can share across multiple doors or household members.
Auto-Close Timer
The most popular automation: close the garage automatically if it has been left open. Create a helper input_number.garage_auto_close_minutes (default 15) and a toggle input_boolean.garage_auto_close_enabled so you can disable it when you are working in the garage.
automation:
  - alias: "Garage Auto-Close"
    triggers:
      - trigger: state
        entity_id: cover.garage_door
        to: "open"
        for:
          minutes: "{{ states('input_number.garage_auto_close_minutes') | int }}"
    conditions:
      - condition: state
        entity_id: input_boolean.garage_auto_close_enabled
        state: "on"
    actions:
      - action: cover.close_cover
        target:
          entity_id: cover.garage_door
      - action: notify.mobile_app_your_phone
        data:
          title: "Garage Door"
          message: "Auto-closed after {{ states('input_number.garage_auto_close_minutes') }} minutes."
Arrival-Based Opening
When you arrive home, get an actionable notification asking if you want the garage opened. Never auto-open without confirmation - that is a security risk. For more reliable zone-based triggers, improving your presence detection accuracy with Bayesian sensors reduces false arrivals and missed departures.
automation:
  - alias: "Garage Open on Arrival"
    triggers:
      - trigger: zone
        entity_id: person.your_name
        zone: zone.home
        event: enter
    conditions:
      - condition: state
        entity_id: cover.garage_door
        state: "closed"
    actions:
      - action: notify.mobile_app_your_phone
        data:
          title: "Welcome Home"
          message: "Open the garage?"
          data:
            actions:
              - action: "OPEN_GARAGE"
                title: "Open"
Pair this with a second automation that listens for the OPEN_GARAGE mobile notification action event and triggers cover.open_cover.
Departure Reminder
If you leave the house and the garage is still open, send a notification with an actionable close button. If no response within five minutes, close it automatically.
automation:
  - alias: "Garage Departure Reminder"
    triggers:
      - trigger: zone
        entity_id: person.your_name
        zone: zone.home
        event: leave
    conditions:
      - condition: state
        entity_id: cover.garage_door
        state: "open"
    actions:
      - action: notify.mobile_app_your_phone
        data:
          title: "Garage Still Open"
          message: "You left but the garage is open. Close it?"
          data:
            actions:
              - action: "CLOSE_GARAGE"
                title: "Close"
      - wait_for_trigger:
          - trigger: event
            event_type: mobile_app_notification_action
            event_data:
              action: "CLOSE_GARAGE"
        timeout: "00:05:00"
        continue_on_timeout: true
      - condition: state
        entity_id: cover.garage_door
        state: "open"
      - action: cover.close_cover
        target:
          entity_id: cover.garage_door
Night Check
At a fixed time (or when your alarm panel arms to night mode), verify the garage is closed.
automation:
  - alias: "Garage Night Check"
    triggers:
      - trigger: time
        at: "22:00:00"
    conditions:
      - condition: state
        entity_id: cover.garage_door
        state: "open"
    actions:
      - action: cover.close_cover
        target:
          entity_id: cover.garage_door
      - action: notify.mobile_app_your_phone
        data:
          title: "Garage Secured"
          message: "Garage door was open at 10 PM. Closed it automatically."
Safety Interlock
If you have a motion sensor in the garage (a $10 Zigbee sensor like the Aqara P2 is plenty), add a condition to all close automations: check for motion before closing. If motion is detected, delay the close action by two minutes and re-check. This prevents the door from closing on a person or a car that is partially in the doorway.
ESPHome Alternative
The Shelly stock firmware works well, but power users often flash ESPHome onto Shelly hardware for deeper customization. ESPHome gives you a native garage door cover entity without the template workaround, and you can add features like cover position estimation based on timed travel, custom LED status indicators, and direct sensor integration without the SW input limitations.
The Gen3 devices (ESP-Shelly-C38F chip) can run ESPHome, though flashing requires some effort compared to the older ESP32-based Plus models. The ESPHome Shelly 1 page has device-specific configuration examples.
For most people, the stock firmware with the native Shelly integration is the simpler and more maintainable path. ESPHome is worth considering if you already run ESPHome devices and want everything on the same firmware platform.
Tips and Common Pitfalls
Check your WiFi signal strength before committing to a permanent installation. Garage door openers sit in the ceiling, often at the edge of your WiFi coverage. The Shelly web UI shows WiFi RSSI - anything worse than -75 dBm will cause intermittent disconnections. A WiFi access point or mesh node in the garage solves this.
Set the Shelly’s power-on default state to OFF. Without this, a power outage followed by restoration could trigger the relay and open your garage door in the middle of the night. Every Shelly model exposes this setting in its web UI under device settings.
A two-car garage with separate openers needs two Shellys, one per door. Each gets its own reed switch, its own template cover entity, and its own set of automations. Home Assistant handles this cleanly - duplicate the configurations with different entity names.
Spend some time getting reed switch placement right. The magnet should be within 10-15mm of the reed switch when the door is fully closed. Too far apart and you get false “open” readings. Test by opening and closing the door manually several times while watching the binary sensor state in Home Assistant’s developer tools before finalizing the mounting position.
For extra confidence when closing the door remotely, consider adding a camera feed to your garage dashboard card. A cheap WiFi camera or an old phone running a camera app gives you visual confirmation before sending the close command. The picture-elements card in Home Assistant can overlay the garage door controls on top of a camera feed.