 Botmonster Tech
Caddy reverse proxy for self-hosted services: zero-config HTTPS

Caddy is the simplest reverse proxy for self-hosted services. It gets and renews TLS certificates from Let’s Encrypt with zero config. Install the static binary, write a Caddyfile with three lines per service, and Caddy handles HTTPS, HTTP/2, OCSP stapling, and renewal on its own. That replaces hundreds of lines of Nginx config and separate Certbot cron jobs.
If you run even a handful of services on a home server or VPS, a reverse proxy with proper TLS is non-negotiable. Caddy makes this painless, so there’s no excuse to skip it.
Why Caddy Over Nginx or Traefik
Nginx has been the default reverse proxy for over a decade, and it still works fine. But for a typical homelab or small server, Caddy cuts enough friction to be worth the switch.
The biggest win is automatic HTTPS. Caddy gets TLS certificates from Let’s Encrypt (or ZeroSSL) for any domain that points to your server. No extra config needed. With Nginx, you install Certbot, run certbot certonly --nginx, set up a cron job for renewal, then reload Nginx after each one. Caddy does all of that on its own.
Then there is configuration simplicity. Proxying a service in Caddy looks like this:
gitea.example.com {
    reverse_proxy localhost:3000
}
The equivalent Nginx config needs a server block with listen 443 ssl, ssl_certificate, ssl_certificate_key, location /, and proxy_pass directives. That’s 15 or more lines at a minimum.
Caddy is also a single Go binary, around 40 MB, with no external dependencies. Install via apt install caddy, download from caddyserver.com, or pull the Docker image caddy:2.11-alpine. Nginx drags in OpenSSL, PCRE, and zlib.
HTTP/2 is on by default for all HTTPS sites. HTTP/3 (QUIC) needs just one global option: servers { protocols h1 h2 h3 }. Nginx needs explicit http2 directives and has no stable HTTP/3 support without a custom build.
On performance, Caddy and Nginx are a tie for services under 10,000 requests per second. That covers nearly every homelab. Caddy uses about 20 MB more RAM at idle because of its Go runtime, which is nothing on a modern server.
Traefik is the other popular option. It shines at dynamic, label-based routing in Docker and Kubernetes. If you run a large container setup, Traefik might be the better fit. For everything else, Caddy’s static Caddyfile is simpler to reason about. For a full walkthrough of the label-based routing workflow, see our guide on deploying Docker Compose with Traefik in production.
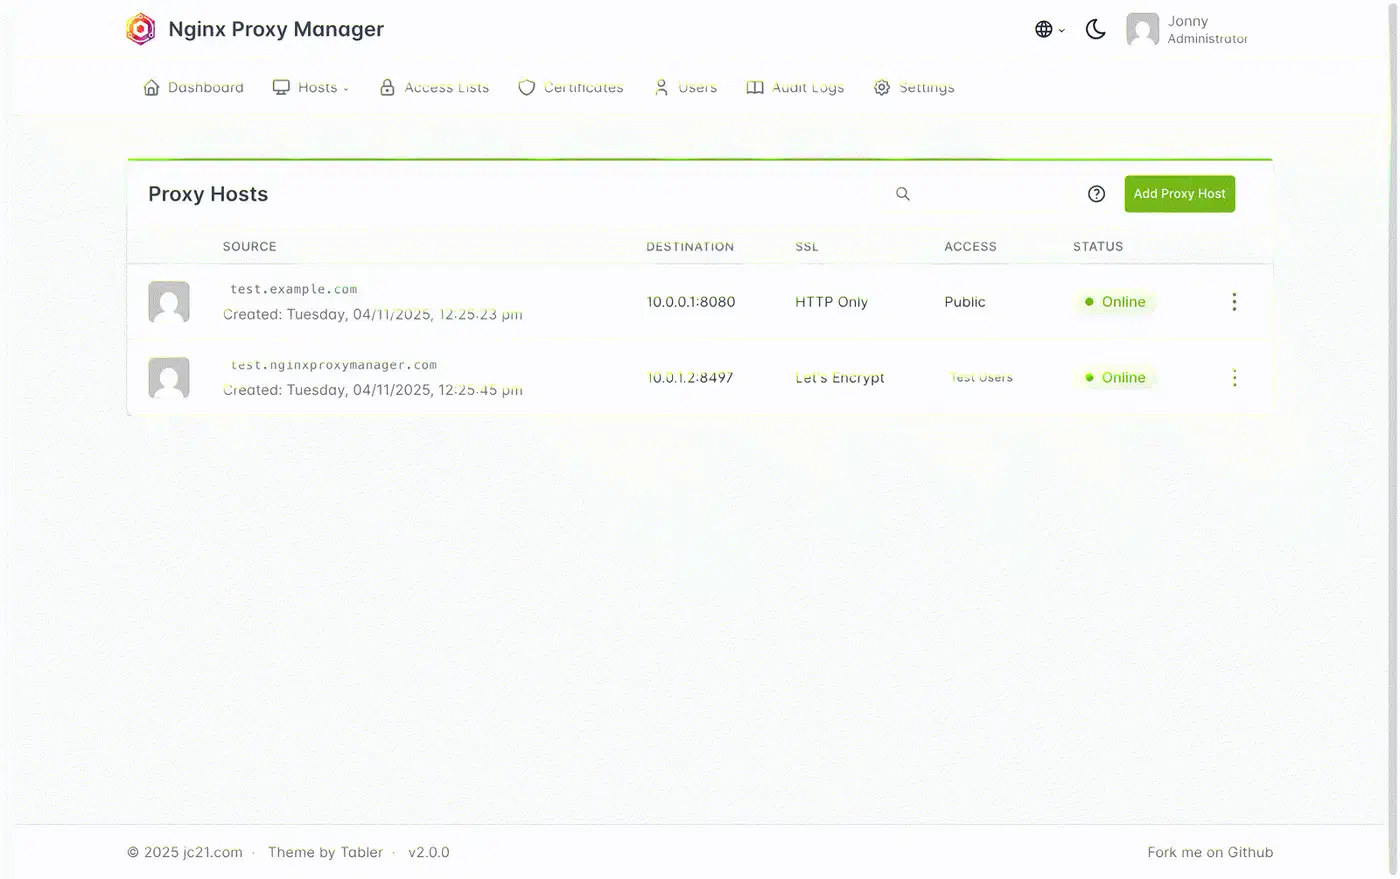
Nginx Proxy Manager (NPM) is the GUI option. It wraps Nginx in a web interface, which suits people who prefer clicking over editing config files. The trade-off: NPM runs Nginx plus a Node.js API plus SQLite, uses more resources, and stores your config in a database rather than a text file you can version. Caddy gives you a single file you can commit to Git and deploy anywhere.
Nginx is still the better pick if you need advanced TCP/UDP stream proxying, complex map directive logic, Lua scripting via OpenResty, or your team already knows Nginx well. Caddy can do basic TCP proxying through the layer4 plugin, but it’s less mature.
Installing Caddy and Writing Your First Caddyfile
Debian/Ubuntu installation:
sudo apt install -y debian-keyring debian-archive-keyring apt-transport-https
curl -1sLf 'https://dl.cloudsmith.io/public/caddy/stable/gpg.key' | sudo gpg --dearmor -o /usr/share/keyrings/caddy-stable-archive-keyring.gpg
echo "deb [signed-by=/usr/share/keyrings/caddy-stable-archive-keyring.gpg] https://dl.cloudsmith.io/public/caddy/stable/deb/debian any-version main" | sudo tee /etc/apt/sources.list.d/caddy-stable.list
sudo apt update && sudo apt install caddy
Docker Compose:
services:
  caddy:
    image: caddy:2.11-alpine
    ports:
      - "80:80"
      - "443:443"
    volumes:
      - ./Caddyfile:/etc/caddy/Caddyfile
      - caddy_data:/data
      - caddy_config:/config

volumes:
  caddy_data:
  caddy_config:
The /data volume is critical. It stores your TLS certificates. Lose it and you re-issue every certificate, which can hit Let’s Encrypt rate limits.
When you install via the package manager, the Caddyfile lives at /etc/caddy/Caddyfile. Validate the syntax before you reload:
caddy validate --config /etc/caddy/Caddyfile
caddy reload
The reload has zero downtime. Your open connections stay intact while Caddy picks up the new config.
Multiple services are just stacked site blocks in the same Caddyfile:
gitea.example.com {
    reverse_proxy localhost:3000
}

jellyfin.example.com {
    reverse_proxy localhost:8096
}
Caddy keeps a separate TLS certificate for each domain and routes traffic by the SNI hostname.
Provisioning a wildcard cert requires a DNS provider plugin. For Cloudflare:
*.example.com {
    tls {
        dns cloudflare {env.CF_API_TOKEN}
    }
}
This needs a Caddy build with the DNS plugin via xcaddy: xcaddy build --with github.com/caddy-dns/cloudflare.
Let’s Encrypt caps you at 50 certificates per registered domain per week. To stay under that limit while you experiment, add this global option at the top of your Caddyfile:
{
    acme_ca https://acme-staging-v02.api.letsencrypt.org/directory
}
Browsers don’t trust staging certificates, but the rate limits are far more generous. Remove this line once your config works.
Proxying Common Self-Hosted Services
Each self-hosted app has its own quirks behind a reverse proxy: WebSocket support, large file uploads, custom headers. Here are tested Caddyfile blocks for popular services. A privacy-friendly analytics app is one of the easiest to add. The guide on putting Plausible behind Caddy uses a three-line block to add HTTPS to the dashboard.
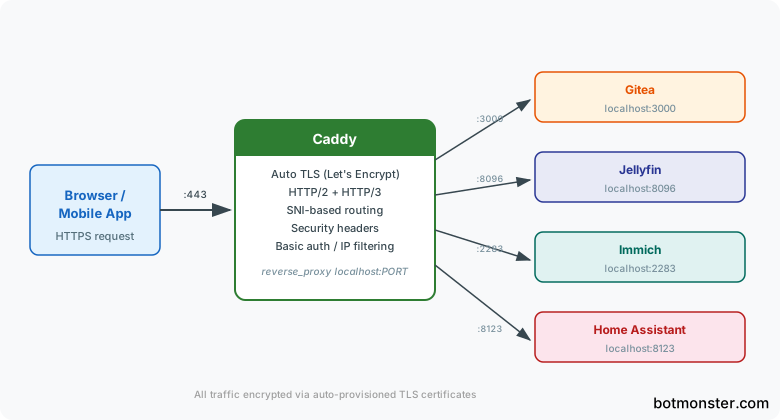
Gitea (port 3000). Caddy fronts a self-hosted Git platform with one block:
gitea.example.com {
    reverse_proxy localhost:3000
}
Also set ROOT_URL = https://gitea.example.com/ in Gitea’s app.ini so clone URLs use the right domain. SSH passthrough needs either a layer4 block or Gitea SSH on a non-standard port. The same instance can turn on Gitea Actions for in-house automation, and Caddy gives the Actions web UI clean HTTPS for free.
Jellyfin (port 8096):
jellyfin.example.com {
    reverse_proxy localhost:8096 {
        header_up X-Real-IP {remote_host}
    }
}
Set the Jellyfin “Base URL” to empty and “Known Proxies” to 127.0.0.1 in the Networking dashboard.
Immich (port 2283):
immich.example.com {
    reverse_proxy localhost:2283 {
        transport http {
            read_timeout 600s
        }
    }
    request_body {
        max_size 50GB
    }
}
The longer timeouts and the body size limit let you upload large photo and video libraries without mid-transfer failures.
Home Assistant (port 8123):
ha.example.com {
    reverse_proxy localhost:8123 {
        transport http {
            read_timeout 0
        }
    }
}
Setting read_timeout 0 turns the timeout off. You need this because Home Assistant uses long-lived WebSocket connections, and Caddy would otherwise close them after 30 seconds.
Vaultwarden (port 8080):
vault.example.com {
    reverse_proxy localhost:8080 {
        header_up X-Real-IP {remote_host}
    }
}
General pattern: Start with reverse_proxy localhost:PORT. Add transport http { read_timeout } for WebSocket or streaming services. Add request_body { max_size } for upload-heavy services. Add header_up directives when the backend needs the real client IP.
Security Hardening
Your reverse proxy is the boundary between the internet and your services. Caddy has several built-in features to lock that down.
You can define reusable security headers with a Caddyfile snippet:
(security-headers) {
    header {
        Strict-Transport-Security "max-age=31536000; includeSubDomains; preload"
        X-Content-Type-Options "nosniff"
        X-Frame-Options "SAMEORIGIN"
        Referrer-Policy "strict-origin-when-cross-origin"
    }
}
Then import it in any site block: import security-headers.
For admin panels, add basic authentication:
caddy hash-password
# Enter your password, get a bcrypt hash
route /admin/* {
basicauth {
admin $2a$14$...
}
reverse_proxy localhost:8080
}You can also limit access by IP, so a service stays on your local network only:
@allowed remote_ip 192.168.1.0/24 10.0.0.0/8
handle @allowed {
    reverse_proxy localhost:8080
}
handle {
    respond 403
}
For Fail2ban integration, enable file-based access logging:
log {
    output file /var/log/caddy/access.log
}
Then create a Fail2ban filter that matches 401/403 responses. It bans an IP on its own after repeated failed logins. For a full server-level security baseline, see how to harden a Linux server with SSH lockdown, automatic security updates, and nftables firewall rules.
If you can’t open ports 80 and 443 on your router, Cloudflare Tunnel (cloudflared) is a good option. Caddy still handles the reverse proxying locally, and Cloudflare Tunnel provides the public ingress without port forwarding.
DNS and Split-Horizon Access
For services you reach both locally and remotely, you need proper DNS. Create A records that point *.example.com to your server’s public IP, which you can read off a page that reports it back from the server itself. For local access without hairpin NAT issues, run a local DNS server like Pi-hole or Technitium. It resolves those same domains to your server’s internal IP, such as 192.168.1.100. This is split-horizon DNS: external queries hit your public IP, internal queries go straight to the LAN address.
Pair this with Tailscale for remote access. Now your services work the same whether you’re at home or on the road, with no VPN client to juggle.
Caddy does not care where the traffic comes from. It just sees requests on port 443 and proxies them. The DNS layer decides which path the traffic takes to get there.
Troubleshooting Tips
A few common issues come up when you start with Caddy.
If certificates fail to issue, Caddy needs ports 80 and 443 open and reachable from the public internet for the HTTP-01 and TLS-ALPN-01 ACME challenges. If your ISP blocks port 80, add a DNS provider plugin and switch to the DNS challenge. Check journalctl -u caddy for detailed error messages about certificate provisioning.
A 502 Bad Gateway means Caddy reached the backend but got no valid response. Confirm the backend service is running on the expected port with ss -tlnp | grep PORT. Also check whether the service is bound to 127.0.0.1 or 0.0.0.0. Some Docker setups only expose ports on specific interfaces.
If a service like Home Assistant or the Vaultwarden password server drops its WebSocket connection, you probably need read_timeout 0 in the transport block. Caddy’s default timeout works for standard HTTP, but WebSocket connections need to stay open the whole time.
One more thing: always run caddy validate --config /etc/caddy/Caddyfile before you reload. A syntax error in one site block stops every site from loading, not just the broken one.