Sync your EV charging with solar production in Home Assistant

Why PV Self-Consumption Matters Right Now
A 7.4 kW wall box pulling a flat 32A through a sunny afternoon is the worst load profile for a house with rooftop solar. It ignores what the panels do. It drags power from the grid during the cheapest hours of the day. It forces the inverter to dump the surplus at whatever feed-in rate your utility feels like paying that month. Since the post-2023 collapse of feed-in tariffs across Europe, that rate is painful. Export rates in Germany, the Netherlands, and the UK now sit around 6-8 cents per kWh. Retail import hovers between 28 and 35 cents. Every exported watt is a 20-cent loss. Every imported watt while the sun is up costs the same.
The fix is a solar-synced charge controller: a small piece of automation that reads live production and household load , works out the surplus, turns it into a charging current between 6A and 32A, and writes that value to the wall box every few seconds. Home Assistant is the open-source platform I reach for first. It already talks to every major solar inverter and every wall box worth owning. The automation fits in one YAML file, runs locally, and on my own setup it cuts daylight grid import from tens of kilowatt-hours per day to near zero.
There are non-money reasons to care too. Dynamic grid tariffs and time-of-use pricing now push midday prices below zero on sunny weekends across Dutch, Belgian, and Spanish grids. An uncontrolled export can cost you money to get rid of. Dutch netcongestie rules and the German section 14a EnWG framework let grid operators throttle dumb EV charging, but locally steered charging stays exempt. On the green side, rooftop PV sits around 40 gCO2/kWh lifecycle, versus 300-400 gCO2/kWh for the typical European grid mix. For the household member who shrugs at all of the above, the line that works is “free miles paid for by the roof.”
A fixed schedule like “charge from 11:00 to 15:00” does not solve the problem. On a cloudy Tuesday the car pulls from the grid at the full setpoint. On a sunny Saturday the schedule ends at 15:00 and leaves three hours of surplus on the table. A surplus-following controller is the only thing that tracks what the panels are doing.
Wall Boxes That Home Assistant Can Actually Control
Not every wall box exposes a writable current setpoint. The ones that do use wildly different protocols. A box that takes a new amp value every ten seconds gives a much smoother control loop than one that rejects changes more often than every thirty seconds. Four families cover most HA-friendly installs on the market today.
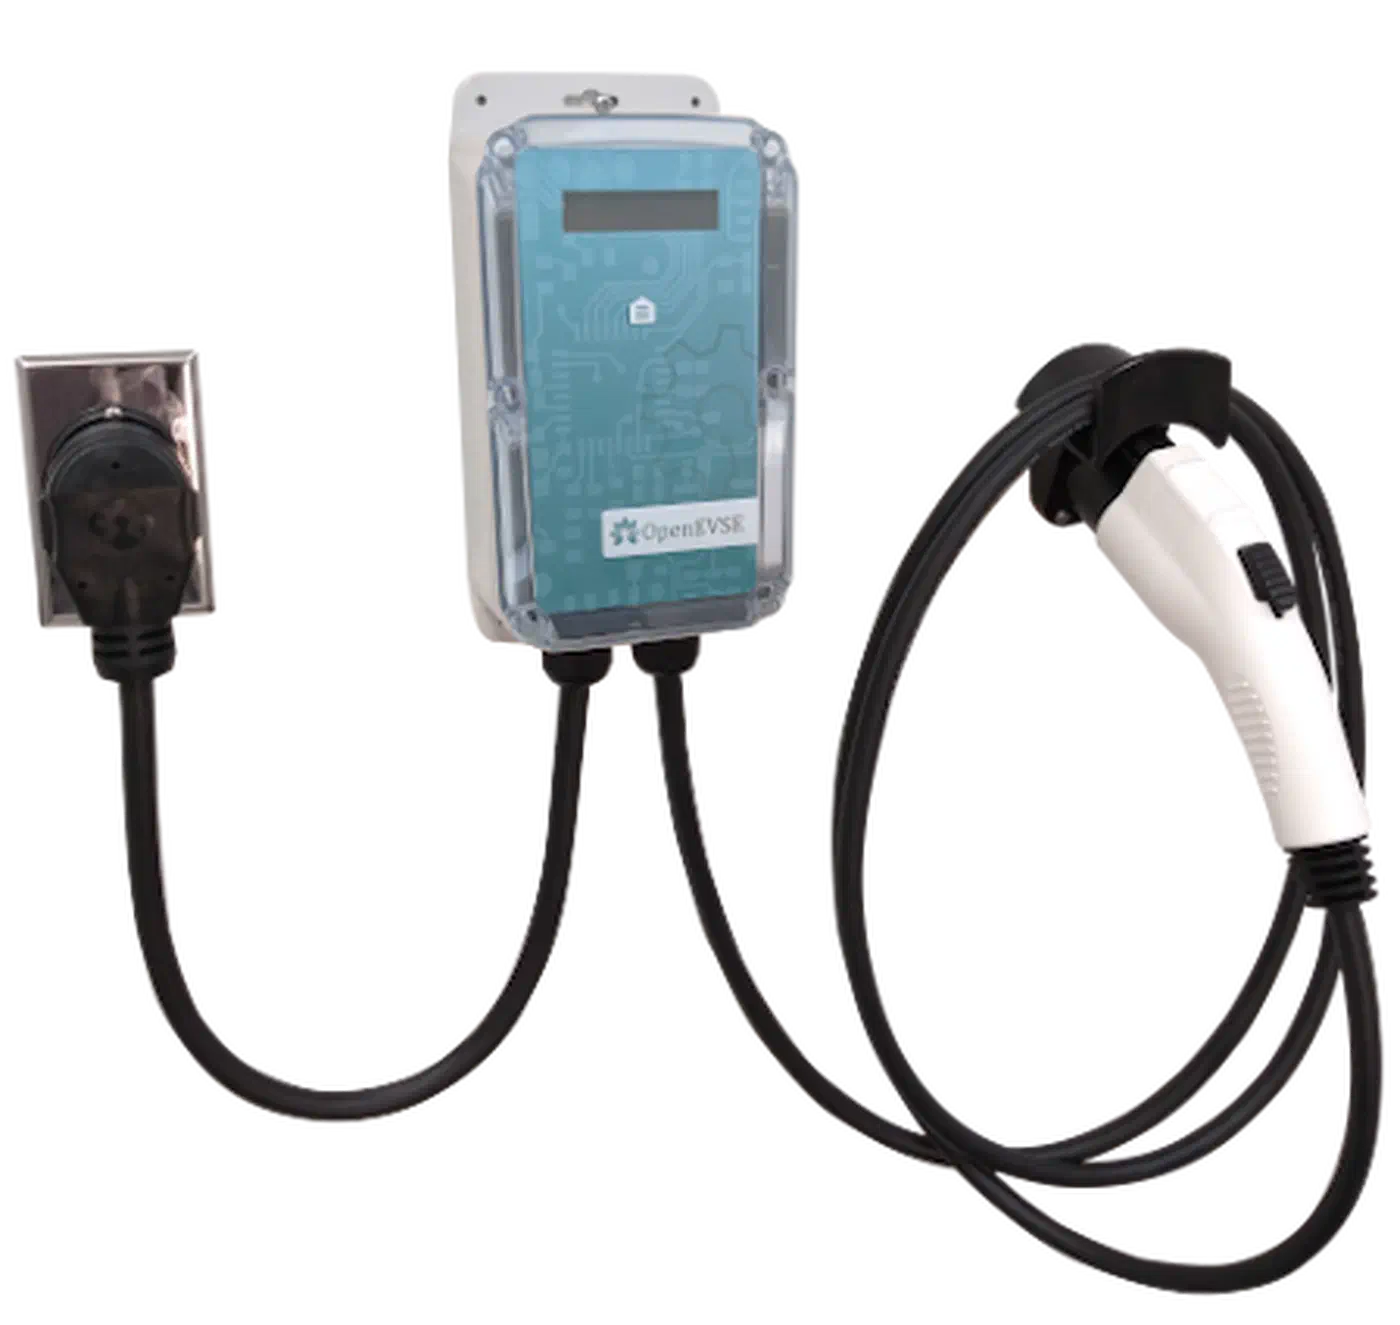
OpenEVSE
is the open-source reference design. It speaks both HTTP and the messaging protocol Home Assistant uses for DIY hardware
. The native openevse integration exposes a charge-rate number entity for 6-48A setpoints, plus session energy and state sensors. The community wrapper at firstof9/openevse
adds solar divert modes on the device itself if you prefer the logic to sit closer to the contactor.
The go-e Charger (Gemini, HOMEfix, HOME+) is the most popular plug-and-play option in Europe. The ha-goecharger-api2 community add-on talks local HTTP API v2 over WebSocket. It exposes per-phase current sensors and a writable amp number entity. Units on firmware below 055 round current changes down hard, so a 13.2A request becomes 13A rather than 14A. Update the firmware before you trust fine-grained control.

Keba P30 and P40 x-series wall boxes talk over UDP port 7090. The built-in keba integration supports them out of the box. They take current setpoints in milliamps and reply within a second, which makes them the twitchiest of the four, in a good way.
Wallbox Pulsar Plus and Copper SB use the official cloud-based integration. It exposes both a charging-power number and a max-current number. The cloud link is the catch. If Wallbox servers go down, your surplus controller goes blind. Some Pulsar units also reject current changes more than once every thirty seconds, which forces a slower outer loop.
Whatever you pick, the catch-all fallback is the OCPP custom component at lbbrhzn/ocpp
. It turns any OCPP 1.6J wall box into an HA-controlled device. It does this by sending the SetChargingProfile message server-side and exposing a max-current number entity. Alias whichever entity you end up with to number.wallbox_max_current in a customize file. Every automation below then stays portable across hardware changes.
Three hardware limits apply no matter the protocol. 6A is the IEC 61851 and SAE J1772 floor: below that, the EV will not charge at all. 16A is a typical single-phase home max. 32A is the three-phase ceiling most European home installs allow before you need a utility upgrade.
| Wall box | Protocol | Cloud required | Typical update rate | Price range |
|---|---|---|---|---|
| OpenEVSE | MQTT / HTTP local | No | ~1 s | 500-700 EUR |
| go-e Charger Gemini | HTTP API v2 local | No | 2-5 s | 700-900 EUR |
| Keba P30 x-series | UDP 7090 local | No | <1 s | 900-1200 EUR |
| Wallbox Pulsar Plus | Cloud | Yes | 30 s minimum | 650-800 EUR |
Solar Inverter Integrations and the Surplus Signal
The setpoint is only as good as the surplus reading that feeds it. Five inverter integrations cover most rooftop installs. SMA devices talk Modbus TCP to the built-in sma integration. It exposes a grid-power sensor that goes negative when you export. That sign rule is the cleanest surplus signal you can get, because a negative reading already stands in for unused production.
Fronius Symo and GEN24 use the fronius integration. It reports PV power and grid power with the same SMA-style sign rule. SolarEdge inverters with the optional energy meter feed the solaredge integration over the SunSpec Modbus map. You get per-inverter production plus a single site-consumption value. Huawei SUN2000 owners use the huawei_solar community integration over Modbus TCP or RTU. Enphase IQ Envoy hardware reports production and use via the enphase_envoy integration. It polls at about 1 Hz locally on current firmware.
With any of these feeding Home Assistant, the surplus template sensor is a three-line job:
template:
  - sensor:
      - name: "PV Surplus W"
        unit_of_measurement: "W"
        state: >
          {% set s = states('sensor.pv_power') | float(0) - states('sensor.house_load_w') | float(0) %}
          {{ [s, 0] | max }}
The clamp to zero is the load-bearing line. A negative surplus (you are pulling from the grid) must not flow into the amp math as a negative number. If it does, the integer rounding feeds back and spits out nonsense setpoints.
If there is a home battery in the mix, you have a priority call to make. Subtract battery charge power from the surplus to give the wall battery first dibs. Add it back to push the EV ahead of the battery. An input_select entity named surplus_priority with options battery_first, ev_first, and split gives the household one switch to make that choice without editing YAML.
Modbus-based integrations poll at 10-30 seconds by default. That happens to be the cadence a smooth control loop wants. Faster polling adds jitter the wall box cannot follow anyway. Slower polling misses cloud dips. Ten seconds is the value I have settled on across SMA, Fronius, and Huawei installs.
The Automation: Turning Watts Into Amps
The core of the system is a short automation. It turns a smoothed surplus reading into an amp setpoint and writes it to the wall box. For a single-phase 230V install the math is:
amps = surplus_w / 230Round down. Rounding up guarantees a brief grid pull every time the surplus is not an exact multiple of 230 watts. For three-phase installs the divisor becomes 230 times 3, or 690 watts per amp.
Two smoothing steps keep the loop from swinging. A statistics
sensor with state_characteristic: mean over 120 seconds on the surplus signal soaks up cloud dips and inverter sampling jitter. Hysteresis on the output side, where you only write a new setpoint if it differs from the current one by at least 1A, stops the wall box getting a new command every ten seconds.
sensor:
  - platform: statistics
    name: "PV Surplus Avg 2m"
    entity_id: sensor.pv_surplus_w
    state_characteristic: mean
    max_age:
      minutes: 2
    sampling_size: 60

automation:
  - alias: "Solar-following EV charge"
    trigger:
      - platform: state
        entity_id: sensor.pv_surplus_avg_2m
    variables:
      surplus: "{{ states('sensor.pv_surplus_avg_2m') | float(0) }}"
      target_amps: "{{ (surplus / 230) | int(0) }}"
      clamped: "{{ [[target_amps, 6] | max, 32] | min }}"
      current: "{{ states('number.wallbox_max_current') | int(0) }}"
    condition:
      - "{{ (clamped - current) | abs >= 1 }}"
    action:
      - service: number.set_value
        target:
          entity_id: number.wallbox_max_current
        data:
          value: "{{ clamped }}"
Below 6A of target, there are two sane choices. The first is to pause the session via the wallbox charging switch. Wait for the surplus to climb back above 6A * 230V = 1380W for 60 seconds before you resume. The second is a “top up from grid” mode held at 6A, picked by the user through an input_boolean.allow_grid_topup. The pause path is cleaner when the battery has plenty of range. The top-up path is kinder to your commute when the forecast is bad.
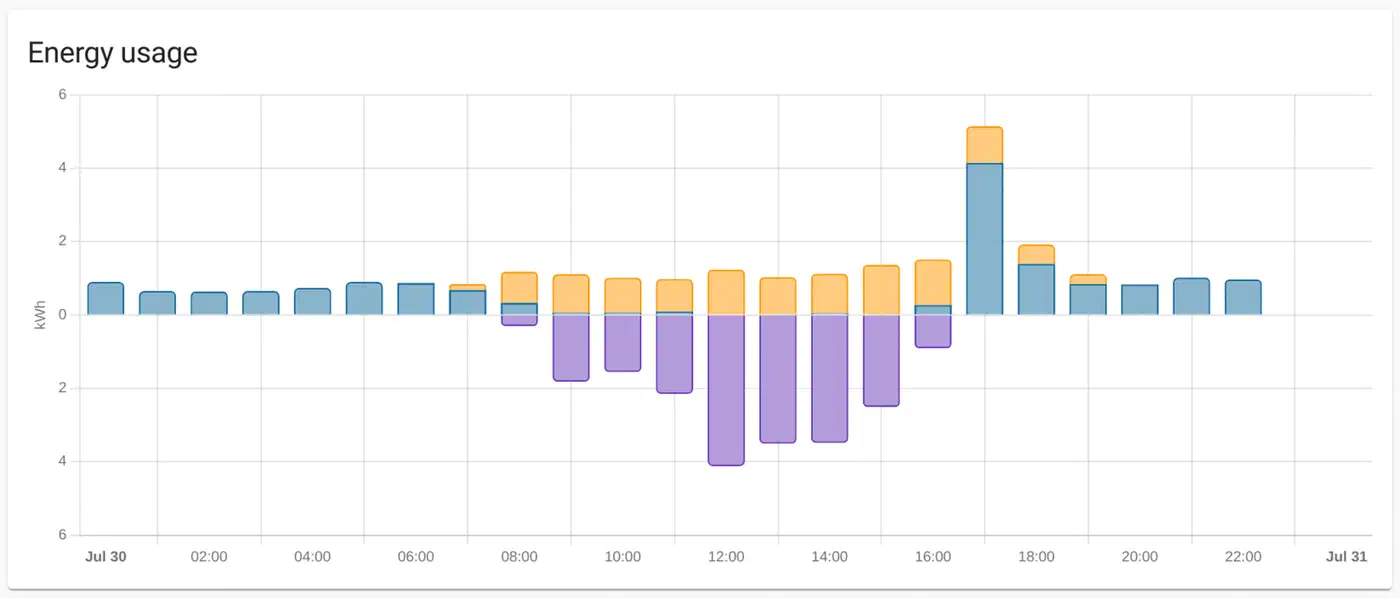
Three minutes of straight below-6A surplus is the right line for pausing. Shorter windows false-trigger on quick cloud dips. A Lovelace dashboard showing PV production, house load, EV draw , target amps, and actual wall-box current on one 2-hour chart is a must for the first week of tuning. Almost every issue you will hit shows up on that chart within ten seconds.
The Edge Cases Every Installation Hits
A naive surplus-follower works on a clear April afternoon and breaks on a typical part-cloudy day in January. Six failure modes are worth handling up front.
Cloud dips are the most common. A cumulus cloud can drop output by 70% in ten seconds. Without the 120-second average, the automation will yo-yo the contactor and the onboard charger. Some EVs, like early Renault Zoe and Nissan Leaf models, will refuse to resume after a few cycles. They throw a fault code until you restart the session by hand.
The 6A floor is set by the control pilot signal in the charging cable. No amount of clever YAML can get around it. Below roughly 1.4 kW of surplus you cannot charge a compliant EV without pulling from the grid. The top-up-vs-pause choice above is the only real answer. Feeding the wall box a 5A setpoint does not work. The car will still draw 6A and pull the rest from the grid.
Home-battery priority is what causes the most household arguments. If you own an LFP or lithium wall mount, decide up front whether the EV or the battery gets surplus first. A split rule, where the first 3 kW feeds the battery and anything past that goes to the EV, works well if the battery is usually full by mid-morning.
Three-phase load imbalance can trip DSO-set single-phase caps. If your grid operator sets a 4.6 kW single-phase limit, clamp the max amps at 20A no matter the surplus. Going over the cap can trigger anti-islanding or grid-guard trips that need a manual reset at the inverter.
The “car says full” case shows up as a wall box stuck on a 6A setpoint and 0A actual draw. A full battery refuses current no matter what amps you ask for. Catch it with a check on actual current below 1A for five minutes. Then stop pushing setpoint changes until the next session starts. Without this guard, the automation will flip between 6A and 7A forever while the car ignores both.
Winter low-sun spells deserve their own plan. Below a season floor of roughly 2 kWh of daily PV yield, switch the surplus automation off and fall back to a cheap-tariff night schedule. Six weeks of constant 6A pokes during a dark December wear out contactors that would otherwise last a decade. Preconditioning adds a similar wrinkle. If the EV app starts cabin warming while plugged in, the car will pull 2-3 kW no matter what setpoint you sent. Watch for actual current above the setpoint, and pause the automation for the preconditioning window.
When a Packaged Tool Makes More Sense
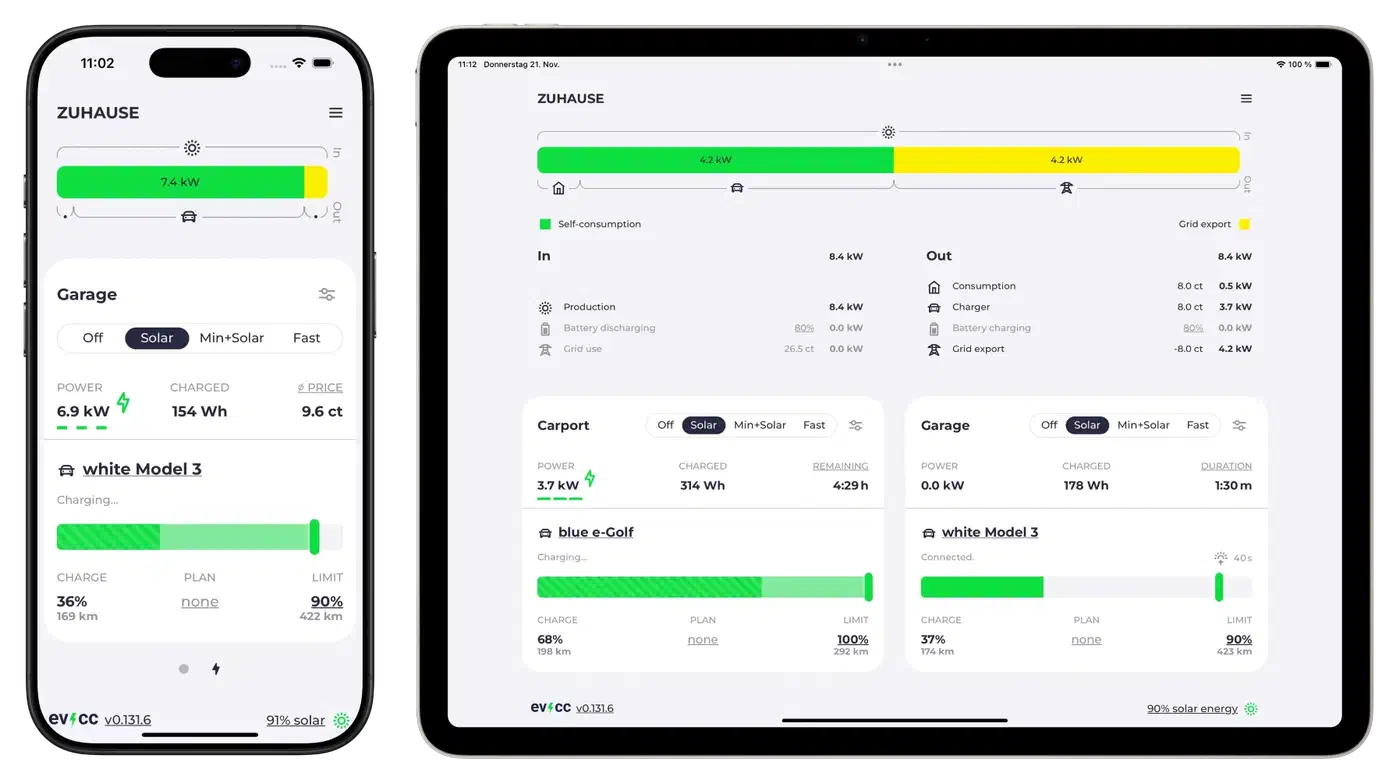
Not every reader wants to run their own YAML control loop. evcc
and openWB
are both mature open-source packages that solve the same problem. They ship a polished UI, multi-car support, and dynamic-tariff support baked in. evcc in particular talks to Home Assistant both ways. The ha-evcc
integration exposes evcc state as HA entities. Since May 2025 evcc can also drive any HA entity that ships turn_on and turn_off services as a PV-surplus consumer. That setup turns HA into a generic load-switching layer while evcc owns the charging logic.
The trade-off is structural. A native HA automation lives in one YAML file, restarts in seconds, and is easy to version-control. evcc is a separate daemon with its own config format, its own restart cycle, and its own dashboard. For one EV, one wall box, and one inverter, the YAML path is cleaner. For two EVs, a home battery, dynamic tariffs from Tibber or Octopus Agile , and a heat pump that also wants to see the surplus, evcc saves weeks of debugging.
Either path lands at the same result. The grid meter barely moves while the sun is up. The car charges on whatever the panels make. The summer power bill drops by a third to a half, based on how much you drive. The YAML above is the shortest route there for anyone already on Home Assistant. The hardware list covers what is on European and North American installer shelves right now.