 Botmonster Tech
Home Assistant can hear your wake word with no cloud

The short answer: Home Assistant’s Wyoming protocol connects local wake word detection (openWakeWord or microWakeWord), speech-to-text (Whisper), text-to-speech (Piper), and intent handling into a voice pipeline where your audio stays inside your LAN. Put a Wyoming satellite on a Raspberry Pi with a microphone, point it at your Home Assistant server, and you get an always-listening, privacy-first smart home assistant that answers in under a second on modest hardware. Pair it with a wall-mounted tablet dashboard and the room needs no phone at all.
There is no cloud account to create, no recordings shipped to a data center, and no terms of service that quietly change every few months. If you already run Home Assistant, adding voice now comes down to installing three add-ons and wiring up one small Pi.
How Home Assistant Voice Pipelines Work
A voice pipeline is a chain of components that turns a spoken sentence into a smart home action. In Home Assistant, the chain has five stages:
- Wake word detection, where a small model listens continuously for a trigger phrase like “OK Nabu” or “Hey Jarvis”.
- Speech-to-text (STT): once the wake word fires, the audio that follows is recorded and transcribed.
- Intent recognition, where Home Assistant’s built-in Assist pipeline matches the text against your devices, areas, and custom sentences.
- Action: the matched intent runs as a service call (turn on a light, start a timer, set a scene).
- Text-to-speech (TTS), where Piper turns the reply into audio and the satellite plays it back.
Everything is connected via the Wyoming protocol, a small framing format that lets each stage run as an independent server. Whisper can live in one container, Piper in another, openWakeWord in a third, and a satellite on a Raspberry Pi across the house can talk to all of them over your LAN. Auto-discovery via Zeroconf finds Wyoming services automatically, so once the add-ons are running, Home Assistant picks them up without any manual YAML editing.
Because the stages are decoupled, you can scale each piece separately. Heavy STT work runs on your main Home Assistant machine where CPU is plentiful. The wake word engine runs on a Pi Zero 2 W near the couch. Nothing leaves your network, yet any component can be upgraded or replaced on its own.

Setting Up the Server Side
All three server-side pieces (STT, TTS, wake word) install as Home Assistant add-ons from the official add-on store, which means no manual Docker commands and automatic updates through Supervisor.
For Whisper, go to Settings > Add-ons > Add-on Store > Whisper > Install. After it starts, open the configuration tab and pick a model size. This choice has the biggest impact on both accuracy and latency in the whole pipeline:
| Model | RAM | Pi 4 latency | Accuracy (short commands) | Recommended for |
|---|---|---|---|---|
tiny-int8 | ~200 MB | 3-5 s | Okay | Pi 4 default, speed over accuracy |
base-int8 | ~400 MB | 8-12 s | Good (~90%) | Pi 5, Home Assistant Green |
small-int8 | ~1 GB | 15-20 s | Very good (~95%) | x86 servers, NUCs |
medium | ~4 GB | Too slow for Pi | Excellent | Dedicated GPU box |
Home Assistant defaults to auto, which picks tiny-int8 on ARM and base-int8 elsewhere. Whisper supports 99 languages, selected in the same configuration screen. Language affects both model download size and accuracy, so if you speak German at home, pick German rather than leaving it on auto-detect.
Piper follows the same flow: Settings > Add-ons > Piper > Install, then pick a voice. Piper runs on CPU only, no GPU required, and a Pi 5 generates a two-second reply in 200-500 ms. Each language has several voices, usually with low, medium, and high quality variants. The medium variants sound natural enough that guests rarely notice they are local, and they cost almost nothing in CPU compared to high.
openWakeWord installs the same way. The add-on ships with a handful of pre-trained wake words: “Okay Nabu”, “Hey Jarvis”, “Hey Mycroft”, and “Alexa”. You can enable several at once, and each satellite can subscribe to a different trigger, which is handy if you want the kitchen Pi to answer to one name and the office Pi to another.
microWakeWord is the lighter alternative, built by Kevin Ahrendt for running directly on ESP32-S3 microcontrollers. It runs three wake words simultaneously on a single ESP chip and powers the official Home Assistant Voice Preview Edition hardware. If you plan to use ESPHome-based satellites rather than a Pi, microWakeWord is the natural choice.
Speech-to-Phrase, released in Voice Chapter 9, is a very different take on STT for people who only use voice for home control. It auto-generates recognizable phrases from your devices, areas, and sentence triggers, then trains a tiny model against that fixed vocabulary. A Raspberry Pi 4 processes a command in under a second, a Pi 5 in 150 milliseconds. The trade-off: anything outside the pre-trained phrase set will not be recognized, so no shopping list dictation, no timer names, no wildcards. For command-only smart home use, the speed gain is worth it.
Once the add-ons are running, wire them together at Settings > Voice Assistants > Add Assistant. Pick Whisper for STT, Piper for TTS, and openWakeWord for wake words, then set this as the preferred pipeline. The Assist debug screen in the Developer tab lets you type test sentences and watch each stage fire, which is the fastest way to confirm the pipeline is wired correctly before you touch any hardware.
Building a Wyoming Satellite
The server can answer voice commands on its own if it has a microphone attached, but distributed satellites are what make Home Assistant voice practical day to day. You put one small always-on device per room, and each one streams audio back to the central pipeline.
A minimum hardware shopping list looks like this:
- Raspberry Pi Zero 2 W (cheap) or Pi 4/5 (more headroom)
- A USB microphone, or a ReSpeaker 2-Mic HAT / 4-Mic array for better far-field pickup
- A speaker: a 3.5 mm powered speaker, a USB speaker, or whatever you plug into the 3.5 mm jack on the ReSpeaker HAT
- A 32 GB SD card and a 5 V power supply
The 2-Mic HAT is the simplest option and supports far-field pickup up to about three meters, which is fine for a normal-sized room. The 4-Mic linear array adds 180-degree direction detection, which helps when the satellite sits against a wall and needs to reject noise coming from behind it. For a small room the 2-Mic is enough.
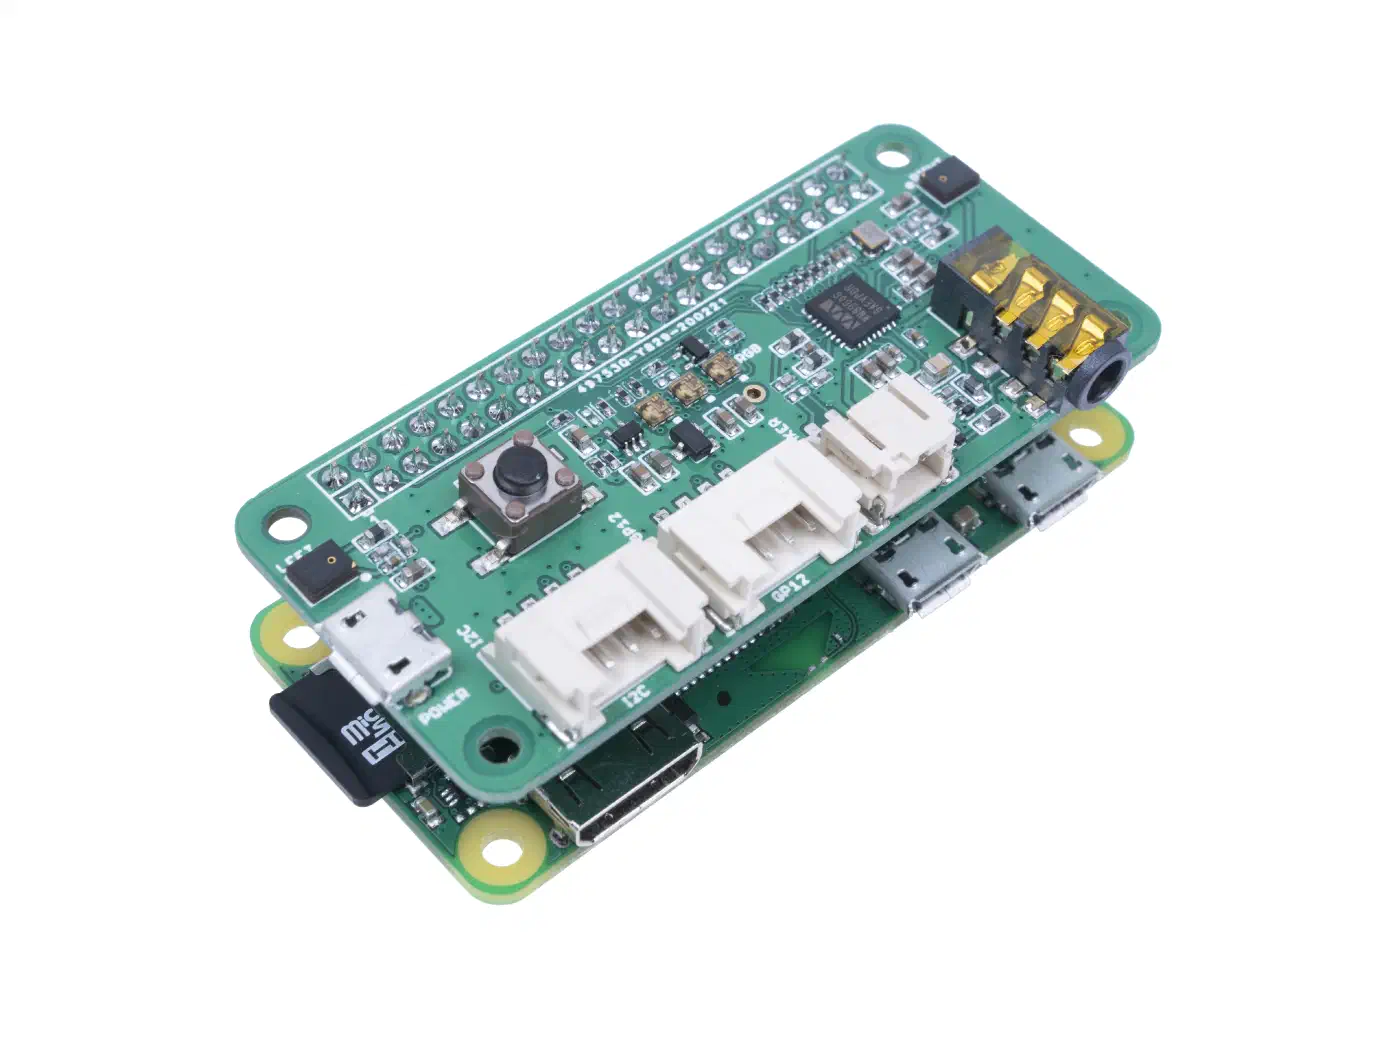
On the software side, flash Raspberry Pi OS Lite and run the wyoming-satellite install script. The tutorial walks through installing ALSA, the satellite service, and a local openWakeWord instance so the Pi can do wake word detection on-device without streaming raw audio to the server. Only post-wake-word audio crosses the network, which cuts bandwidth and latency at the same time. If you prefer an ESP32-S3-based alternative to a Pi, Willow firmware delivers a similar local pipeline with sub-second response times on cheaper hardware.
Once installed, point the satellite at the Home Assistant IP, pick which pipeline it should use, and enable noise suppression and auto-gain control in the satellite’s command-line flags. In the Home Assistant UI, the satellite shows up as a Wyoming device the moment it starts talking to the server.
If you are using the ReSpeaker HAT, its three APA102 RGB LEDs can be wired to the satellite’s state hooks so they glow blue while listening, yellow while processing, and green while speaking. It sounds cosmetic, but once you have visual feedback you stop second-guessing whether the wake word fired.
Multi-room is straightforward: every extra satellite is just another copy of the same image with a different hostname. Home Assistant routes the spoken reply back to whichever satellite triggered the command, so asking the kitchen Pi to start a timer produces an answer from the kitchen speaker, not from every device in the house. If you also want synced music in every room, a Snapcast streaming layer for the entire home runs on the same Raspberry Pi hardware.
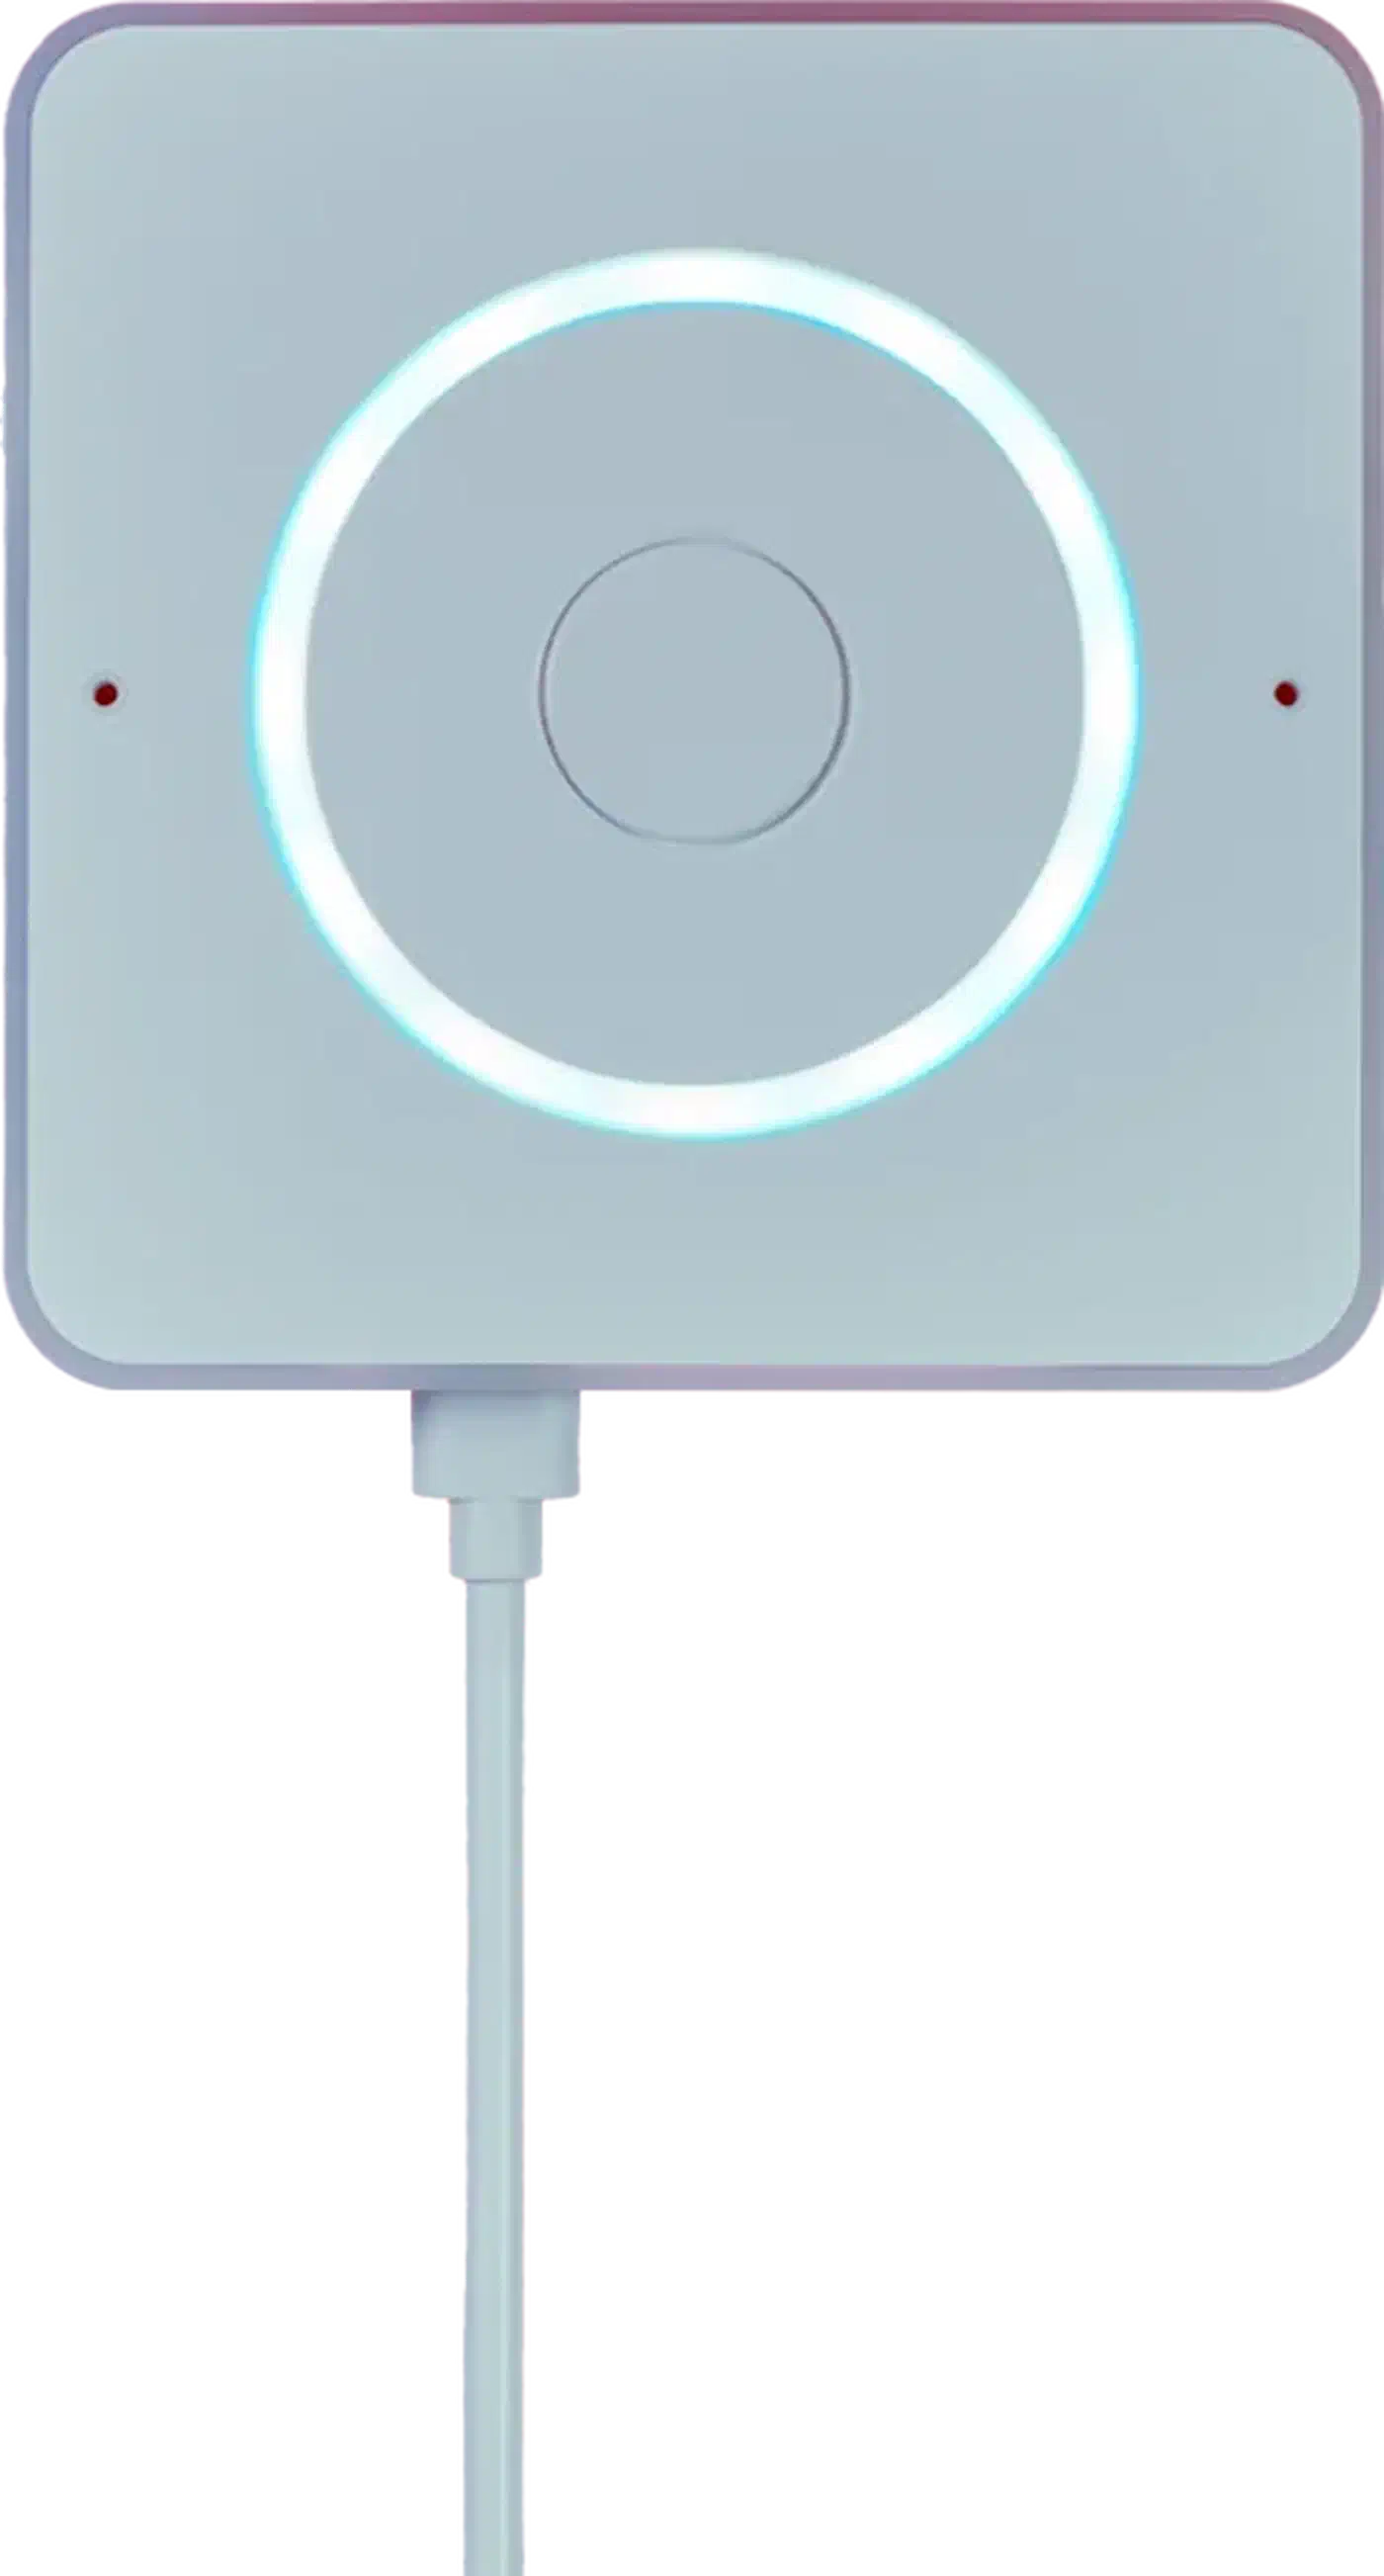
If soldering and flashing a Pi does not appeal, Nabu Casa sells the Home Assistant Voice Preview Edition for $59-$69. It is a purpose-built satellite with an ESP32-S3, an XMOS XU316 audio DSP for echo cancellation, dual microphones, an LED ring, a physical mute switch that cuts power to the mics, and a rotary volume dial that looks like an iPod click wheel. It runs microWakeWord on-device and ships with ESPHome firmware, so you can flash it, customize it, or rewrite the whole thing as code. Our Voice Preview Edition review covers a year of daily use including wake word accuracy, pipeline latency, and whether it holds up as a permanent kitchen fixture.
Optimizing Recognition Accuracy
Local STT has a reputation for being less accurate than cloud services, and out of the box that reputation is deserved. A handful of small tweaks close most of the gap for smart home use:
- Pick the right Whisper model. Moving from
tiny-int8tobase-int8is usually the biggest single accuracy win. On a Pi 5 the latency cost is small; on a Pi 4 it doubles processing time, which is when Speech-to-Phrase starts to look attractive instead. - Turn on noise suppression by passing
--noise-suppression 2to the Wyoming satellite. This uses webrtc-noise-gain to filter steady background noise (fans, HVAC, fridge hum) before sending audio to the server. - Turn on auto-gain with
--auto-gain 5so a quiet whisper and a loud shout both arrive at the server at a usable level. - Mount the microphone well. Ceiling-mounted or shelf-mounted microphones beat desk-mounted ones because they catch more of the room. Keep the mic at least a meter away from speakers, kitchen extractor fans, and AC vents: those three are the most common sources of false wake word triggers.
- Add custom sentences by dropping YAML files into the
custom_sentences/folder in your Home Assistant config. You can teach Assist phrases specific to your vocabulary, like “bedtime mode” or “start the reading scene”. Intent recognition is deterministic, so adding custom sentences has zero performance cost. - Use Speech-to-Phrase for command-only satellites. If a satellite only ever needs to control devices, swap Whisper for Speech-to-Phrase on that pipeline. You lose dictation but gain sub-second response times.
- Keep a cloud fallback if you want one. Home Assistant lets you configure a second pipeline that uses cloud STT (Nabu Casa, OpenAI, Google) as a fallback, and you can toggle it per satellite. Your living room can stay fully local while a guest satellite in the home office falls back to cloud for tricky queries.
Privacy: Local vs Cloud Voice Assistants
Privacy is the main reason most people go through the trouble of setting this up, so it is worth being concrete about what each option actually sends out of your house:
| Assistant | Wake word | Audio leaves network | Text leaves network | Storage |
|---|---|---|---|---|
| Wyoming + Whisper + Piper (this guide) | On-device | No | No | None |
| Home Assistant Cloud (Nabu Casa) | On-device | Yes (STT only) | Yes | Processed, not retained |
| Amazon Alexa | Cloud-confirmed | Yes | Yes | Retained by default, opt-out buried |
| Google Home | Cloud-confirmed | Yes | Yes | Retained for “service improvement” |
| Apple HomePod / Siri | On-device for common commands | Yes for complex queries | Yes | Anonymized ID, shorter retention |
The fully local setup is the only one where the answer to “did anything leave my network” is a flat no. That matters if you have kids, if you have guests over, or if you object to a multinational corporation keeping a searchable index of your kitchen conversations. Pairing this setup with smart home network segmentation — putting every IoT device on its own VLAN — closes the remaining attack surface at the network layer.
The honest trade-off is conversational accuracy. Cloud assistants are noticeably better at long, free-form queries (“what’s a good substitute for buttermilk in pancakes?”) because they run much larger models. For short smart home commands like turning off lights, setting a timer, running a scene, or querying a sensor, local STT is indistinguishable from cloud in practice, and it is frequently faster because there is no round trip to a data center.
A practical compromise many people settle on: run Wyoming locally for every home control command, and keep a phone nearby for general knowledge questions. You get the privacy floor for the 95% of voice use that involves your own devices, and you keep a separate escape hatch for the 5% that benefits from a larger model. You can also close that gap on-device by giving Assist a local LLM brain that fields free-form questions without the cloud.
Final Thoughts
Home Assistant’s voice stack has reached the point where a fully local assistant is no longer a weekend science project. Install three add-ons, flash a Pi with wyoming-satellite, pick a wake word, and you get a private voice assistant that handles the 90% of tasks people actually use voice for. Add Speech-to-Phrase or the Voice Preview Edition and the rough edges (latency, echo cancellation, visual feedback) get smoother still.
If you already run Home Assistant, there is no longer a good reason to plug an always-listening commercial speaker into your living room. The pieces exist, they are free, and they stay on your network.