 Botmonster Tech
A $9 chip with RuView can hear you breathe through a wall

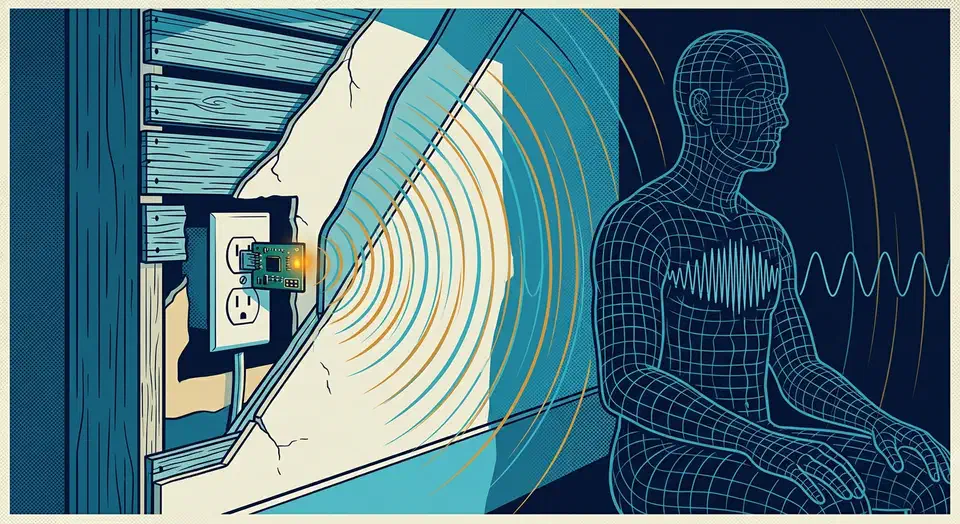
RuView WiFi sensing turns a $9 ESP32 board into a presence and breathing monitor that reads radio reflections instead of pictures. The project measures 82.3 percent held-out presence accuracy, retracted its old 100 percent claim, and ships an on-device pose model at 3.0 percent. Those three numbers come from three different models.
Key Takeaways
- RuView reads WiFi reflections off people, so no camera and no wearable.
- Your laptop can’t do this because its WiFi chip hides the raw data.
- The project pulled its 100 percent presence claim and published 82.3 percent.
- The on-device pose model is a first cut at 3.0 percent.
- A sensor that hears breathing through a wall needs everyone’s consent.
ruvnet/RuView is an MIT-licensed Rust project that reads WiFi radio data off cheap chips. It reports who is in a room, how fast they are breathing, and roughly how their heart rate is trending. Its README is unusually blunt about which of its own numbers hold up.
How does WiFi sensing detect people through walls?
Every WiFi radio already measures how a room distorts its own signal. A human body is a large, wet obstacle, and it distorts that signal in a rhythmic pattern. Breathing shows up as a slow wobble, and a heartbeat as a smaller, faster one.
A radio can report that distortion two ways, as RSSI or as CSI. RSSI is a single number: how strong the signal is. Channel State Information is richer. It reads both amplitude and phase on each of 56 subcarriers, many times a second. That extra detail is what makes vital signs readable at all.
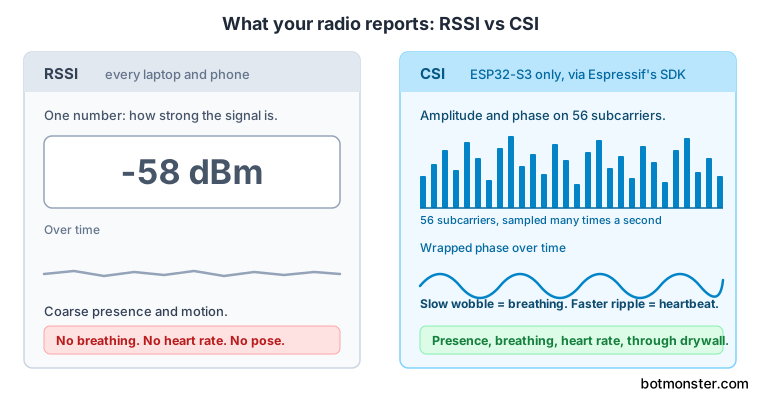
However, consumer WiFi chips in laptops and phones never hand CSI to the operating system. Espressif’s SDK does. That’s why the project runs on a $9 ESP32-S3 instead of the machine on your desk.
The signal processing itself is ordinary. Breathing comes from a 0.1 to 0.5 Hz bandpass on the wrapped phase, counted by zero crossings, for a 6 to 30 BPM range. Heart rate uses a 0.8 to 2.0 Hz bandpass for a 40 to 120 BPM range. Neither figure ships with a published accuracy number in the README.
The project models through-wall sensing with Fresnel-zone geometry and multipath. It caps the range at roughly 5 m and calls it signal-dependent. Drywall is easy to read through, and a wet brick wall is close to hopeless.
Presence fires in under 1 ms, but only after about 30 seconds of ambient calibration. Fall detection fires in under 200 ms using a phase-acceleration threshold, a 3-frame debounce, and a 5 second cooldown.
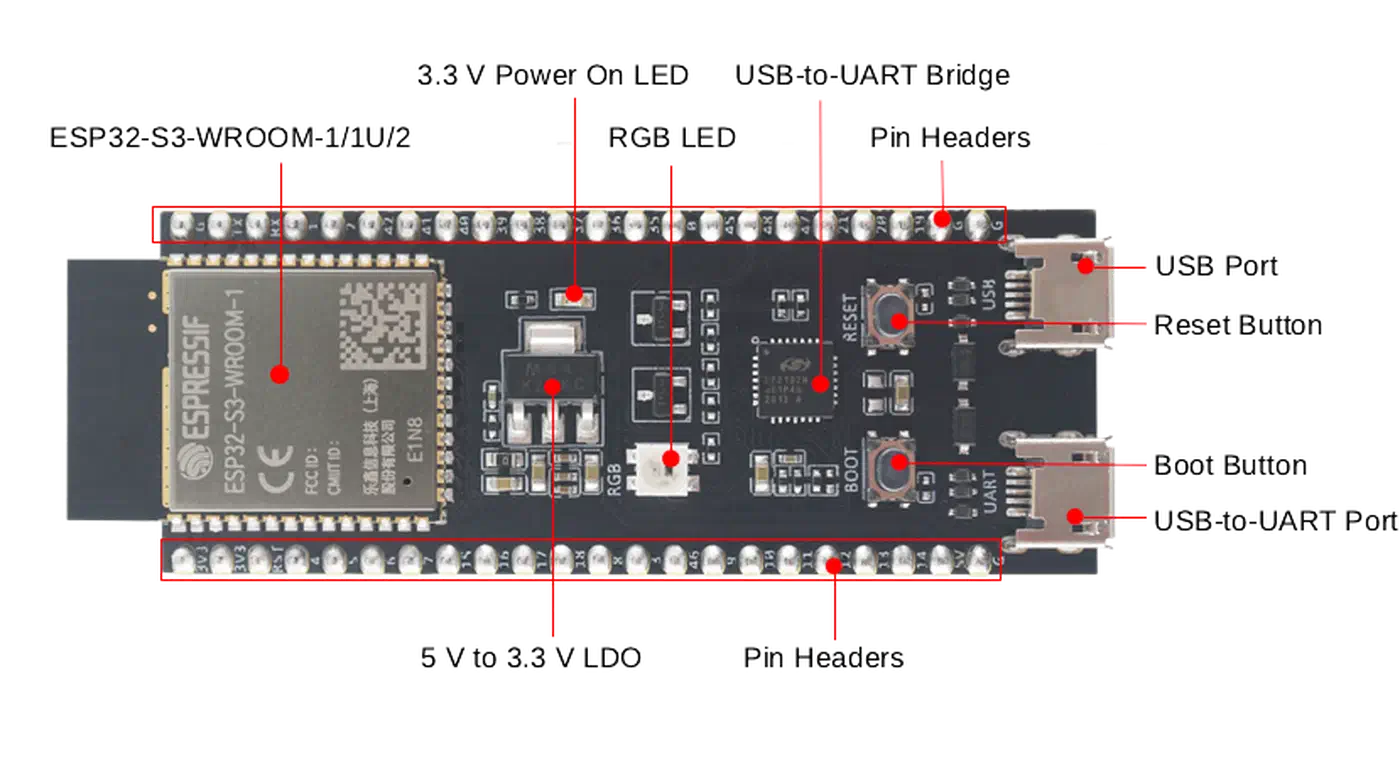
Not every ESP32 will do. The beta notice rules out the ESP32-C3 and the original ESP32 outright, because both are single-core and cannot keep up with the CSI signal processing.
What RuView hardware actually costs, tier by tier
The headline number is $9, and it’s real. Still, it buys the weakest build on the list.
| Tier | Hardware | Cost | Full CSI | What you get |
|---|---|---|---|---|
| Free | Any Windows, macOS, or Linux laptop | $0 | No | Coarse presence and motion from RSSI only |
| Evaluation | ruvnet/wifi-densepose Docker image | $0 | Simulated | Dashboard and API on fake data |
| Entry | 1x ESP32-S3 node | ~$9 | Yes | Presence, vitals, poor spatial resolution |
| Mesh | 3 to 6x ESP32-S3 plus your router | ~$54 | Yes | Same, with usable room coverage |
| Research | ESP32-C6 DevKit | $6 to $10 | Yes | WiFi 6 and 802.15.4 on the same firmware |
| Full system | ESP32 nodes plus Cognitum Seed | ~$140 BOM | Yes | Vector store, kNN search, witness chain, 105-cog catalog |
The mesh tier is the realistic hobbyist target. Three to six nodes hop across channels 1, 6, and 11 on a time-division schedule. That builds 168 virtual subcarriers per link.
The Cognitum Seed is a commercial box from the same author. The README also carries an affiliate program paying 25 percent on referred sales, so the $140 tier is the paid tier.
Old research network cards still work too. An Intel 5300 or Atheros AR9580 gives full CSI with 3x3 MIMO for roughly $50 to $100. Finding one means hunting eBay for 2013 hardware. On the software side, pip install ruview and pip install wifi-densepose ship the same 250 KB wheel.
How RuView compares to a commodity presence sensor
Most people reading this already own an mmWave sensor or have priced one up.
| RuView mesh | Aqara FP2 mmWave | Sonoff SNZB-06P | |
|---|---|---|---|
| Cost per room | ~$54 (3 nodes) | about $58 | about $15 |
| Setup effort | Flash firmware, provision, calibrate | Plug in, pair | Pair |
| Presence | Yes | Yes, up to 30 zones | Yes |
| Breathing and heart rate | Yes, no published accuracy | No | No |
| Through-wall | ~5 m, signal-dependent | No | No |
| Maturity | Beta, no warranty | Shipping product | Shipping product |
RuView is the cheap, ambitious option and the only one of the three still in beta. Nothing else at this price claims to read your breathing.
Run RuView on an ESP32-S3 and publish it to Home Assistant
Try it with simulated data first
Run docker pull ruvnet/wifi-densepose:latest, then docker run -p 3000:3000 ruvnet/wifi-densepose:latest, and open http://localhost:3000. The image ships simulated CSI, so the dashboard is all you are testing.
Buy the right board
Order an ESP32-S3 development board for about $9, or an ESP32-C6 DevKit at $6 to $10 if you want WiFi 6 and 802.15.4. The original ESP32 and the ESP32-C3 are not supported.
Flash the csi-node firmware
Put the board in download mode and run python -m esptool --chip esp32s3 --port COM9 --baud 460800 write_flash 0x0 bootloader.bin 0x8000 partition-table.bin 0xf000 ota_data_initial.bin 0x20000 esp32-csi-node.bin.
Provision WiFi and the sink address
Run python firmware/esp32-csi-node/provision.py --port COM9 --ssid "YourWiFi" --password "secret" --target-ip 192.168.1.20. The node now knows which network to join and where to stream CSI.
Start the bridge with MQTT enabled
Launch the sensing server with the --mqtt flag pointed at your broker. Leave --model off for now, because the published Hugging Face bundle is JSONL RVF and the loader only parses binary RVF.
Confirm the entities land in Home Assistant
Open Settings, then Devices and Services, and check that MQTT auto-discovery created the node with its 21 entities. Import one of the 3 starter Blueprints to prove the events fire.
Calibrate the empty room
Leave the room empty for about 30 seconds while the node learns the ambient baseline. Then walk back in and watch the presence entity flip.
Add a second node before you trust it
A single node has poor spatial resolution. Add a second or third ESP32-S3 on the opposite side of the room before you automate anything on the output.
RuView in Home Assistant, 21 entities and 10 of them inferences
One MQTT flag is the whole integration. Turn on --mqtt and every node arrives in Home Assistant
as 21 entities plus 3 starter Blueprints. The project also offers an Apple Home bridge over HAP-1.1 and a Matter endpoint. Siri, Google Assistant, and Alexa can then read presence and vitals by room with no custom skill.
Eleven of those entities are raw signals: presence, motion energy, breathing rate, heart rate, occupancy count, signal quality, and similar. These map cleanly onto sensor entities. They also degrade visibly when the radio path is bad, which is exactly what you want.
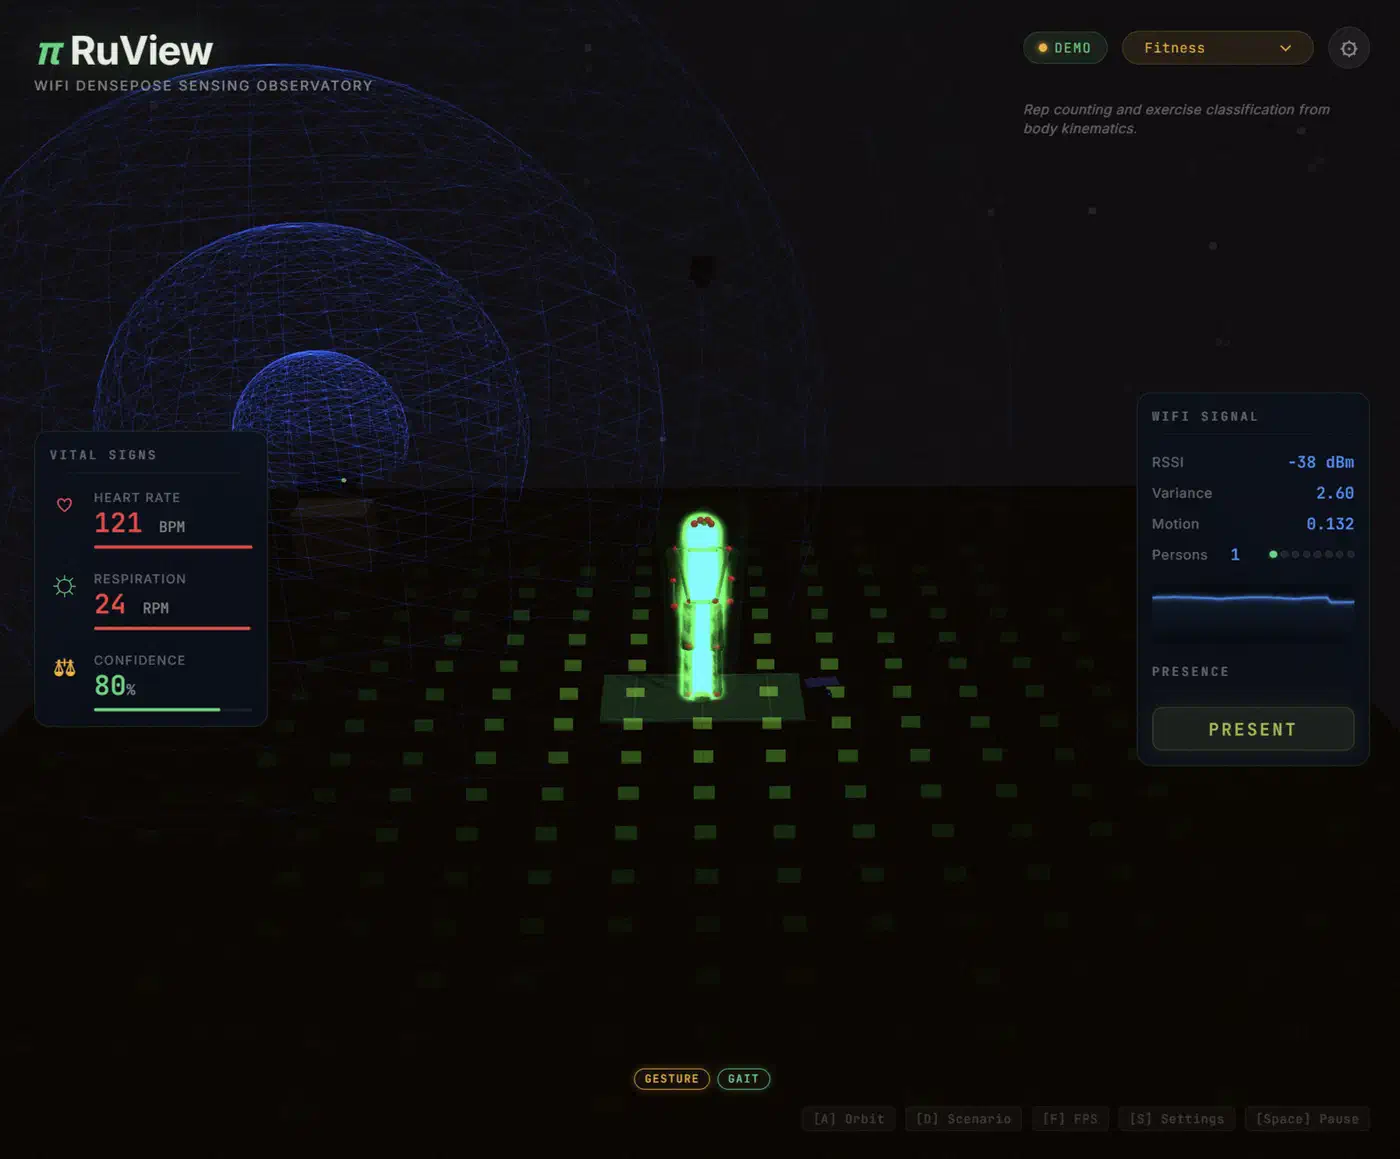
The other ten are inferred semantic states, and they are a different animal. They include someone-sleeping, possible-distress, room-active, elderly-inactivity-anomaly, meeting-in-progress, bathroom-occupied, fall-risk-elevated, bed-exit, no-movement, and multi-room-transition. Those are clinical-sounding labels coming out of a hobby sensor with no regulatory clearance.
To the project’s credit, it publishes precision and recall for every one of them in docs/integrations/semantic-primitives-metrics.md. Read that file before you automate on any of it.
| Primitive | Precision | Recall | Latency to fire |
|---|---|---|---|
bathroom_occupied | 0.99 | 0.97 | under 1 s |
room_active | 0.96 | 0.94 | 30 s |
bed_exit | 0.94 | 0.89 | under 1 s |
someone_sleeping | 0.92 | 0.78 | 5 min |
elderly_inactivity_anomaly | 0.85 | 0.61 | varies |
fall_risk_elevated | 0.74 | 0.55 | varies |
possible_distress | 0.71 | 0.62 | 60 s |
The two entities with the scariest names are the two weakest performers. A fall_risk_elevated recall of 0.55 means it misses roughly half the events it’s meant to catch. The project’s own notes say the v1 version uses a motion-variance proxy, with a real gait score planned. It also warns that these are upper bounds from a single-room test set. Real rooms should expect 5 to 15 points lower F1.
What presence automation is really like
I have run presence automations at home for years, and the sensor is never the hard part. PIR sensors only detect movement. Sit still on a sofa for four minutes, the lights die, and the household complains by dinner. A cheap workaround leans on the phones and tags people already carry: room-level BLE presence places them by which ESP32 relay hears them best.
mmWave fixed that and brought new problems. Mine saw the ceiling fan, and a curtain moving over a radiator. One of them cheerfully reported the neighbour walking around behind a shared wall, which is a preview of the same issue RuView has, only bigger. Tuning took me weeks.
So a third kind of sensor genuinely interests me. Even so, I would put it in a spare room before a bedroom. A 30 second calibration step and an entity named possible-distress are things I want to watch misbehave somewhere low stakes first. I haven’t run RuView on my own hardware, and nothing here is a test of it.
The whole path is also local, running through your own MQTT broker with no cloud account and no internet connection needed. Very few commercial presence-and-vitals products can say that.
Which RuView claims are measured, retracted, or aspirational
The README contains a table titled “Model weights: what’s real, what’s not”, sorting the project’s own checkpoints by maturity.
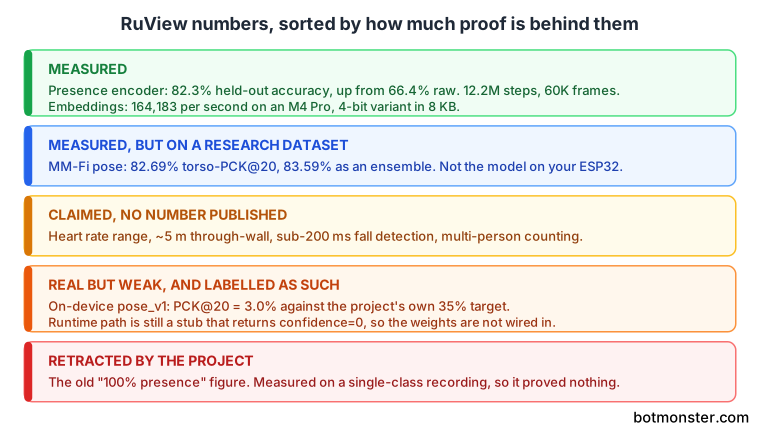
Measured: the v2 CSI encoder reports 82.3 percent label-free held-out accuracy, up from 66.4 percent raw. Training ran 12.2M steps on 60K frames and 610K contrastive triplets. The weights are public at ruvnet/wifi-densepose-pretrained on Hugging Face . The same release reports 128-dim embeddings at 164,183 per second on an M4 Pro. A 4-bit variant fits in 8 KB.
Measured, but on a research dataset: the separate pose model at ruvnet/wifi-densepose-mmfi-pose
hits 82.69 percent torso-PCK@20 on its own. A 3-model ensemble reaches 83.59 percent. That beats MultiFormer at 72.25 percent and CSI2Pose at 68.41 percent on the matched random_split protocol. That is a benchmark result on MM-Fi, a different artifact from the model running on your ESP32.
Retracted: the older “100 percent presence” figure is gone. The project says it was measured on a single-class recording and withdrew it in favour of 82.3 percent. A single-class recording means the model only ever saw one answer, so 100 percent was arithmetic rather than accuracy.
Real but weak, and labelled as such: the committed on-device model pose_v1.safetensors scores PCK@20 of 3.0 percent and PCK@50 of 18.5 percent on a 217-sample holdout. The project’s own ADR-079 target is at least 35 percent. Worse, its runtime path is still a centred-skeleton stub that returns confidence=0. The weights aren’t even wired in yet. All of this is disclosed in the model weights section of the README.
Claimed, with no number: the heart rate range, the roughly 5 m through-wall figure, the sub-200 ms fall detection, and multi-person counting all appear as capability claims. None carries an accuracy figure.
There’s also a gap you’ll hit on day one. The Hugging Face bundle ships as JSONL RVF, but the sensing server only parses the binary RVF format. Pointing --model at model.rvf.jsonl errors out. The live pipeline then goes to null output instead of falling back to heuristics. Run without --model until a JSONL adapter lands.
The project spells out how it wants to be written about, and this post is following that instruction. Nobody should advertise the live single-ESP32 17-keypoint feature without saying in the same breath that it is a first cut, below target, and still running through a stub.
Running python archive/v1/data/proof/verify.py replays a fixed pipeline and compares the SHA-256 of its output to a published hash. So the signal-processing path is reproducible without buying anything.
A sensor that sees through walls is still a surveillance device
RuView markets the absence of a camera as a privacy feature. The use cases page goes further and claims that having no cameras lets a deployment sidestep privacy regulation by design, naming GDPR video rules and HIPAA imaging rules specifically.
That framing is too simple. GDPR governs personal data of every kind, with or without a lens involved. Breathing rate, sleep timing, and bathroom use tied to a named household are personal data. The health-adjacent ones count as special-category data. Dropping the camera removes the imaging rules and leaves the data protection rules in force.
Moreover, the consent problem gets worse once the camera is gone. A camera is visible and universally understood, while a $9 board in a wall socket that logs your roommate’s sleep schedule is neither. Housemates, guests, cleaners, children, and short-term renters can’t opt out of something they can’t see.
Through-wall range works against you too. A sensor that reaches roughly 5 m through drywall doesn’t stop politely at your lease boundary. In a flat or a terraced house, part of that field sits in someone else’s bedroom.
The elderly-care use case needs the hardest thinking. Monitoring a parent’s breathing and bed-exit events is genuinely useful and genuinely invasive. The person being monitored should be the one who agrees to it. That’s rarely the adult child installing the node.
Credit where it’s due, though. RuView ships a beamforming feedback layer built to stop identity leakage at the source. Raw beamforming feedback never leaves the node. Identity embeddings stay in RAM only. A per-site BLAKE3 keyed hash rotates daily and blocks cross-site correlation. The project also reports that WiFi-only channels cannot separate named identities on their own. A --privacy-mode flag strips heart rate, breathing, and pose from both MQTT and Matter.
Four practical rules if you build this anyway:
- Keep the MQTT broker local and off the public internet.
- Tell everyone who lives there before you power a node on.
- Do not point a node at a wall you share with neighbours.
- Treat
possible-distressas a nudge to go look, never as a medical alarm.
RuView is beta software under the MIT licence, with no warranty, no regulatory clearance, and a fall_risk_elevated recall of 0.55. It’s a fascinating thing to build in a spare room and a poor thing to trust with a person’s safety.